After the margin is created, it can be edited using one or both of the following:
• Add Segments - Replaces existing segments of the margin.
• Move Margin - Adjusts the curve of the existing margin.
Margin Aids
View ICE Preparation
For intraoral cases only.
Use View ICE Preparation to toggle between ICE view and stone view.
Show Features
Click Show Features to highlight high contour areas in green. This can be helpful in nding the
margin edge on supragingival preps, inlays, and onlays.
Creating the Margin
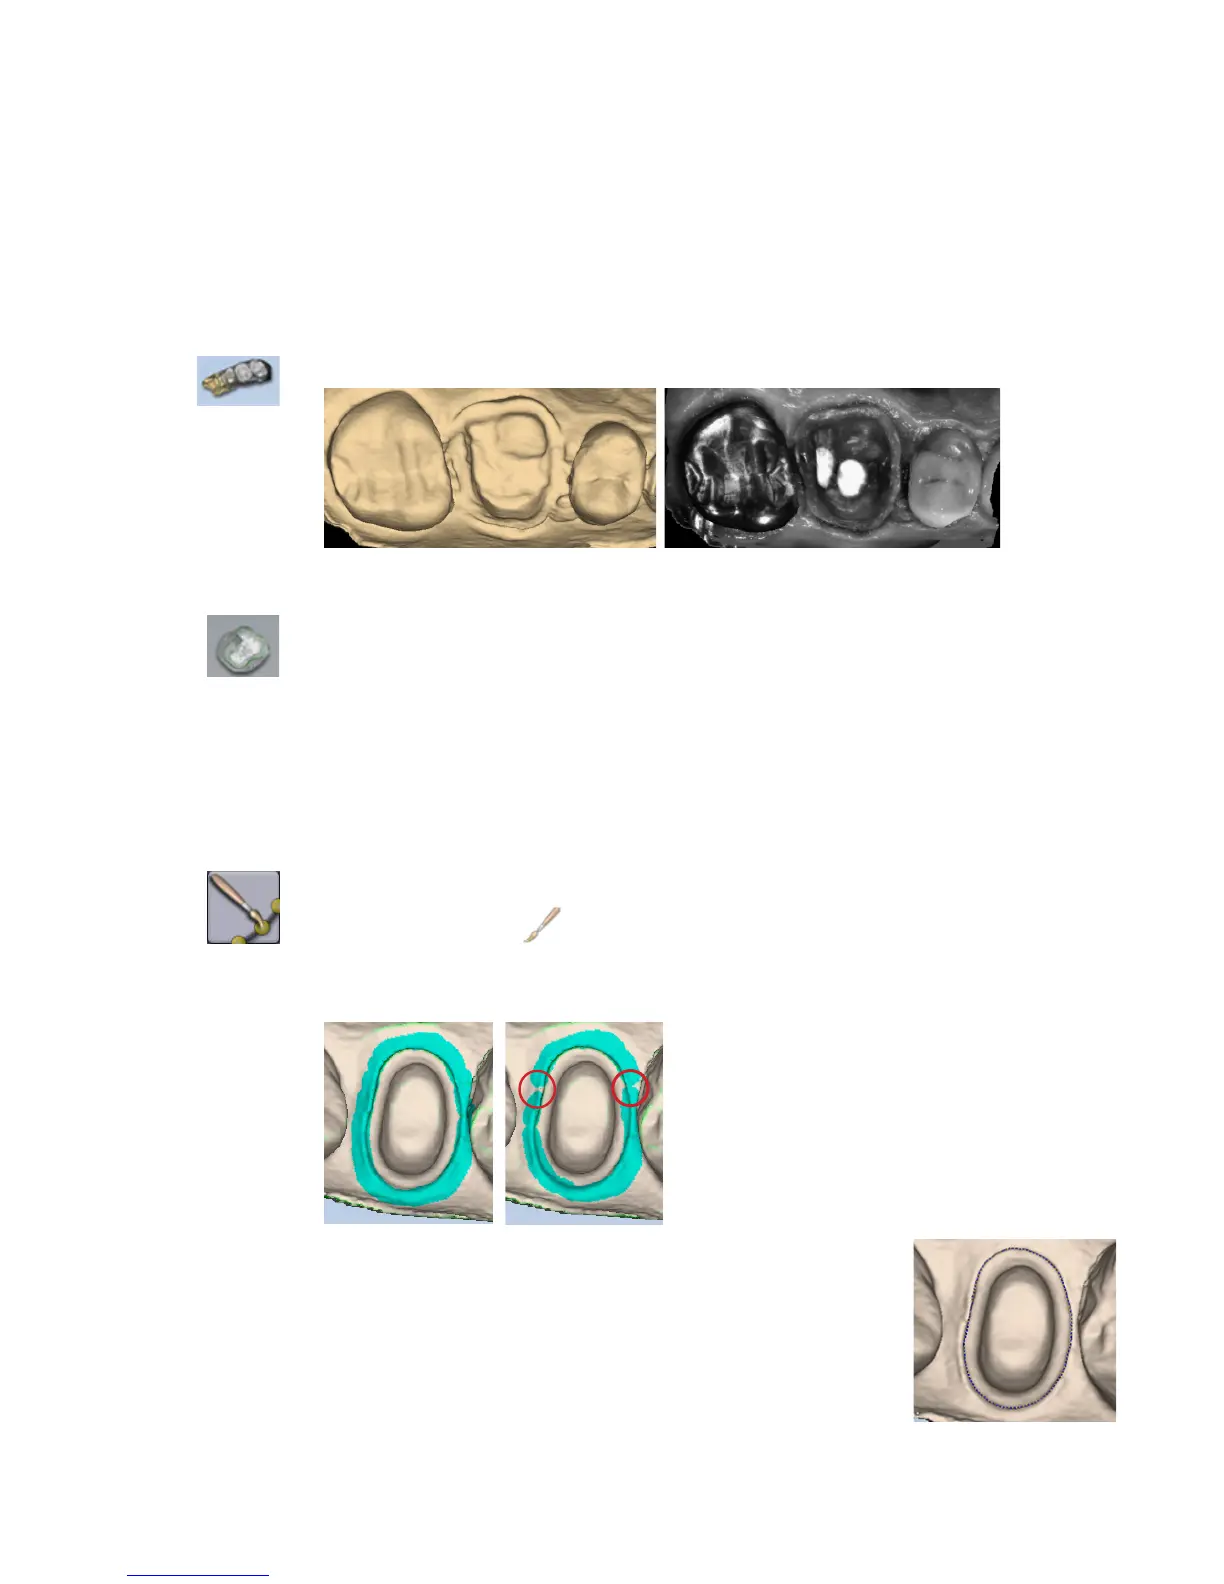
When creating the margin, use either the Paint, Trace, OR Lasso tool. They are not used in
combination.
Paint tool
The Paint tool is recommended for supragingival margins.
1 Click the Paint tool.
The pointer changes to .
2 Hold down the mouse button and drag the Paint tool around the scanned prep to highlight the
outer margin edge. The margin doesn’t have to be perfect, but gaps must be avoided.
3 Click the Paint button again.
The system automatically draws the margin.
4 To delete the margin and start over, click the Paint, Trace, or Lasso
button.
38 Margin Tab Planmeca PlanScan User Manual