Scanning the Impression
Ensure the scanner is positioned correctly. See above for positioning. Be careful not to squeeze
or otherwise distort the impression while scanning.
1 On the Scan tab, select Scan Prep if it is not already selected. Do NOT select Scan Bite
Registration, which resembles an impression.
2 Use the same scan pattern as for an intraoral or a model scan.
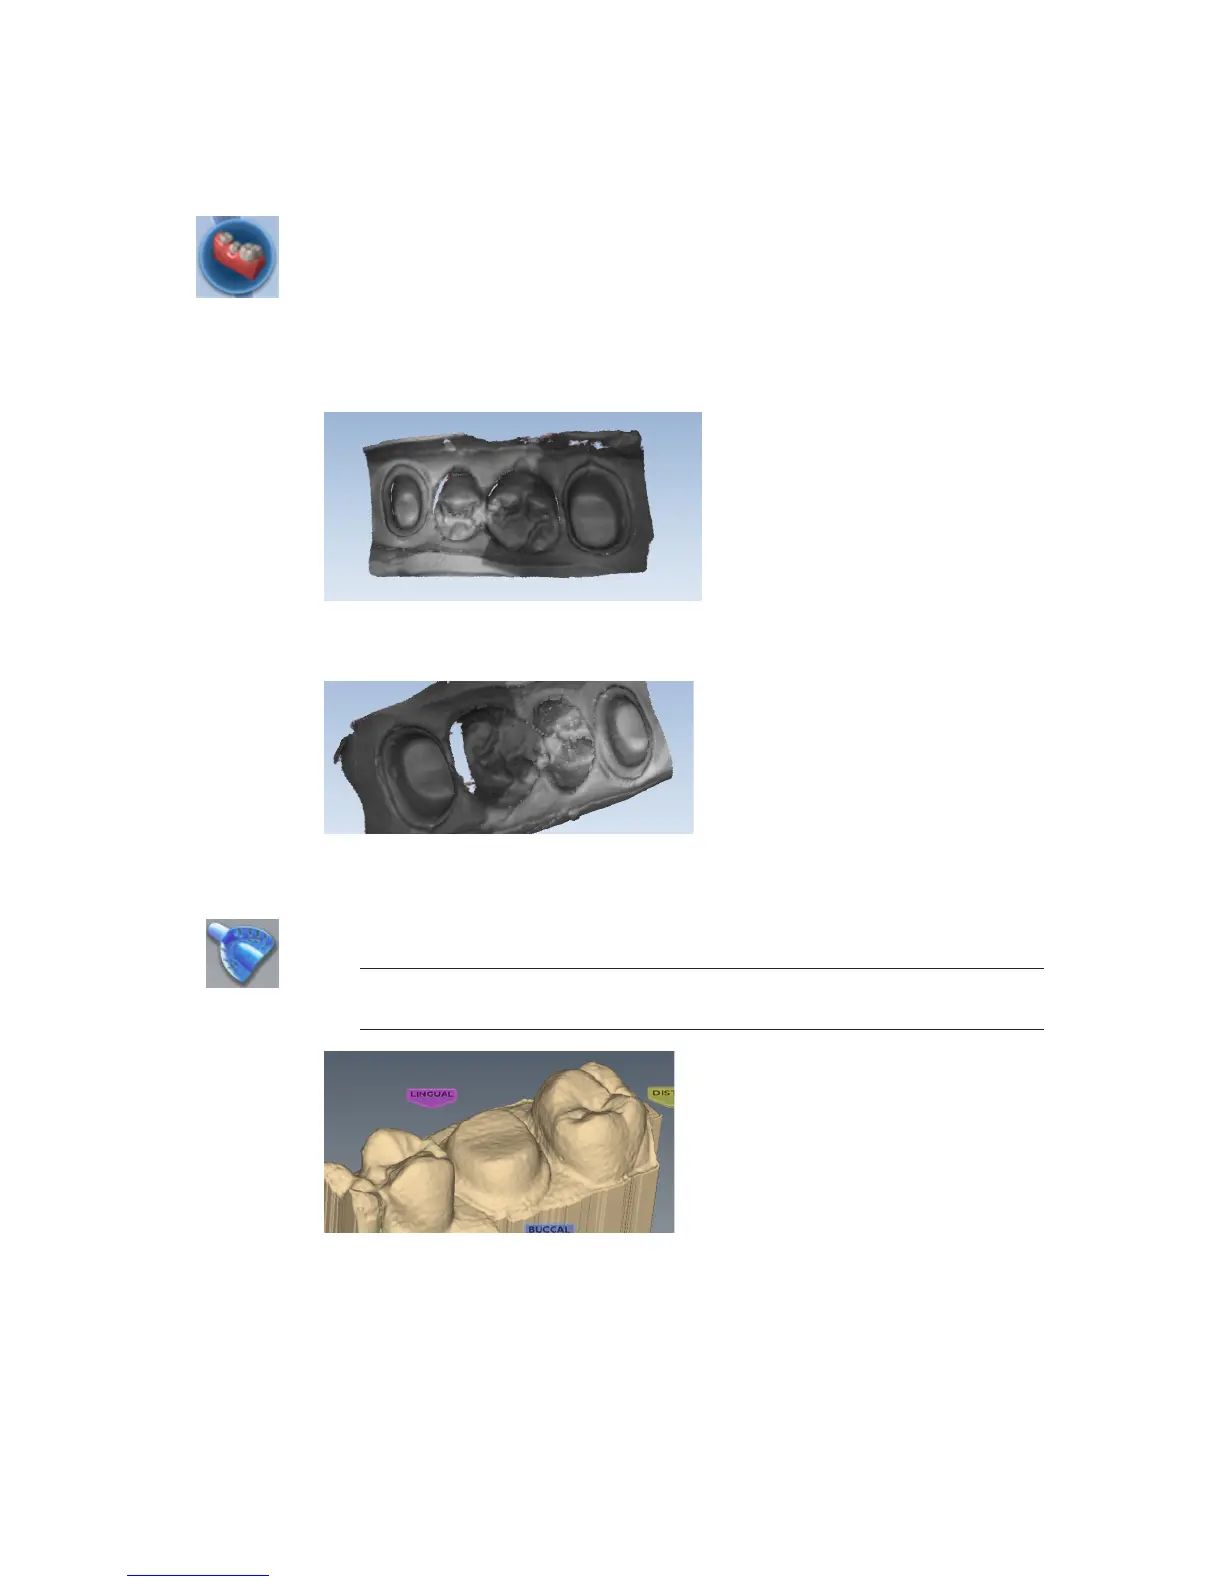
3 Evaluate the model for low data.
Note that from the occlusal view, the impression can give the optical illusion of looking like a
regular model.
4 Rotate the model to see all of the impression. Be sure to check the contact areas on the
adjacent teeth.
5 If there are areas that need additional scans, such as the interproximal area shown above, take
extra scans.
6 Click Impression Mode to invert the model into the normal view. All other tabs will use the
inverted model of the impression for creating the proposal.
Note: A message appears; “Inverting the impression model will reset associated
margins and restorations. Are you sure?” Click Yes to invert the model.
7 Click the Margin tab and continue with the normal procedure for drawing the margin and
designing the proposal.
36 Scanning Planmeca PlanScan User Manual