10 PARTS REPLACEMENT & REPAIR
54 Planmeca ProX Technical manual
10.7 Replacing software
Always turn the X-ray unit off before removing the software chip from its socket.
Never turn the unit on if the software chip is not in its socket.
Antistatic precautions must be performed when handling the software chip. Touch any
grounded metal part of the unit before touching the software chip.
1. Disconnect the X-ray unit from the mains or switch off the power supply.
2. Remove the tube head covers, refer to section 10.2 “Removing tube head covers” on page
46.
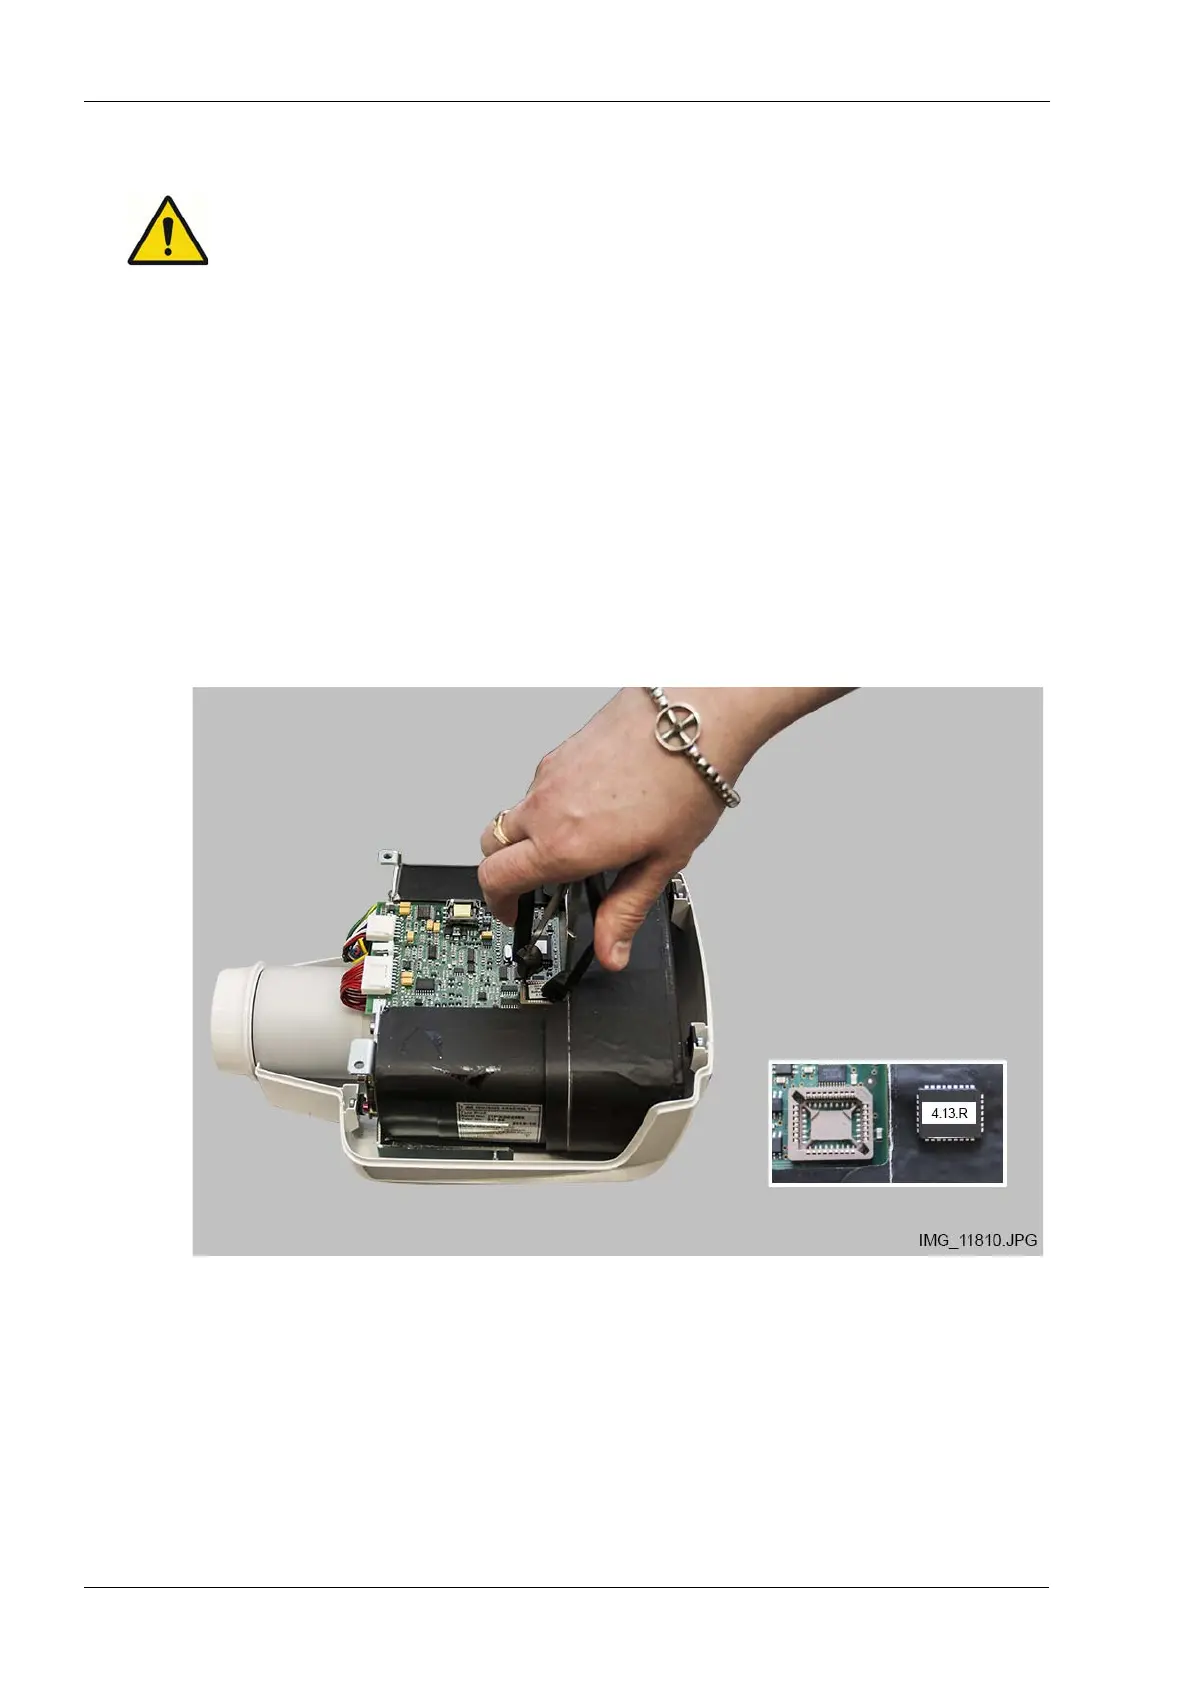
3. Remove the software chip from its socket with the special tool as illustrated below.
The orientation of the software chip is critical. Never try to force the chip into the socket.
4. Carefully place the new software chip into the socket so that the slanted corner of the chip
hits the slanted corner of the socket. Note, that the label on the chip must be outwards.
5. Attach the tube head covers.