8.10
CVT TRANSMISSION
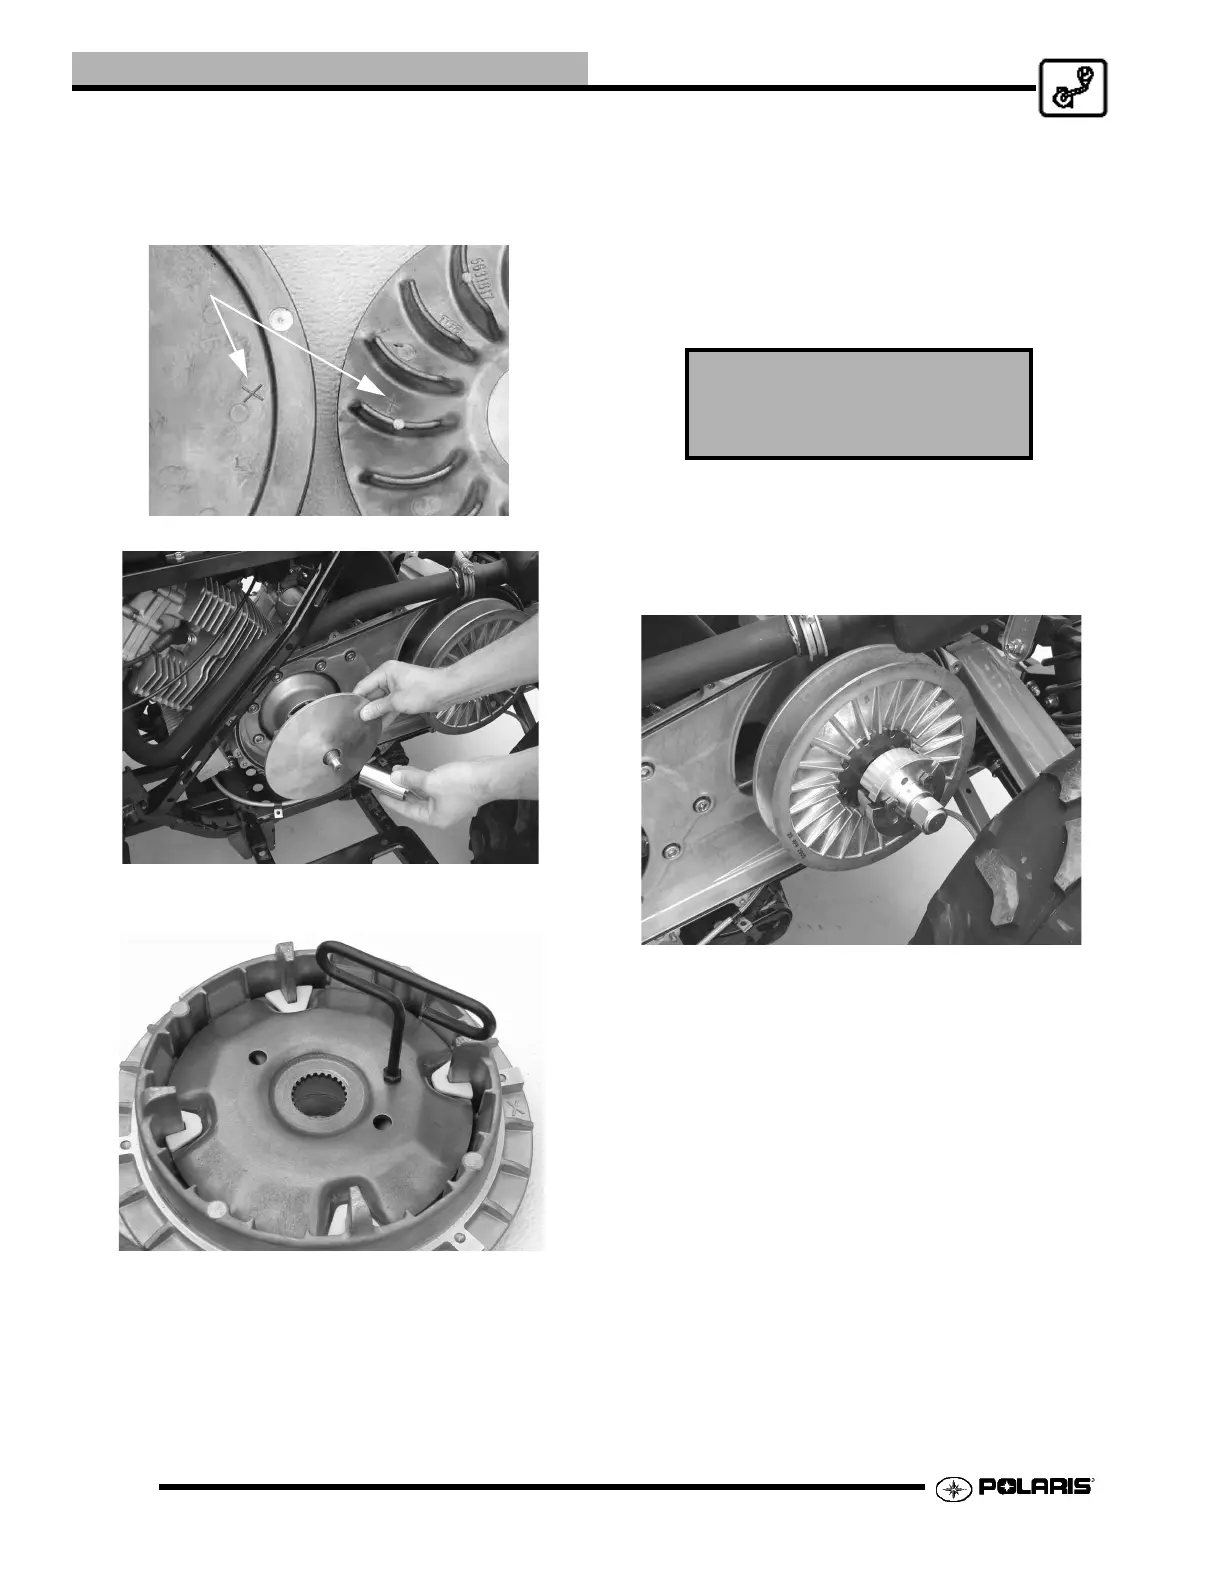
16. The clutch sheaves are balanced from the factory.
When installing clutch on the vehicle, be sure to align
the “X” marks on the sheaves to maintain proper
balance.
17. Install the fixed sheave and spacer sleeve.
18. Install the tool in the offset hole of the moveable
sheave assembly to hold it together for installation.
19. Install the moveable sheave, aligning the “X” mark
with the “X” mark on the fixed sheave, engage the
splines and install the nut. Do not apply any lubricants
to the components. Apply Loctite 242 (Blue) to
threads and torque the retaining nut to 185 ft. lbs. (250
Nm).
IMPORTANT: Be sure splines of cam plate are fully
engaged on shaft spline before tightening the nut!
CVT SYSTEM / DRIVEN CLUTCH SERVICE
1. Remove retaining bolt.
2. Pull the clutch off the shaft using flywheel puller as
shown.
3. Remove the puller and place the driven clutch spring
side up in the clutch spring compressor 8700220.
4. Install arm PA-47457-1 on the spring compressor.
5. Install adaptor PA-47457-2 on the arm.
6. Remove nut (counterclockwise) using tool PA-46076
or a standard socket.
X mark
CVT Drive Clutch Nut Torque
185 ft. lbs. (250 Nm)
Loctite 242 (Blue)
 Loading...