62 63
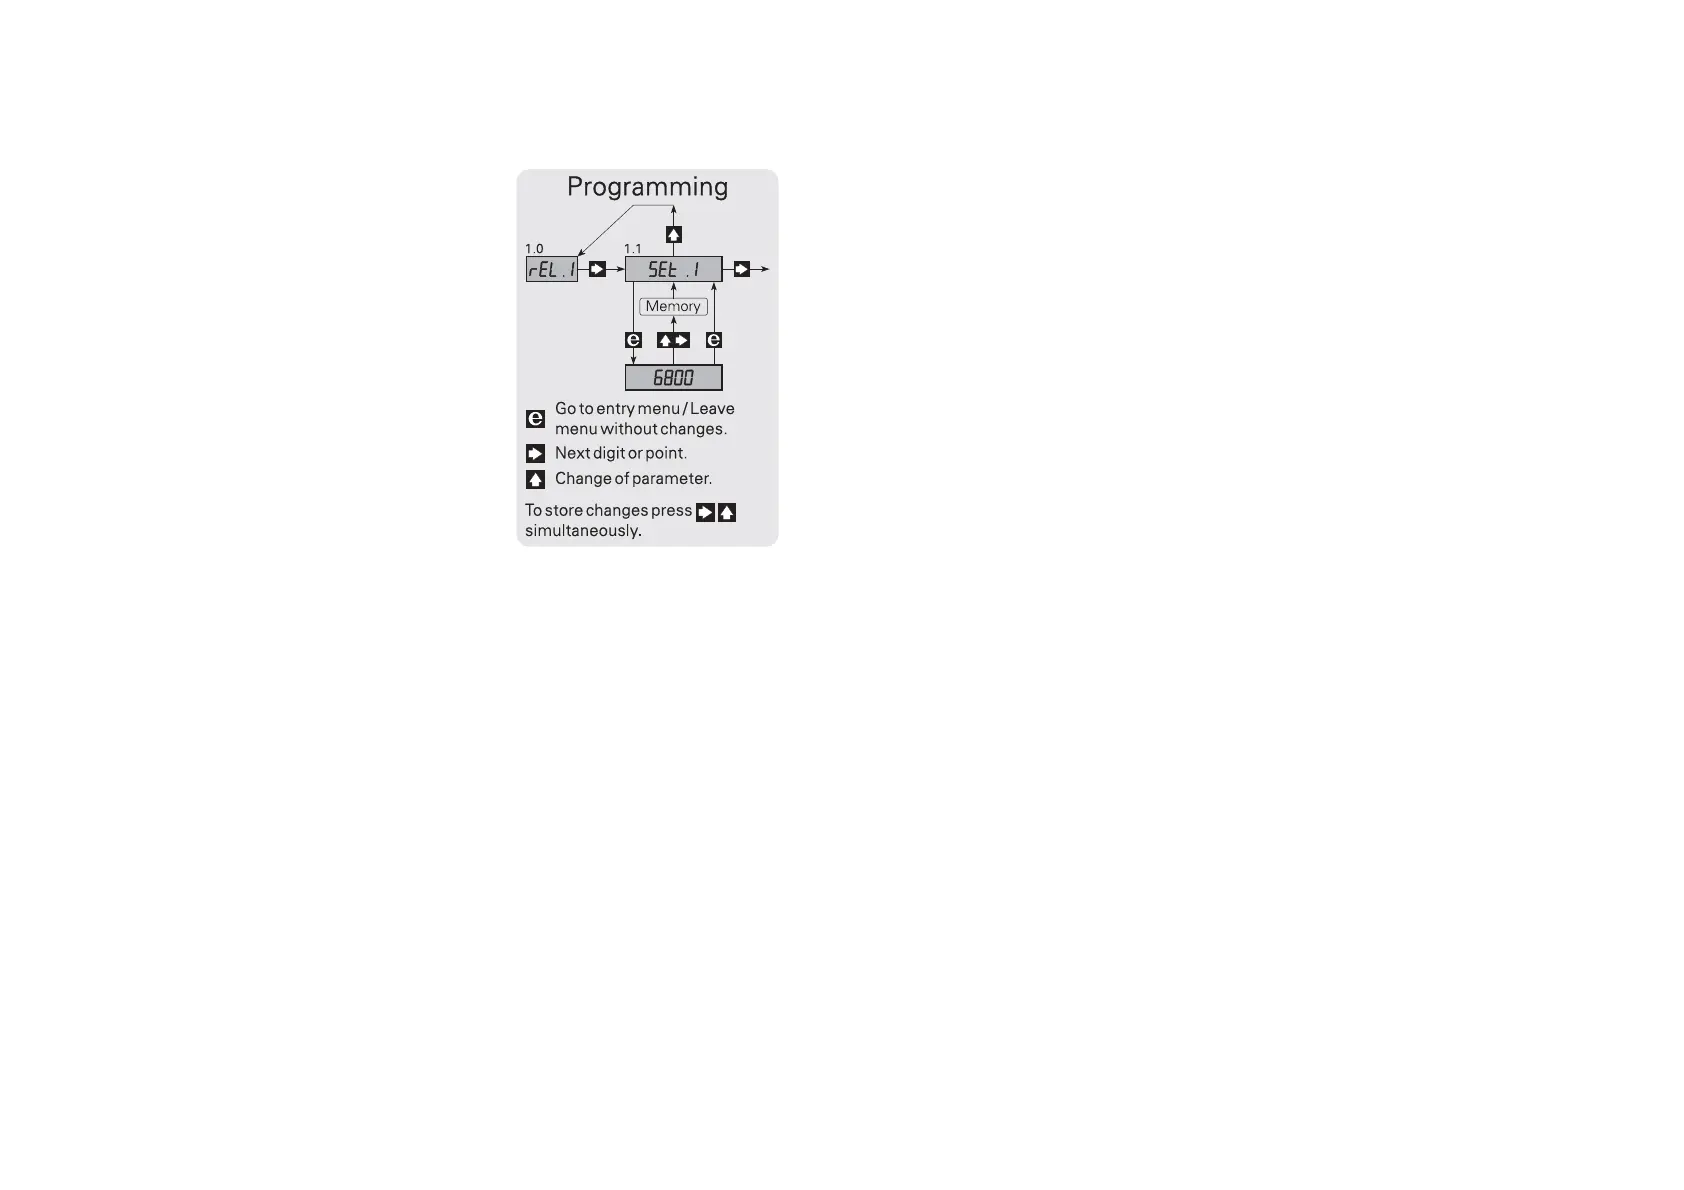
OPERATING THE FUNCTION KEYS
Please refer to the routing diagram on page 66.
GENERAL:
Menus and sub menus are chosen by the
3 function keys
2, 3 and 1. Activating
2 will display the current value. To
prevent unintentional change of setup any
change of parameter must be confirmed
by activating
3 and 1 simultaneously.
Return to previous menu without changing
parameters - activate
2. Current digit is
marked by a point.
0.0 POWER ON
Under default conditions the actual process value is displayed. The
indicator will return to default if no keys have been activated during a
period of 2 minutes.
1.0 RELAY 1 - Only avaliable with units including trip amplifier option.
1.1 Set Relay 1
Activate
2, change setpoint by activating 3 and 1. Setpoint according to
display scaling. Store value by activating
3 and 1 simultaneously.
1.2 Reset Relay 1
Activate
2, change reset point by activating 3 and 1. Reset point
according to display scaling. Store value by activating
3 and 1
simultaneously.
1.3 Delay 1
Activate
2, change delay time (in seconds) by activating 3 and 1.
Delay adjustments are available from 0 to 3276 seconds. Store value by
activating
3 and 1 simultaneously.
2.0 RELAY 2 - This setup is identical to Relay 1
3.0 DISPLAY
3.1 Display Low
Activate
2. Set 0% display scaling according to 0% input value. Change
display scaling by activating
3 and 1. Store value by activating 3 and 1
simultaneously.
3.2 Display High
Activate
2. Set 100% display scaling according to 100% input value.
Change display scaling by activating
3 and 1. Store value by activating
3 and 1 simultaneously.
4.0 ANALOGUE OUTPUT - Only available for units incl. analogue output
option
4.1 Output Low
Activate
2. Set 0% value for analogue output. Are set in micro ampere.
Change value by activating
3 and 1. Store value by activating 3 and 1
simultaneously.
4.2 Output High
Activate
2. Set 100% value for analogue output. Are set in micro ampere.
Change value by activating
3 and 1. Store value by activating 3 and 1
simultaneously.
5.0 SPECIAL FUNCTIONS
5.1 Light - Only available for LED version
Activate
2 for display intensity adjustment. Intensity may be adjusted
from min. 0 to max. 15. Default intensity is 10. Change intensity level by
activating
3 and 1. Store value by activating 3 and 1 simultaneously.
5.2 Point
Activate 2 for decimal point setting. The following options are available:
no decimal point, decimal point setting at 1., 2., 3., 4. or 5. digit. Change
point setting by operating
3. Store value by activating 3 and 1
simultaneously.
5.3 Speed
Activate
2 for display update time setting. Display update time may be
selected from 250 ms to 19000 ms. Are set in ms. Change update time by
activating
3 and 1. Store value by activating 3 and 1 simultaneously.