111
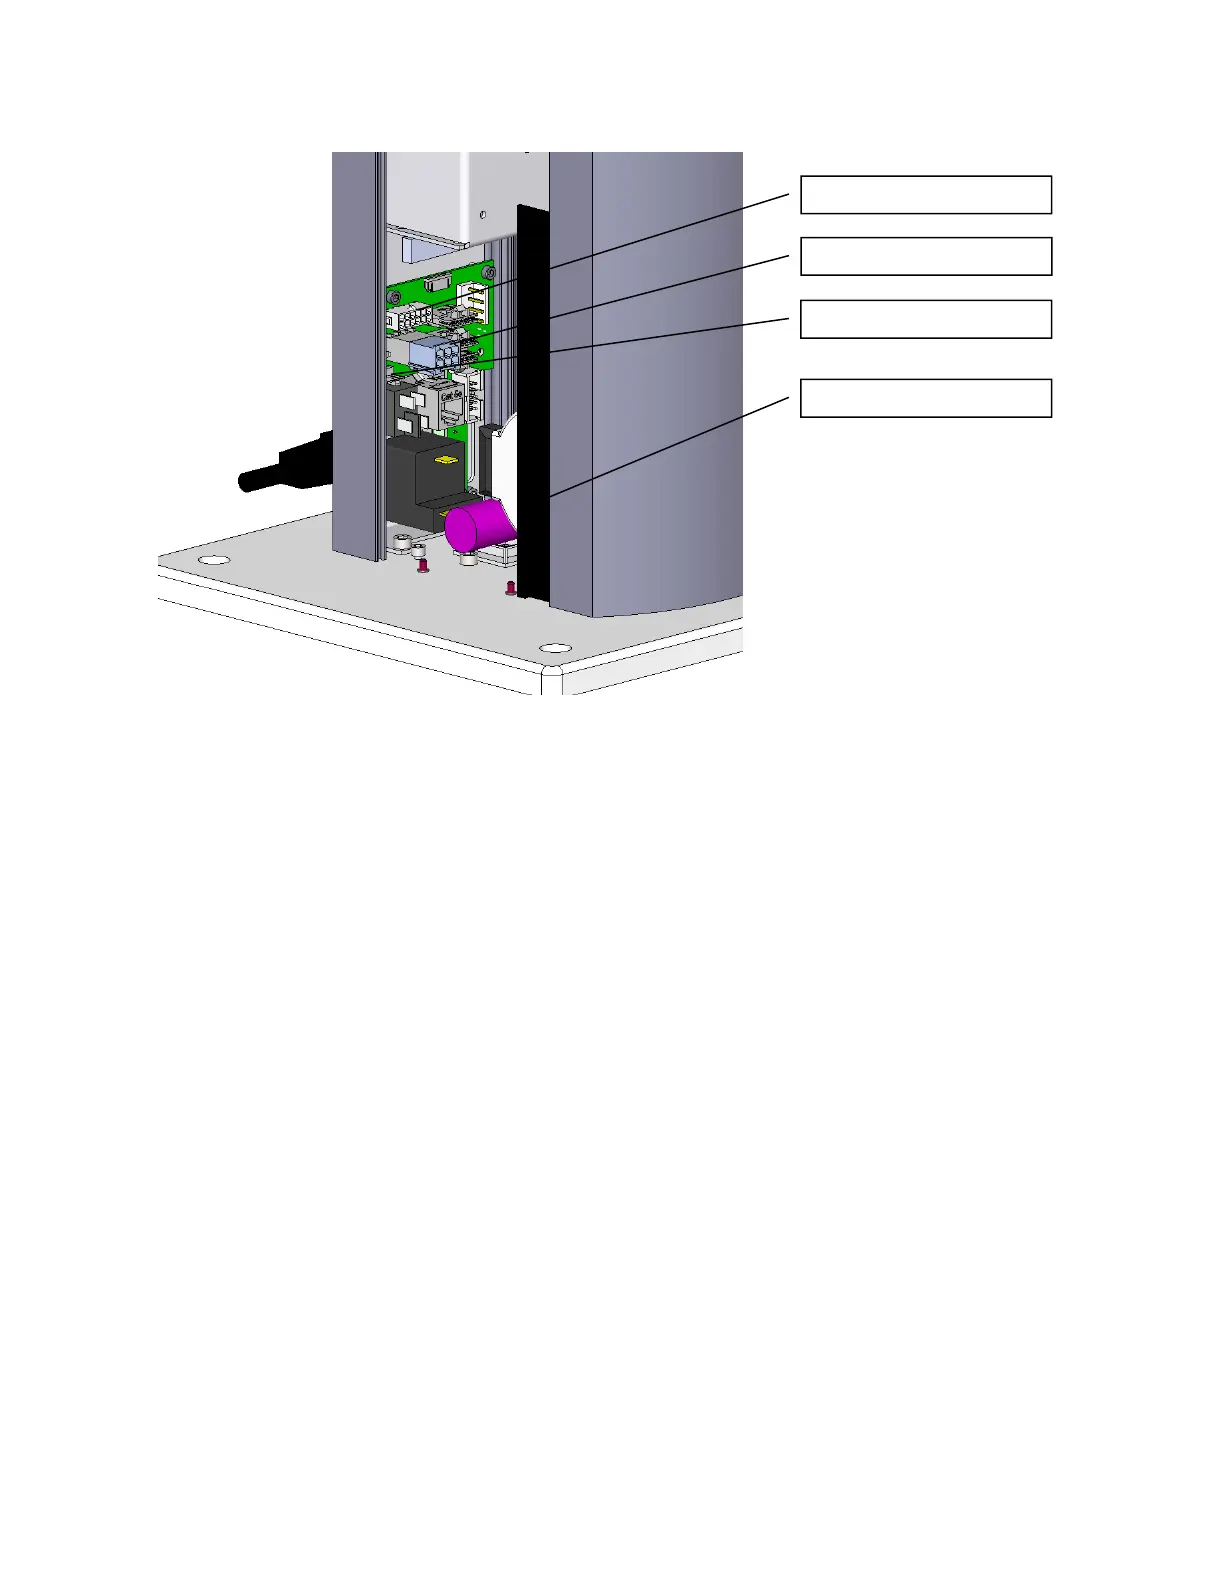
11. Remove the J1 motor and encoder connectors that plug into the J1 Motor Interface Board.
12. Remove the Battery connector that plugs into the J1 Motor Interface Board.
13. Loosen the M4 SHCS screws attaching the Z bearing rail to the Z Extrusion.
14. Slide the Z Rail and Z Carriage with the robot arm still attached partially out the top of the robot,
far enough to expose the power supplies. It may be more convenient to slide the carriage and Z
rail all the way out of the Z extrusion. Take care the bearing block does not slide off the Z rail. It
may be helpful to wrap some tape around the rail to prevent this. If the bearing block slides off
the rail, the bearing balls may be lost, damaging the bearing. Simultaneously slide the Electronic
Chassis out of the Z Extrusion and lay both assemblies on the table.
15. Unplug the cables from the failed power supply.
16. Remove the 4 M3 X 8 SHCS and lock washers to replace the power supply or energy dump PCA.
Be careful not to pull the J1 FFC encoder cable (white 14mm wide flat cable) out of the FFC
connector on the J1 Motor Interface PCA. If this cable is pulled out, you must carefully release
the clamping lid on the FFC cable connector on the J1 Motor Interface PCA by inserting a small
flat bladed screwdriver in the notch in the clamping lid and VERY gently prying the lid out of the
connector. This lid is a cam-lock type of lid, which when inserted, clamps the flat white J1
encoder ribbon cable. Re-insert the J1 flat white encoder ribbon cable into this connector and
carefully press the clamping lid back into the connector. If the J1 encoder cable is disconnected
during this procedure, it will be necessary to re-calibrate the robot as the absolute encoder
backup power will be interrupted to the J1 absolute encoder.
17. Re-attach the power supply cables and re-assemble the robot. Be sure the bearing rail reference
edge is tightly pressed against the reference boss in the Z extrusion. The top of the bearing rail
should be about 35mm below the top of the extrusion and the bottom of the rail should clear the
stage one Z timing belt on the large diameter pulley.
18. Recalibrate the robot.
J1 Encoder Connector
J1 Motor Connector
Batter
Connector
S
lash Guard