PreciseFlex_Robot
42
Mounting Instructions
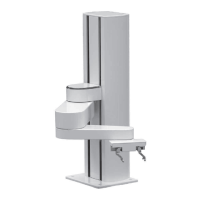
PreciseFlex robots must be attached to a rigid surface that can withstand lateral forces of 200 Newtons
without moving or vibrating. The robot base has an integrated bolting pattern to accommodate 4 M6
SHCS mounting screws located as shown above.
Tool Mounting – PreciseFlex 400
The Precise Flex 400 is typically supplied with an electric gripper. In some cases, a pneumatic gripper
may be supplied by Precise or by the end user. However, the standard robot does not include pneumatic
lines, so if pneumatic tooling is needed, the robot must be ordered with pneumatic lines installed. The
outer link has a flange for users to attach grippers or tooling. The 3kg version typically comes with 2
pneumatic lines installed, but may be ordered with optional electric grippers.
To facilitate electrical interfacing to user tooling, digital I/O signals are available in the outer link. For
robots with an electric gripper, the electric gripper controller in the outer link has two extra inputs and two
extra outputs available for users. However, it should be noted that all the wires in the 18 conductor slip
ring are consumed by the electric gripper, so any additional IO wiring will have to be routed outside the
robot wrist. For robots without the electric gripper, a ribbon cable from the G1400A controller is routed to
the outer link. This ribbon cable provides 4 digital inputs and 4 digital outputs from the controller.
For robots where support for a pneumatic gripper or pneumatic tooling has been ordered, one or two (for
the 3kg robot) 1/8in OD air hoses are routed from the connector plate in the base through the robot and
out to the outer link. These air hoses can be connected to one or two solenoids mounted in the outer link
for tooling control.
Accessing the Robot Controller
Although most of the controller interface signals are exposed on the Facilities Panel at the base, there are
times when it may be necessary to access either the robot’s controller or its power supplies. To access
the robot controller, the cover on the inner link must be removed by removing 4 M3 X 20 SHCS from the
bottom of the inner link
Please see the Guidance 1000A/B Controller, Hardware Introduction and Reference Manual for detailed
information on hardware configuration and interfacing the controller using the various input and output
ports such as those for digital I/O. Also, please refer to the Guidance System Setup and Operation Quick
Start Guide for information on configuring the PC and instructions on operating the robot. Both of these
manuals are available in PDF format and are also contained in the Precise Documentation Library.