26
CONNECTIONS
REAR PANEL CONNECTIONS
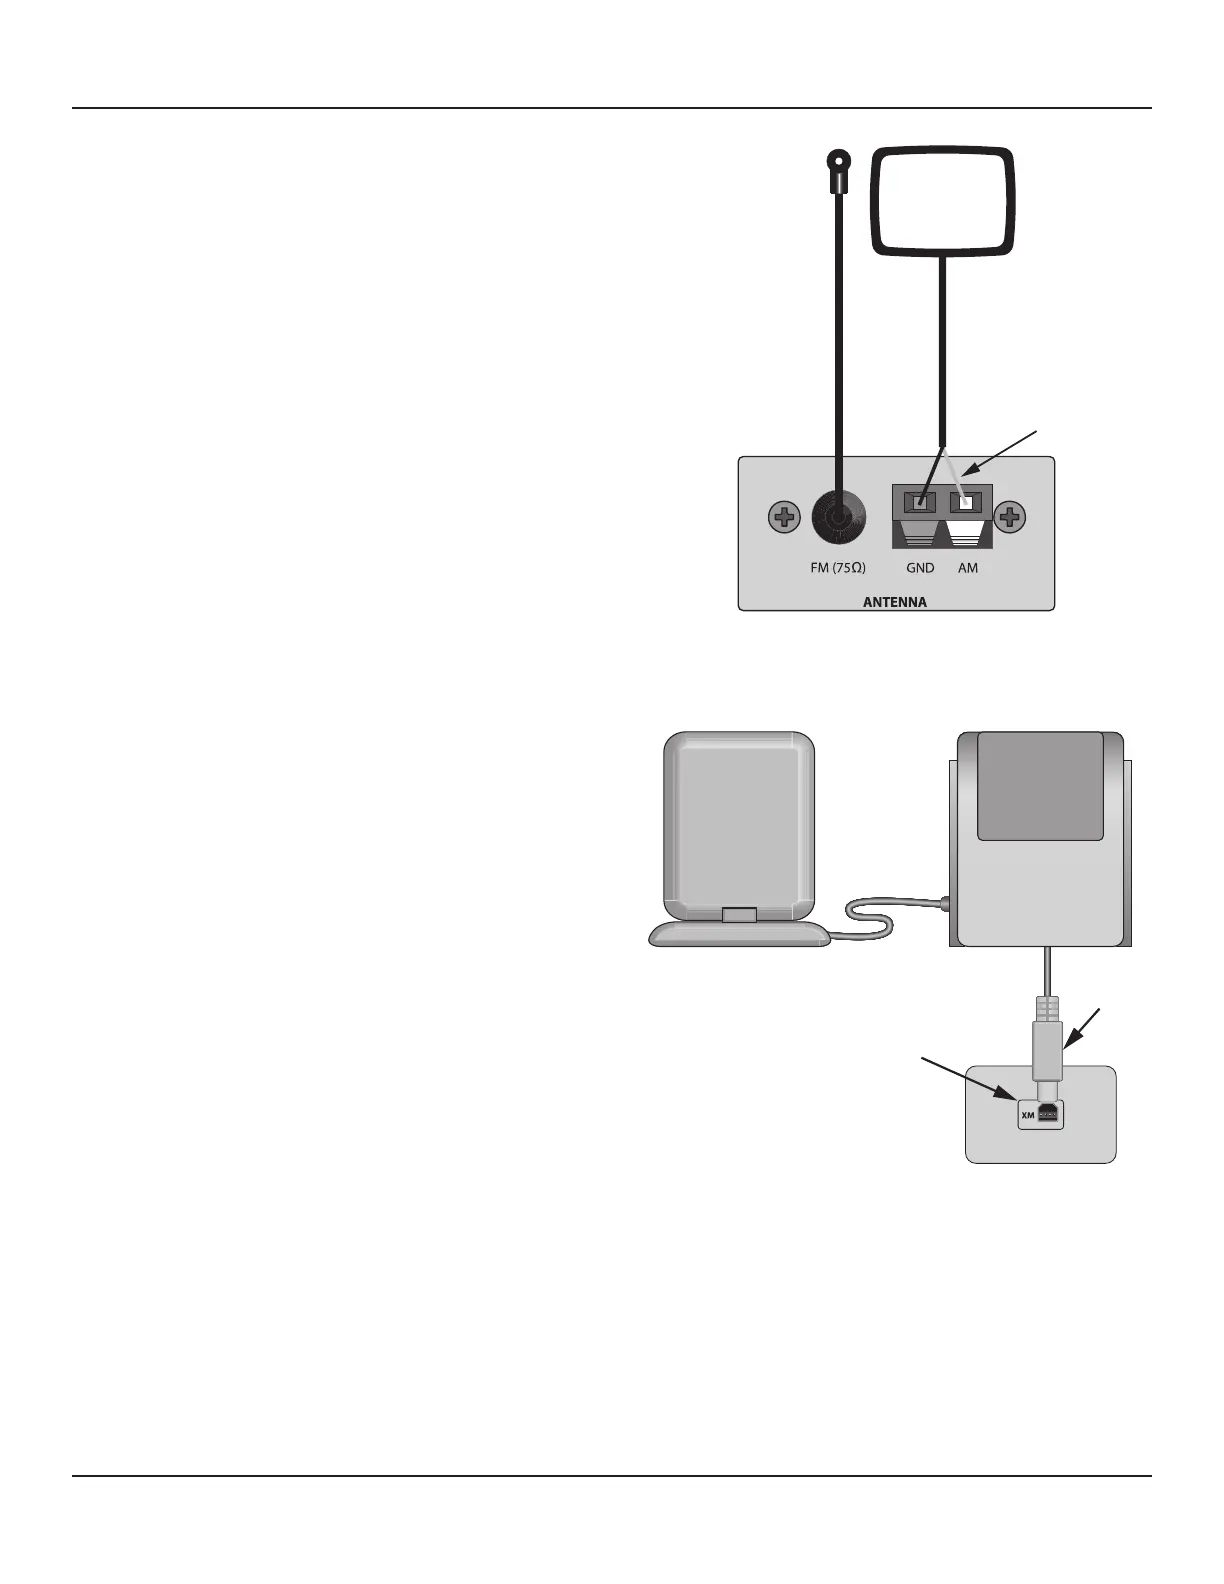
Antenna Connections
Connect the AM and FM Antennas to the AM and FM Antenna
Terminals on the M80 Rear Panel as shown in Diagram 9.
AM Antenna
1. Connect the included AM Loop Antenna to the Antenna
AM & GND Terminals. The spring clips are color coded,
black and white. Connect the black wire from the an-
tenna to the black terminal (GND) and the white wire to
the white terminal (AM).
2. Position the AM Antenna for optimum reception.
Experiment by moving the antenna high and low and
turning it side to side until the best position is found.
The antenna can be formed into a shelf top stand. With
the antenna wire at the bottom and positioned AWAY
from you, carefully pull the molded plastic piece in the
middle away from you then down under the bottom of
the loop. Pull toward the front until the tabs in the bot-
tom of the loop snap into the slots in the molded piece.
Be careful not to pinch the antenna wire. Position the
antenna for best reception.
FM Antenna
1. Attach the FM Antenna ‘F’ connector to the FM(75Ω)
Terminal. Extend the antenna to nd the optimal posi-
tion. Stretch the antenna completely vertical (up and
down) and then try dierent side to side positions until
optimum reception is attained. Use a small wire brad or
thumb tack to secure the antenna to a wall or cabinet
through the hole in the plastic end piece.
XM Satellite Radio Tuner
This ‘XM Ready’ connection requires an external XM Ready
Satellite Radio Tuner. The M80 does not have an on-board
XM Satellite Radio Tuner.
1. Connect the XM Antenna to the XM Satellite Radio
Tuner per the tuner manufacturer’s instructions.
2. Make any other necessary connections for proper
operation of the XM Satellite Radio Tuner per the XM
Tuner’s instructions.
3. Connect the Mini-USB Cable on the XM Satellite Radio
Tuner to the XM Port on the M80 Rear Panel as shown
White wire to AM
Black wire to GND
Diagram 9 Antenna Connections
XM Antenna XM Radio Tuner
XM Port
Mini-USB
Plug
Diagram 10 XM Tuner Connections
in Diagram 10. This connection will provide power and control to the XM Satellite Radio Tuner and receive audio signals
and metadata from the tuner. Metadata will be displayed in the M80 Front Panel Display and in the On-Screen Display
(OSD) when the Main Room Video Display is ON. CHECK XM TUNER will appear in the Front Panel Display and in the On-
Screen Display (OSD) if the XM Tuner is not properly connected.
4. Follow the instructions for the XM Satellite Radio Tuner for antenna position and activation.
Note: XM Satellite Radio requires subscription service from XM Satellite Radio to be able to receive program. To activate an
XM Satellite Radio Subscription, call 1.800.XM RADIO (1.800.967.2346) or visit www.xmradio.com and have the Radio ID ready.
Follow the instructions for the XM Satellite Radio Tuner to nd the Radio ID.