131
Managing the Pegasus32Pegasus32 Product Manual
Choosing Advanced Conguration
This option enables you to directly specify all parameters for a new disk array, logical drives, and spare
drives.
TousetheAdvancedCongurationWizard:
1. From the Storage menu choose Wizard.
2. Click the Advanced button.
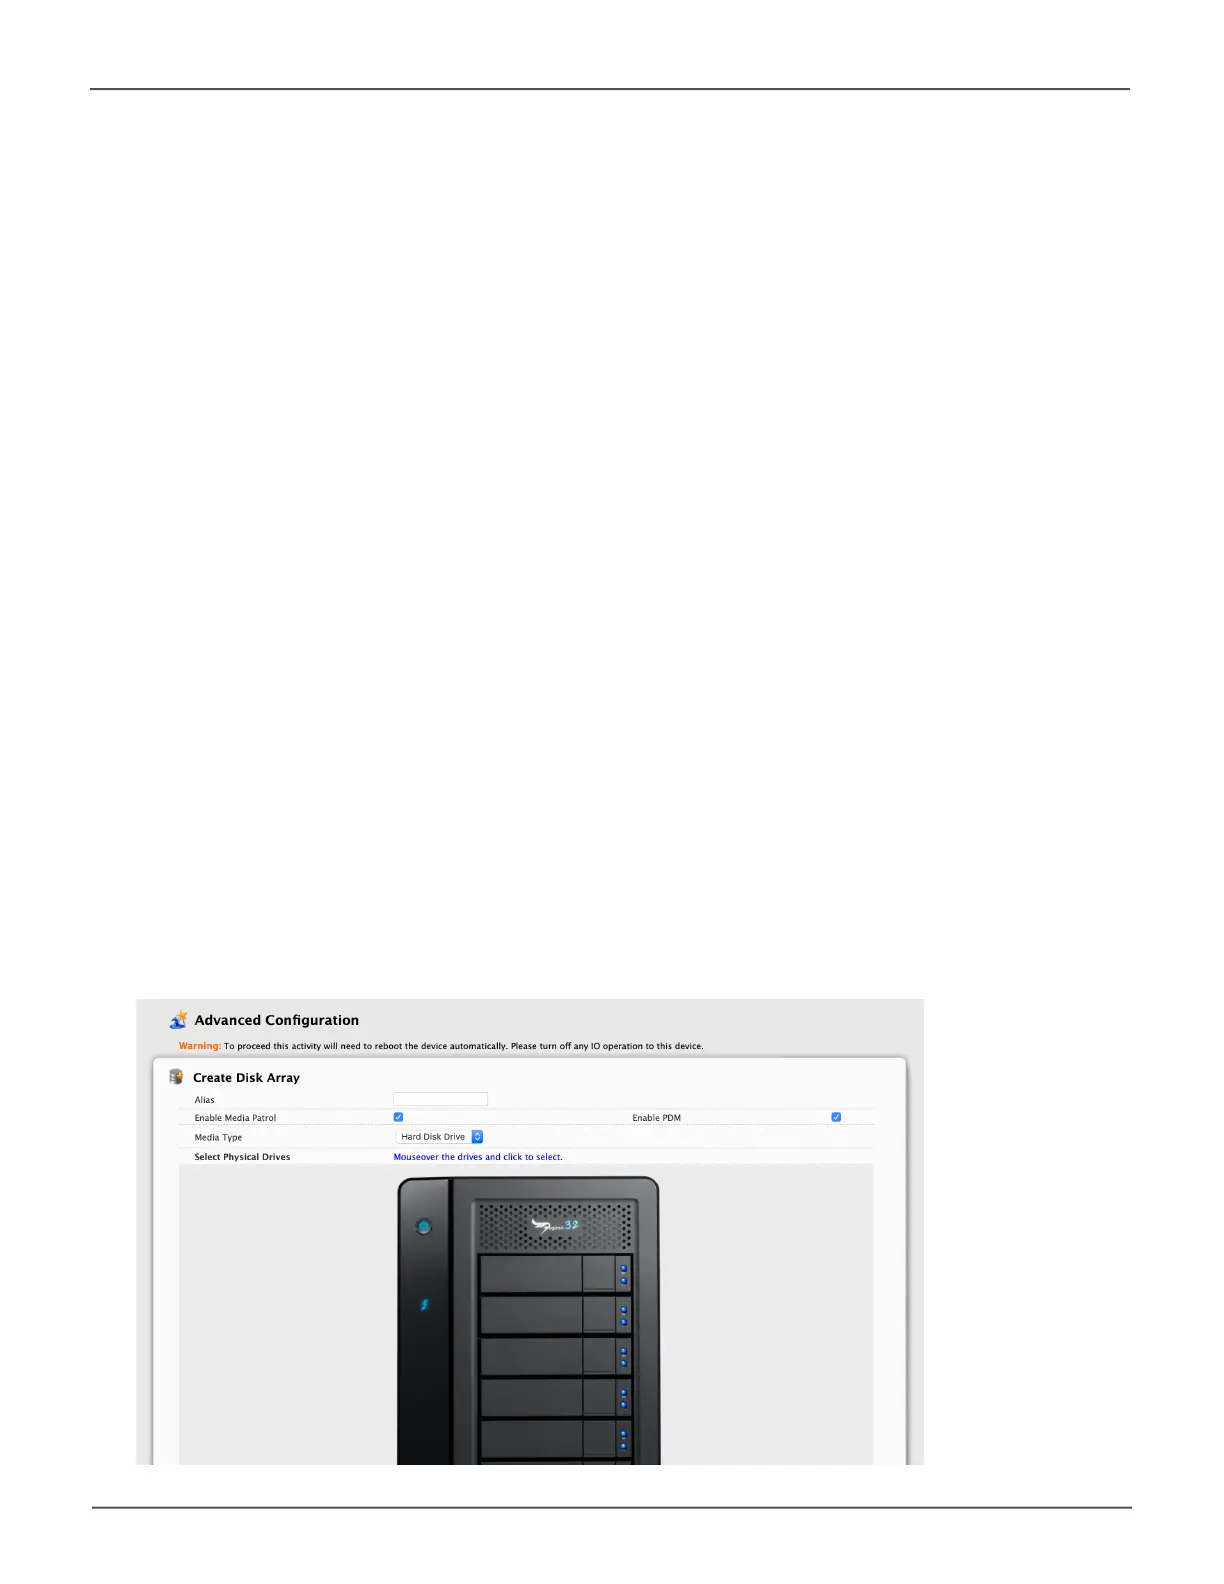
The Create Disk Array screen displays.
Task 1 – Disk Array Creation
To create your disk array:
1. Accept the defaults or make changes:
• Enter an alias in the Alias eld.
Maximum of 32 characters; letters, numbers, space between characters, and underscore.
• Media Patrol – Uncheck to disable on this array.
For more information, see “Media Patrol” on page 99.
• PDM – Uncheck to disable on this array.
For more information, see “PDM” on page 106.
2. In the Select Physical Drives diagram, click the drives to add them to your array.
The drive carriers turn blue when you click them. The physical drives’ ID numbers appear in the
eldbelowthediagram.
3. Click the Next button to continue.
The Create Logical Drive screen displays.
Advanced Conguraon - Create Disk Array

 Loading...


