Troubleshooting Diagnostics
CubiScan 110-T 52
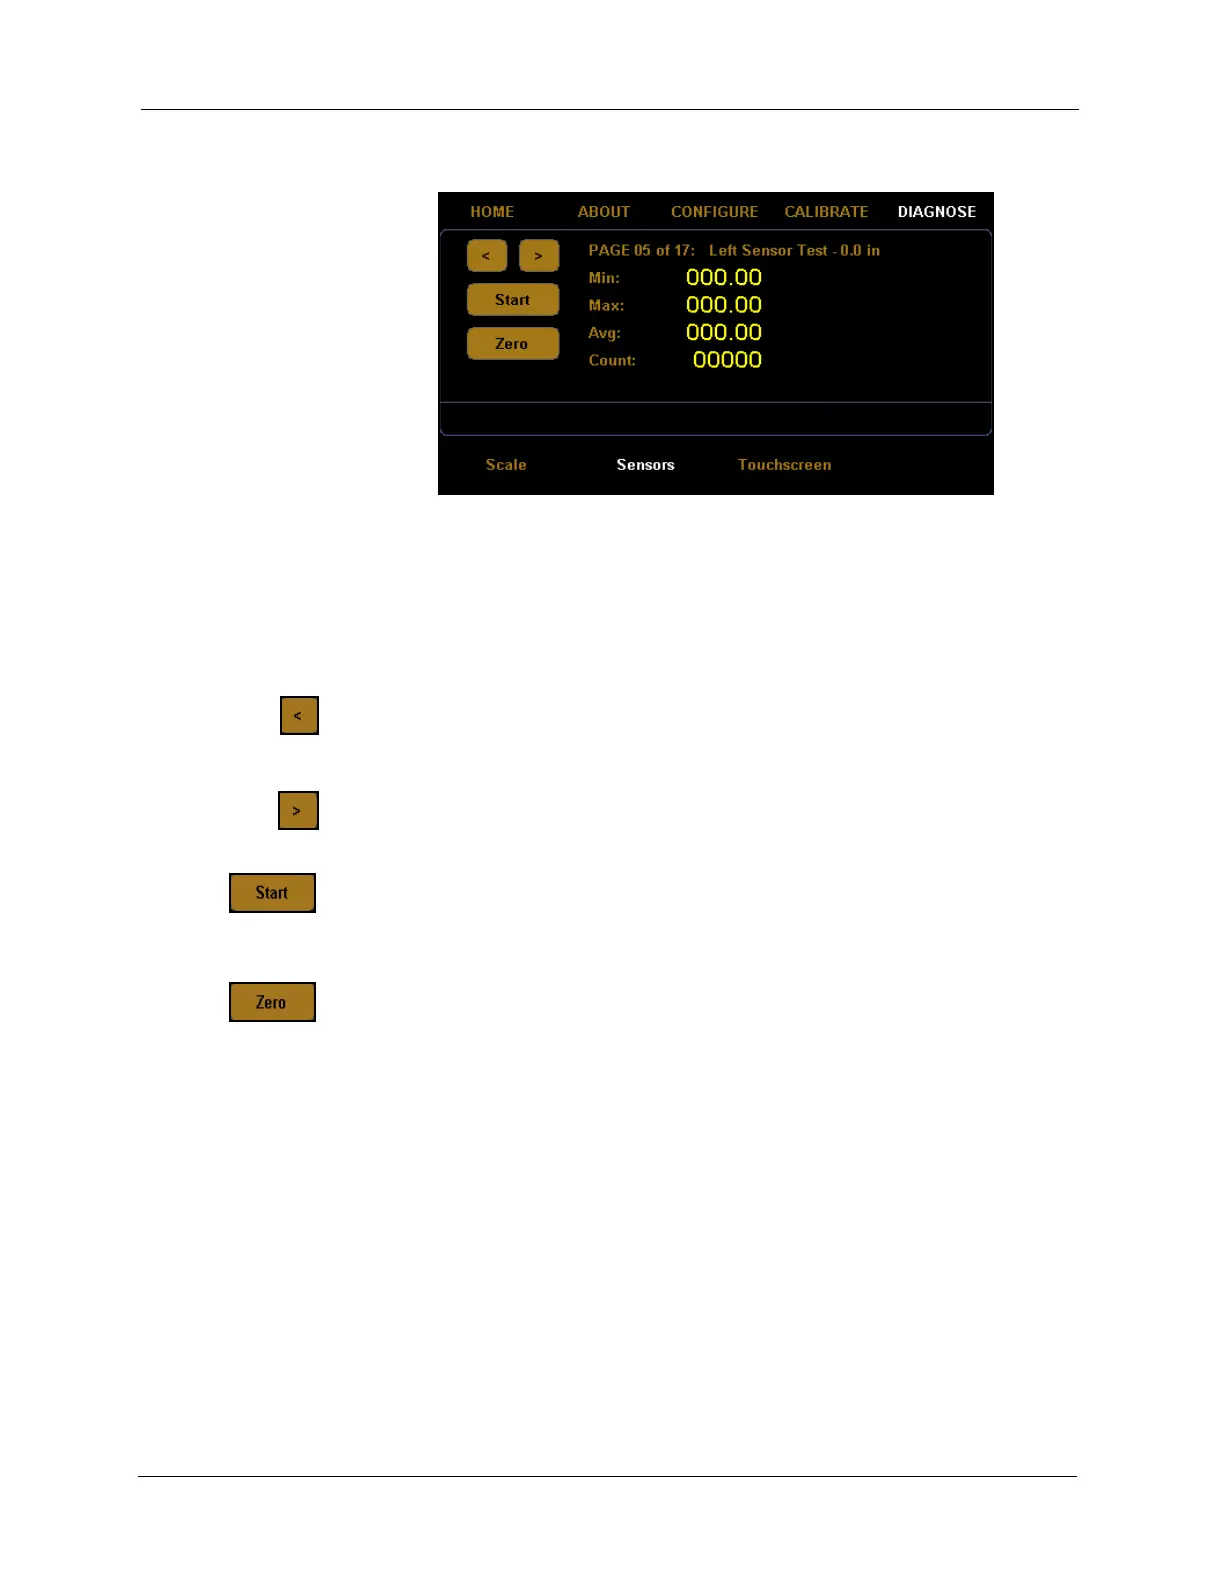
3. Tap the [>] button until you reach the left sensor test screen.
Sensor diagnostic screens five through seventeen are for factory sensor
testing at various sensors and lengths (0, 12, and 24 inches). To begin the
test, place the calibration cube in the appropriate position on the platform.
Tap the left arrow button
[<] to navigate left through the diagnostic sensor
screens.
Tap the right arrow button
[>] to navigate right through the diagnostic
sensor screens.
Tap the
[Start] button to start the diagnostic test. After the test has started,
this button will read
[Stop]. Tap this button to stop the test.
Tap the
[Zero] button to zero the scale. Make sure nothing is on or touching
the platform when you zero the scale, or all future scale readings will be
inaccurate.
Min This field displays the minimum length detected during the sensor test.
Max This field displays the maximum length detected during the sensor test.
Avg This field displays the average length detected during the sensor test.
Count This field displays the count accrued during the sensor test.
Touchscreen Diagnostics
Complete the following steps to view the touchscreen diagnostics.
Figure 52
Fourth Sensor Diagnostic Screen