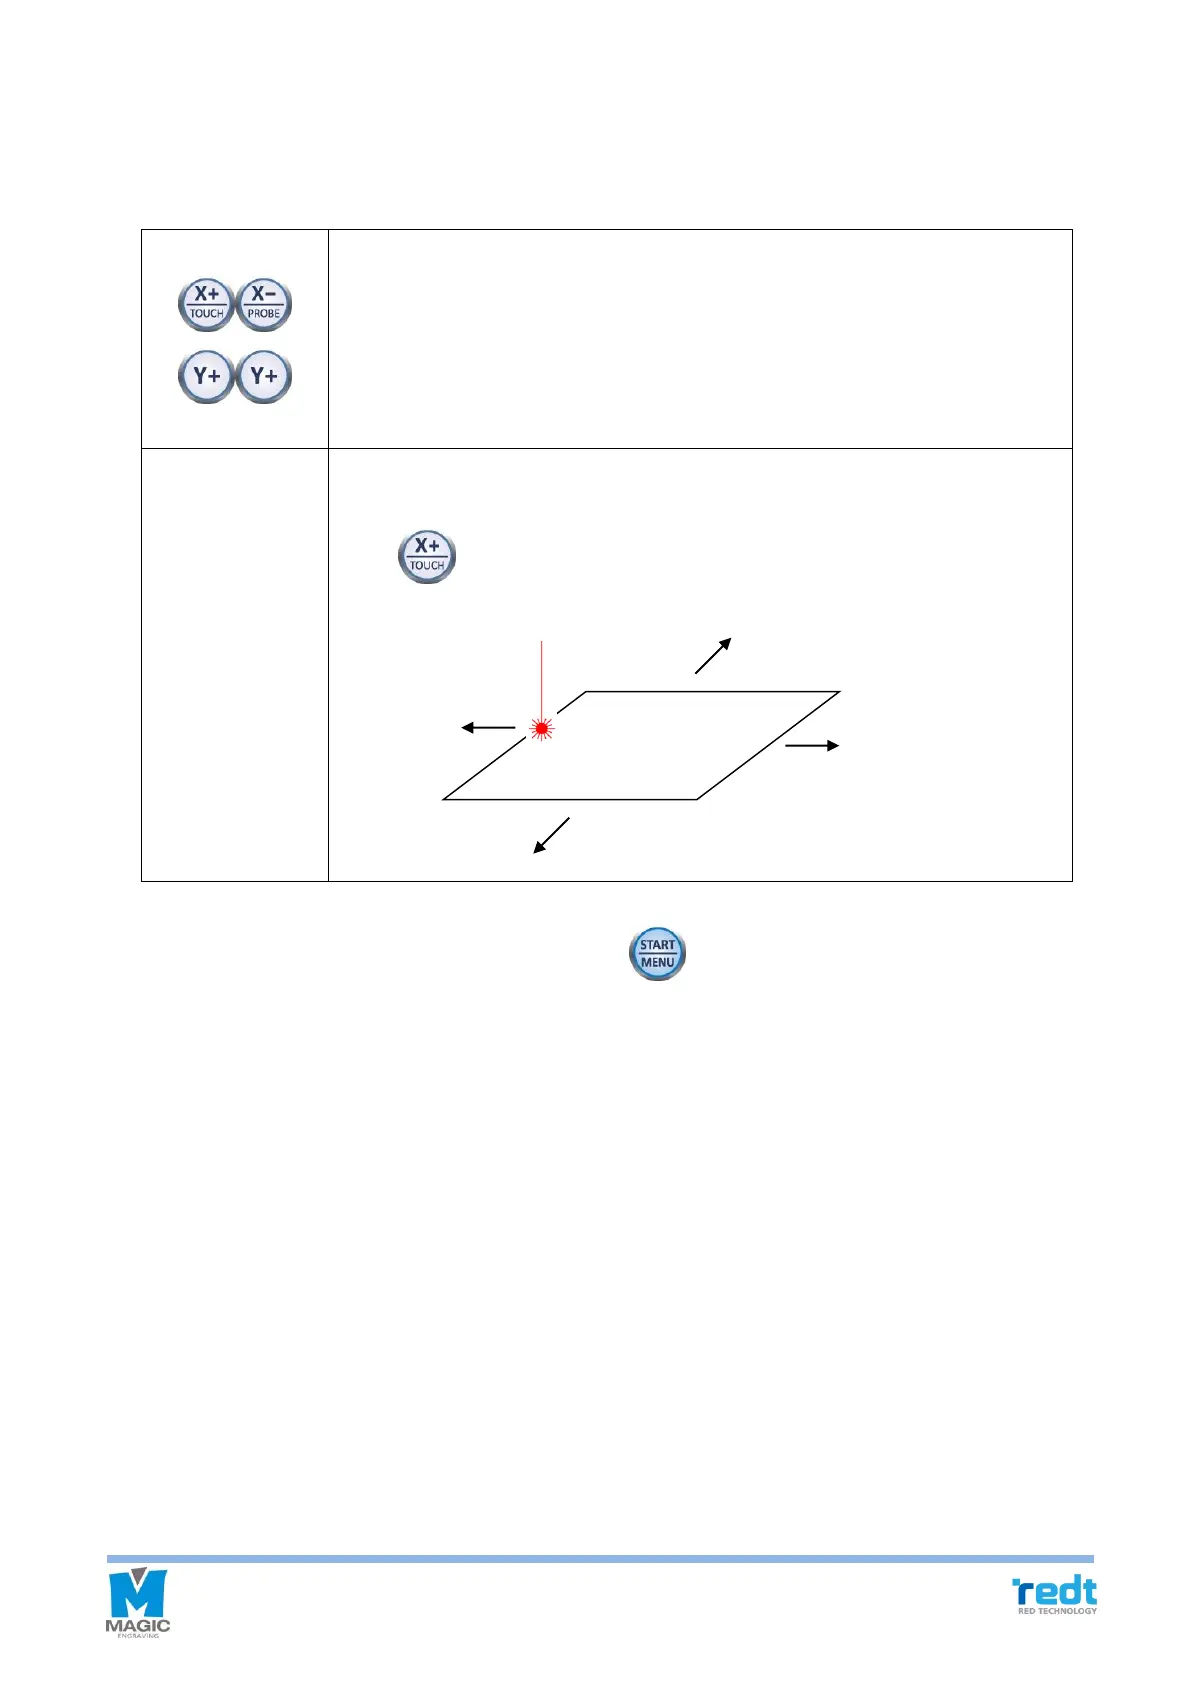
11. If the tool is moved to the center of the material and stopped, the engraving area can be verified and adjusted
by using the direction key button. At this time, check the laser pointer while moving it for easier measurement and
adjustment.
Whenever the direction key is pressed, move the laser pointer to the left, top, right
and bottom of the area to show the area to be engraved. Check whether the area
to be engraved is outside of the materials surface. If so, adjust the location by using
the direction key.
The laser pointer moves the area to be engraved to the left, top, right or bottom
according to current location. If the current location of the laser pointer is left, then,
press key to move the area to the left.
12. After location of engraving is decided, press and hold button until it beeps (more than 3 seconds) to
start the engraving.
13. Close the engraver cover.
Work Area