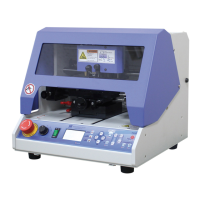
press and hold the button until it beeps (more than 3 seconds) to confirm that the setting is saved.
7. When menu appears on the LCD window like below, select the “Origin” what you want by using the
buttons.
8. Press and hold the button until it beeps (more than 3 seconds) to confirm that the setting is saved.
9. Tool will be moved to the position stored in the button.
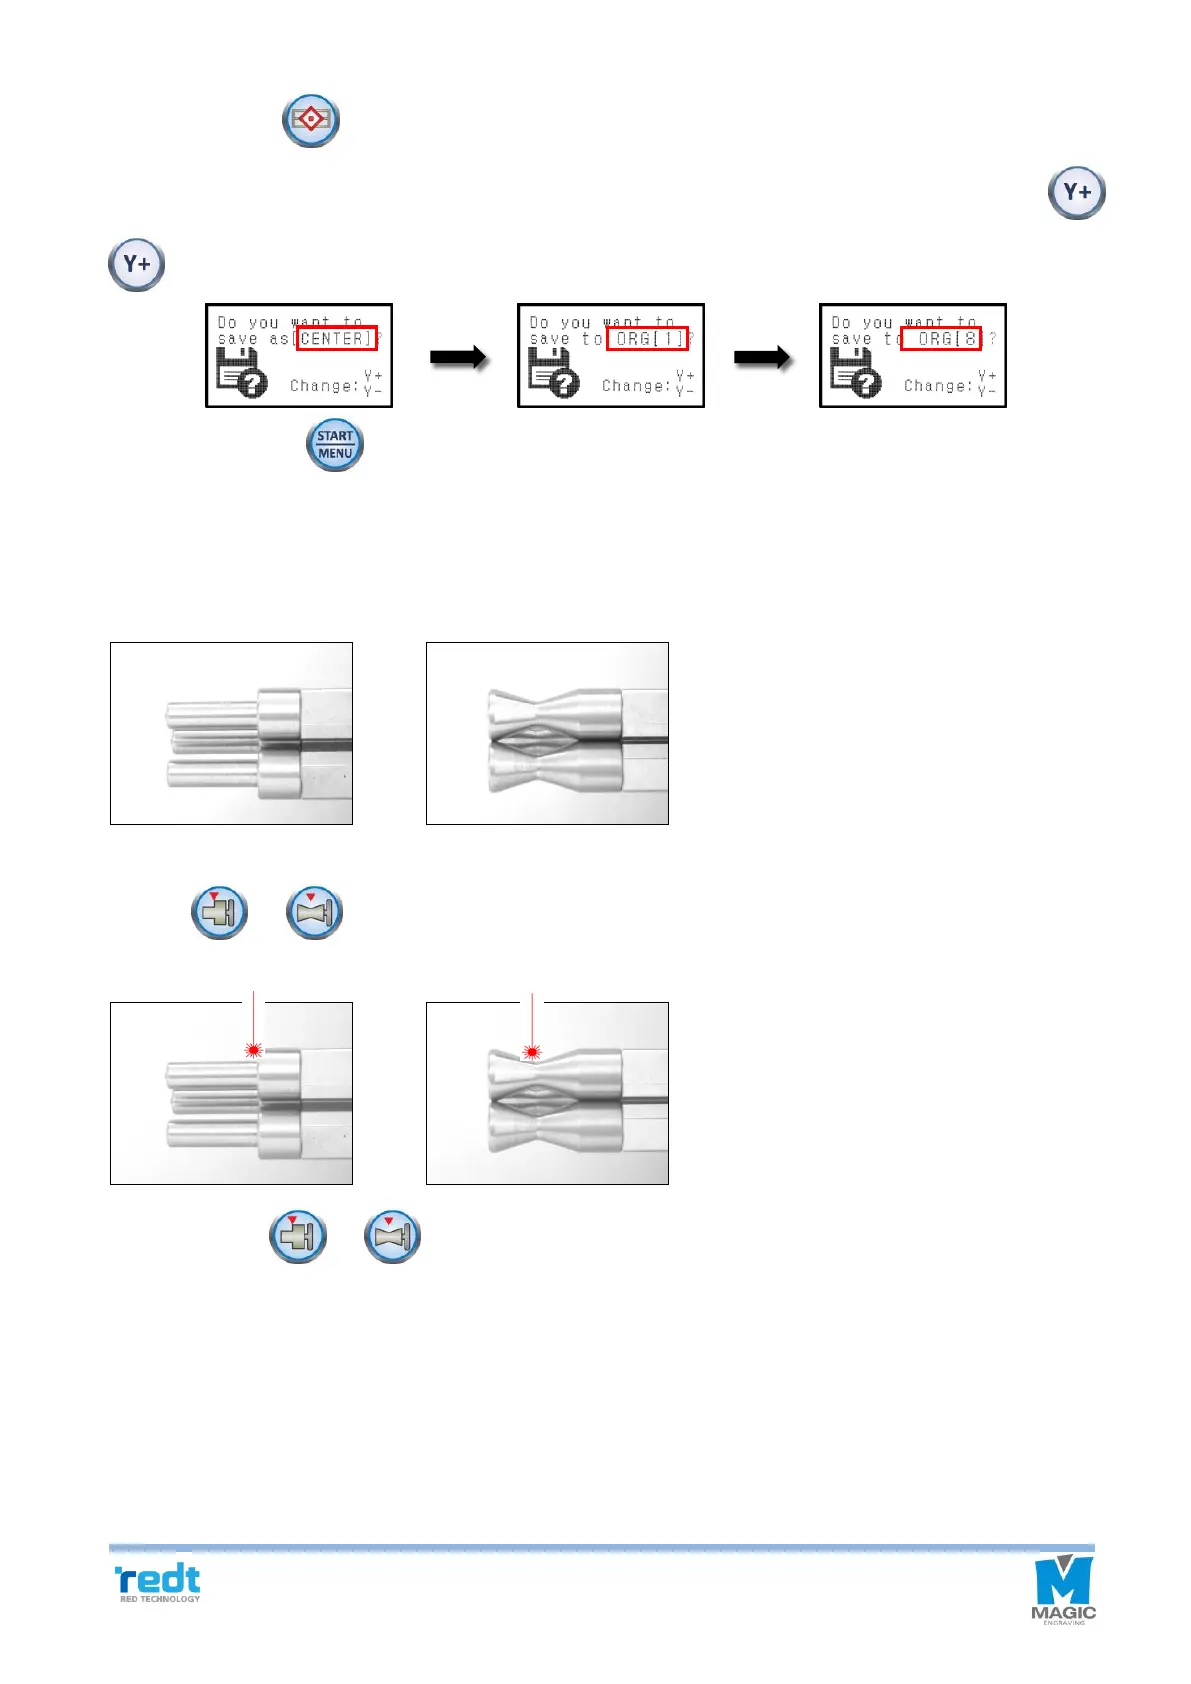
6) Chuck Finger Origin point
1. Set the chuck finger to the rotation clamp of the engraver.
Flat chuck finger Round chuck finger
2. Press or button to turn on the laser pointer at the Origin of the chuck finger.
3. Use the direction key of the engraver to match the laser pointer to the base point of each chuck finger as below.
4. Press and hold or button until it beeps (more than 3 seconds) to confirm that the setting is saved.
7) Rotation Clamp Origin point (Z axis)
1. Set the sharp tool into the rotation chuck of the engraver as shown in the picture below.