Hatching gap, depth, engraving speed and others are pre-set for each
engraving option. Therefore, it is not necessary to designate hatching gap,
depth, engraving speed and others every time and they will be automatically
set with their pre-set values. Each engraving option value can be changed by
pressing Edit or Add button on the Set engraving option window.
Designate a tool to be used for engraving. Each tool setting value can be
changed by pressing Edit or Add button on the Set tool window.
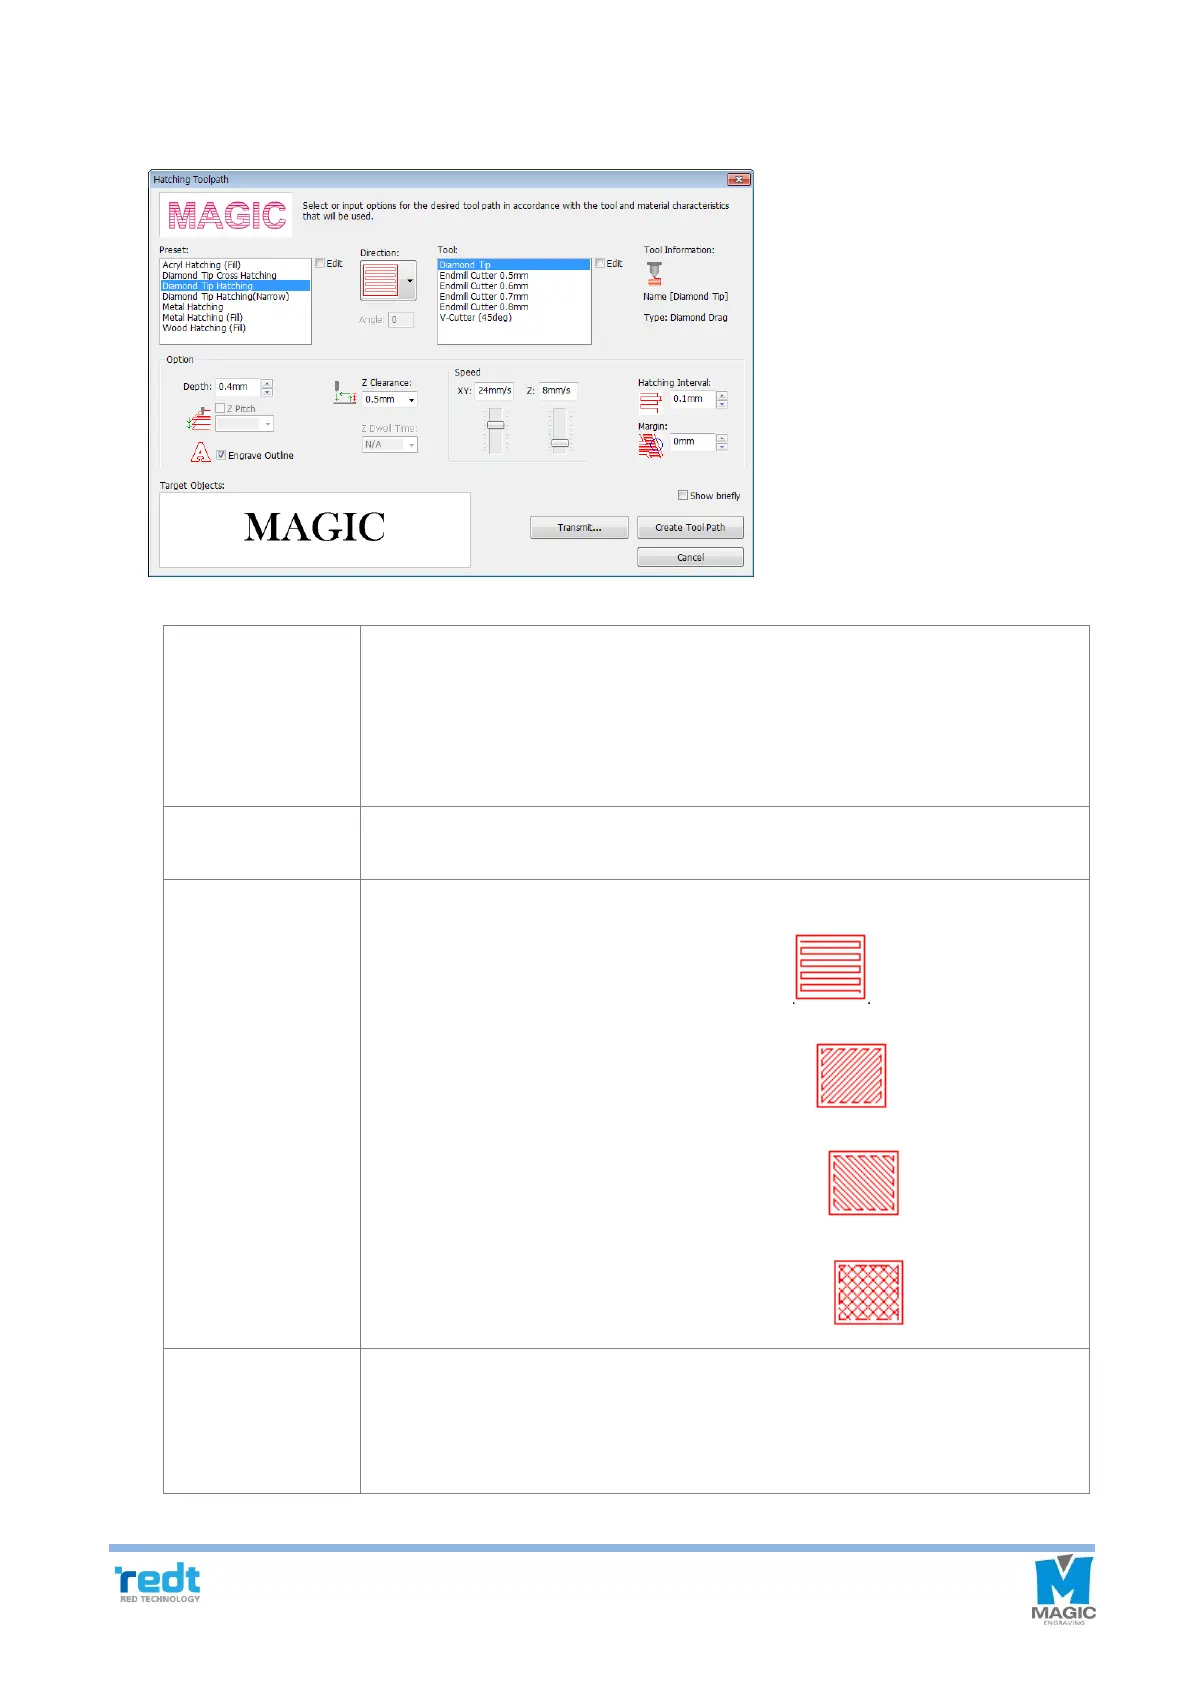
The followings are shown only on hatching tool path.
A tool path is created in the horizontal direction
A tool path is created in the left diagonal direction .
A tool path is created in the right diagonal direction
A tool path is created in the cross hatched direction .
Engraving: It does not mean the actual engraving depth but refers to “Applied
pressure” and the higher depth value is, the bigger the applied
pressure is.
Cutting: Designate an engraving depth actually used for using rotation tools.