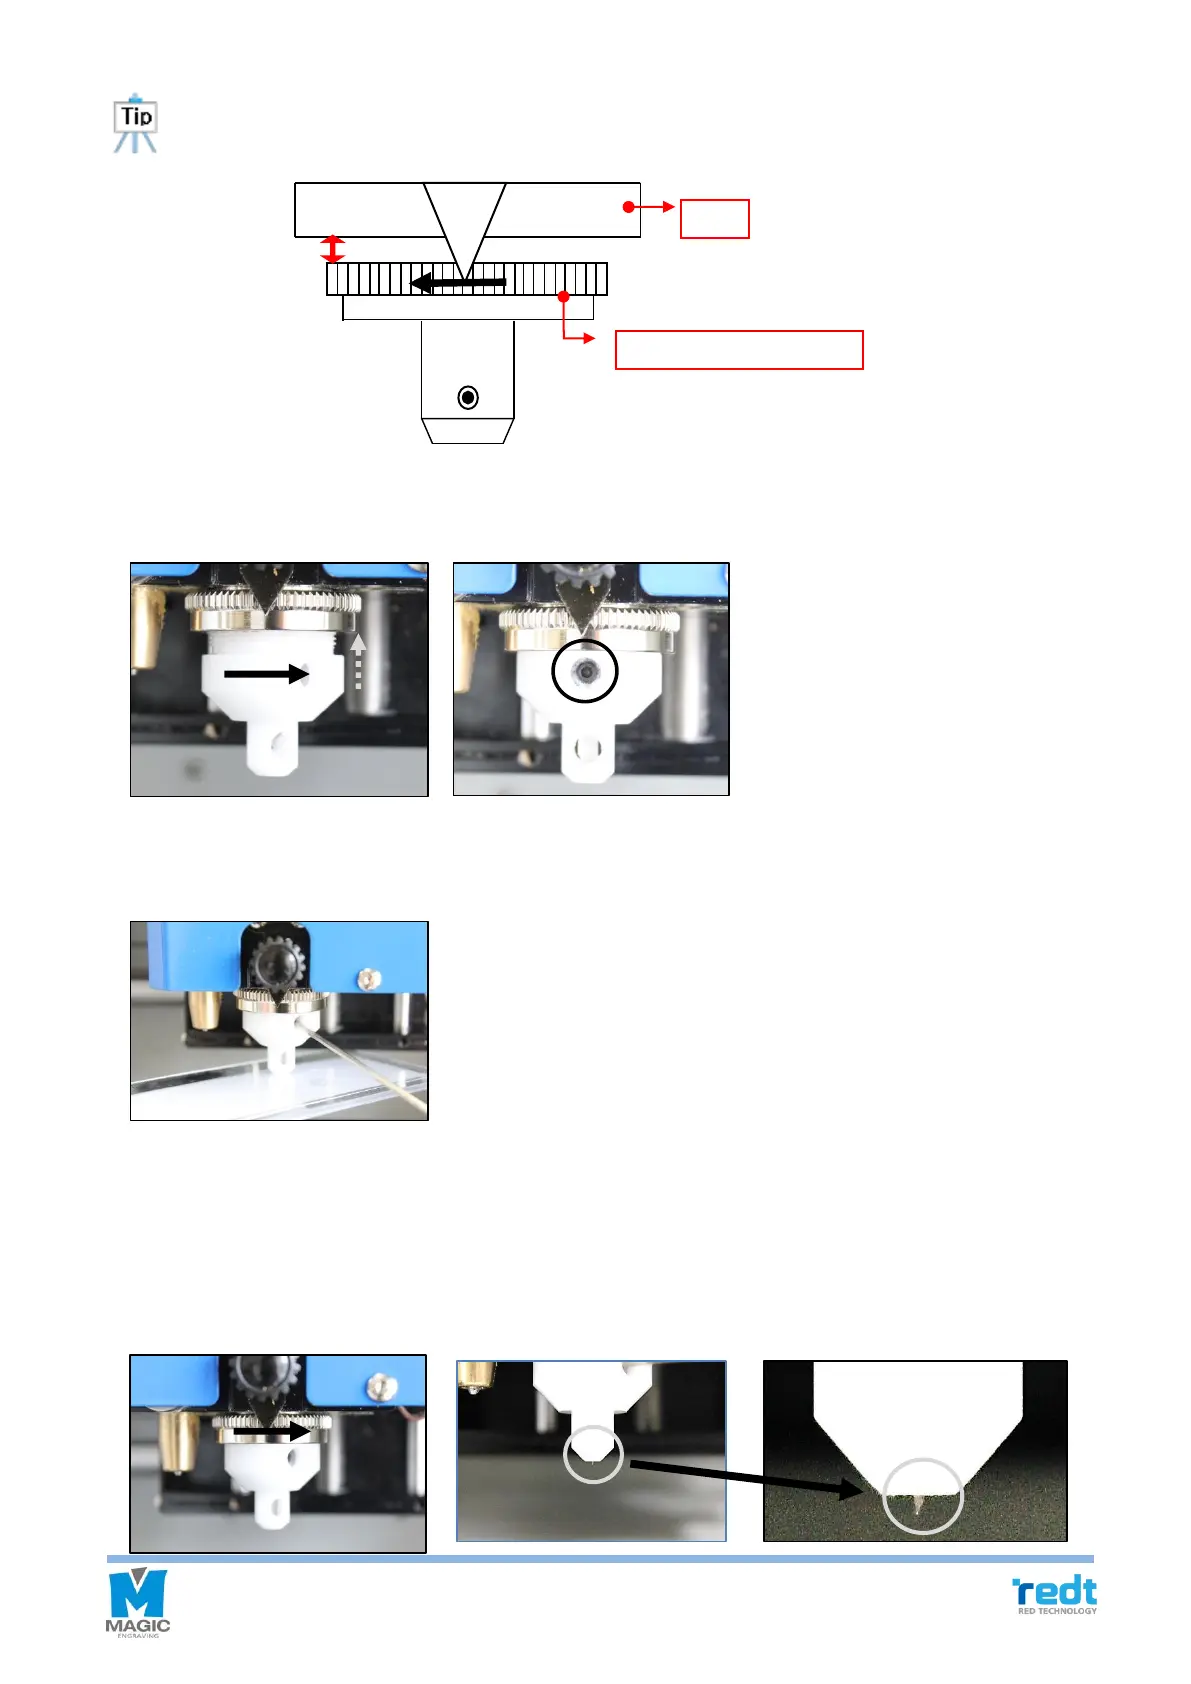
It might be difficult to adjust the tool length if the nose height adjustment screw set to the top, so separate
it about 1~2mm from the head.
3. Assemble the nose height adjustment screw with the nose and turn the assembly to the right to make the nose’s
tool hole locate before the tool tighten bolt.
4. Put a flat plate (Ex: ruler) under the nose as shown in the picture below and release the tool fixing screw with
2mm wrench. Lower the tool until it touches the plate, and tightens the tool in place.
5. If the nose height adjustment bolt is rotated to the right, the nose will face to the top and the tool will be able
to be seen. At this time, the engraving depth is same as the height of the exposed tool. Adjust the length of
the tool to desired depth. (One revolution of the screw moves the tool 1mm up or down)
* If the engraving depth is 1mm on the tool path, and the tool length is by 0.3mm, then the actual engraving
depth will be 0.3mm.