34
eRev. 1.08/15/2023
10.1.2 Loading the Flow Cell Using the Beams Light Source
If using the Beams light source, finish loading the Flow Cell by completing the following steps. If using the Cary 60
spectrophotometer, please see section 10.1.1.
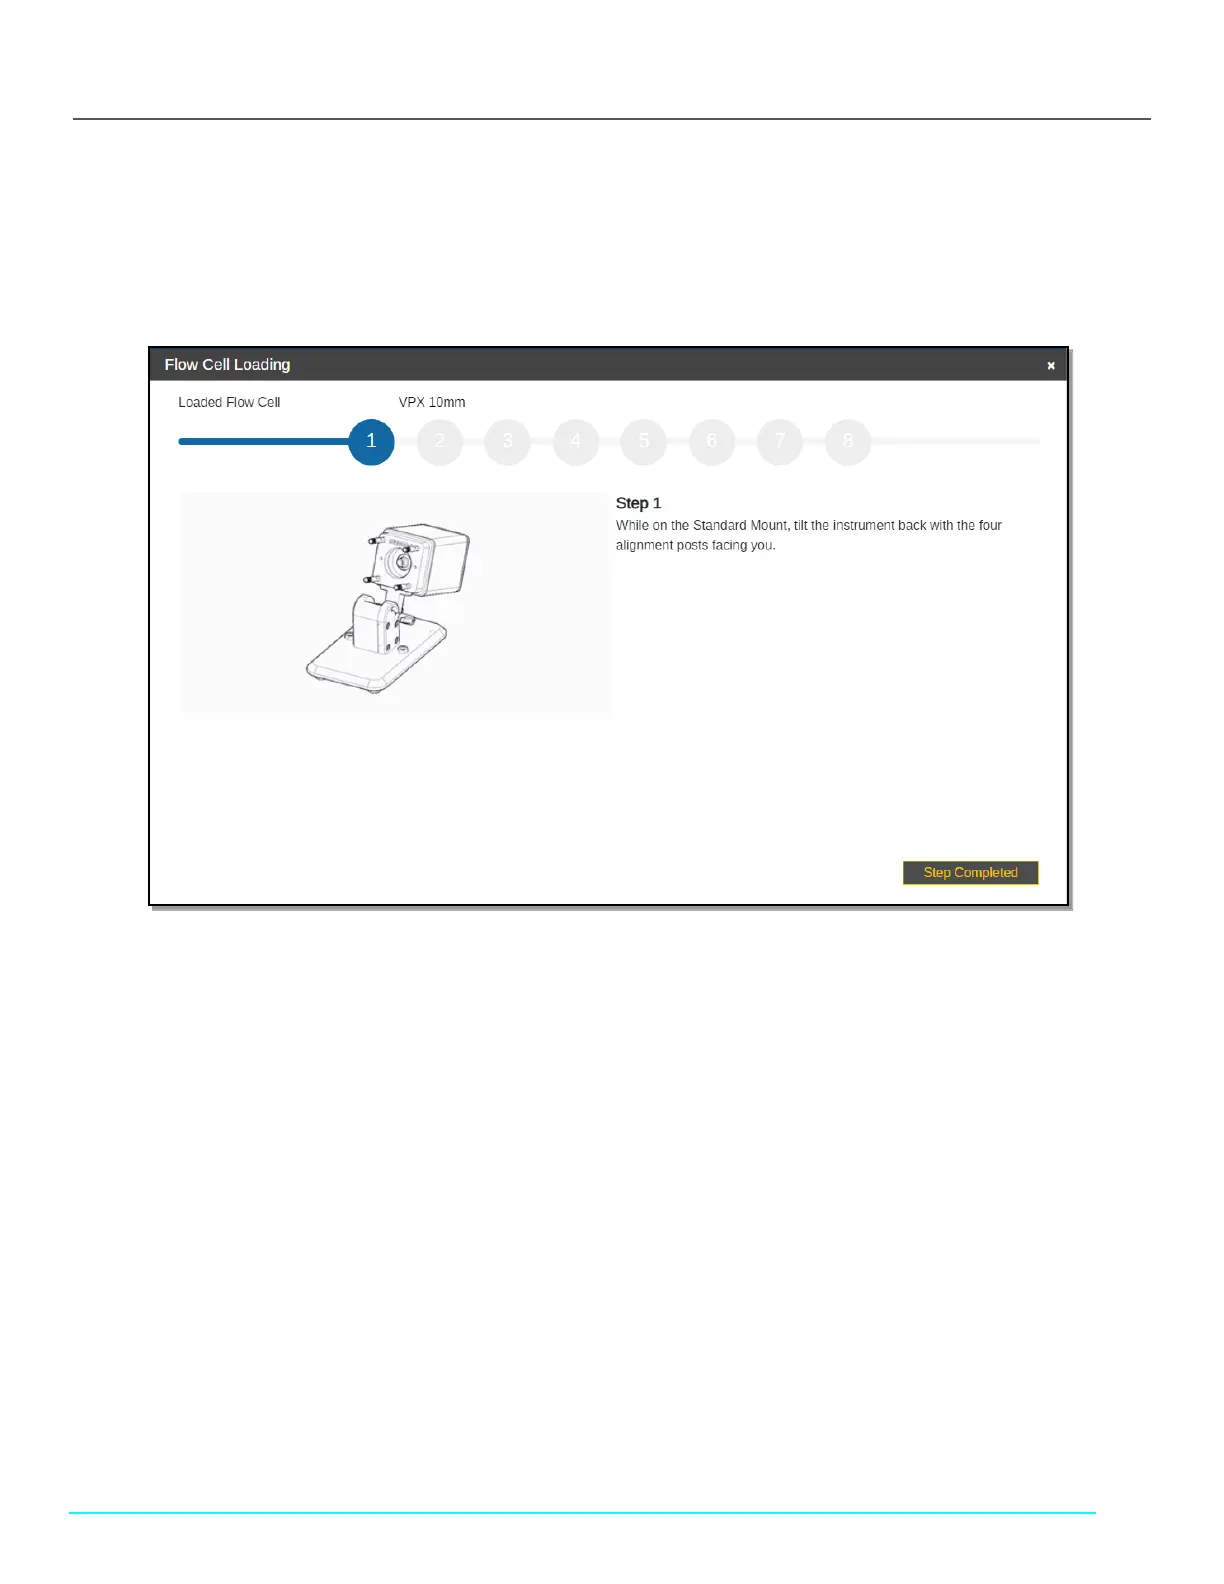
Follow the on-screen prompts. Click Step Completed to proceed.
Figure 43. Flow Cell Loading Instructions (Beams)
1. While on the Standard Mount, tilt the instrument back with the four alignment posts facing you.
Note: If the FlowVPX Head is not being used with the Standard Mount, instead lay the instrument on its side, with the
FlowVPX logo facing up.
2. Place a new Flow Cell gasket on top of the Flow Cell. Then insert the Flow Cell, Fibrette Optical Component first, into the
FlowVPX Head.
• Ensure the gasket fits flat and comfortably on top of the Flow Cell, leaving the Smart Pins uncovered.
• Ensure the Flow Cell Smart Pins are aligned with the Flow Smart Input on the FlowVPX Head.
When using certain Flow Cells, the Alignment Posts will need to be replaced. ViPER Software will prompt the user if this
replacement is required. Otherwise, skip this step.
To replace the Alignment Posts:
a. Remove existing Alignment Posts.
• Access the included 5 mm box wrench.
• Grip the wrench flats on the Alignment Post.
• Turn Alignment Post counterclockwise.
b. Insert the included Extended Alignment Posts.
• Ensure that the threaded Post end closest to the wrench flats is inserted.
• Apply a bead of Loctite to the threads being installed into the Head.
• Tighten each Post in a clockwise direction.
3. Place a new Flow Detector gasket on top of the Flow Detector so that the guide holes align. Then insert the Flow Cell
Detector, glass side first.
4. Secure the Flow Cell and Detector to the FlowVPX Head with the four acorn nuts.