Chapter 8. Matrix Counting and Analysis Workflow
8004708 Cellometer™ Ascend User Manual Rev A 35
PREVIEWING CHANNEL IMAGES
In the Preview area, channels available for viewing (e.g., Channel 1 and Channel 2) are based on the assay Imaging
Mode. The Channel 1/BR image is displayed by default. Tapping the FL button displays the Channel 1/FL image.
Note: If only one channel is available, the Preview field channel dropdown will be hidden.
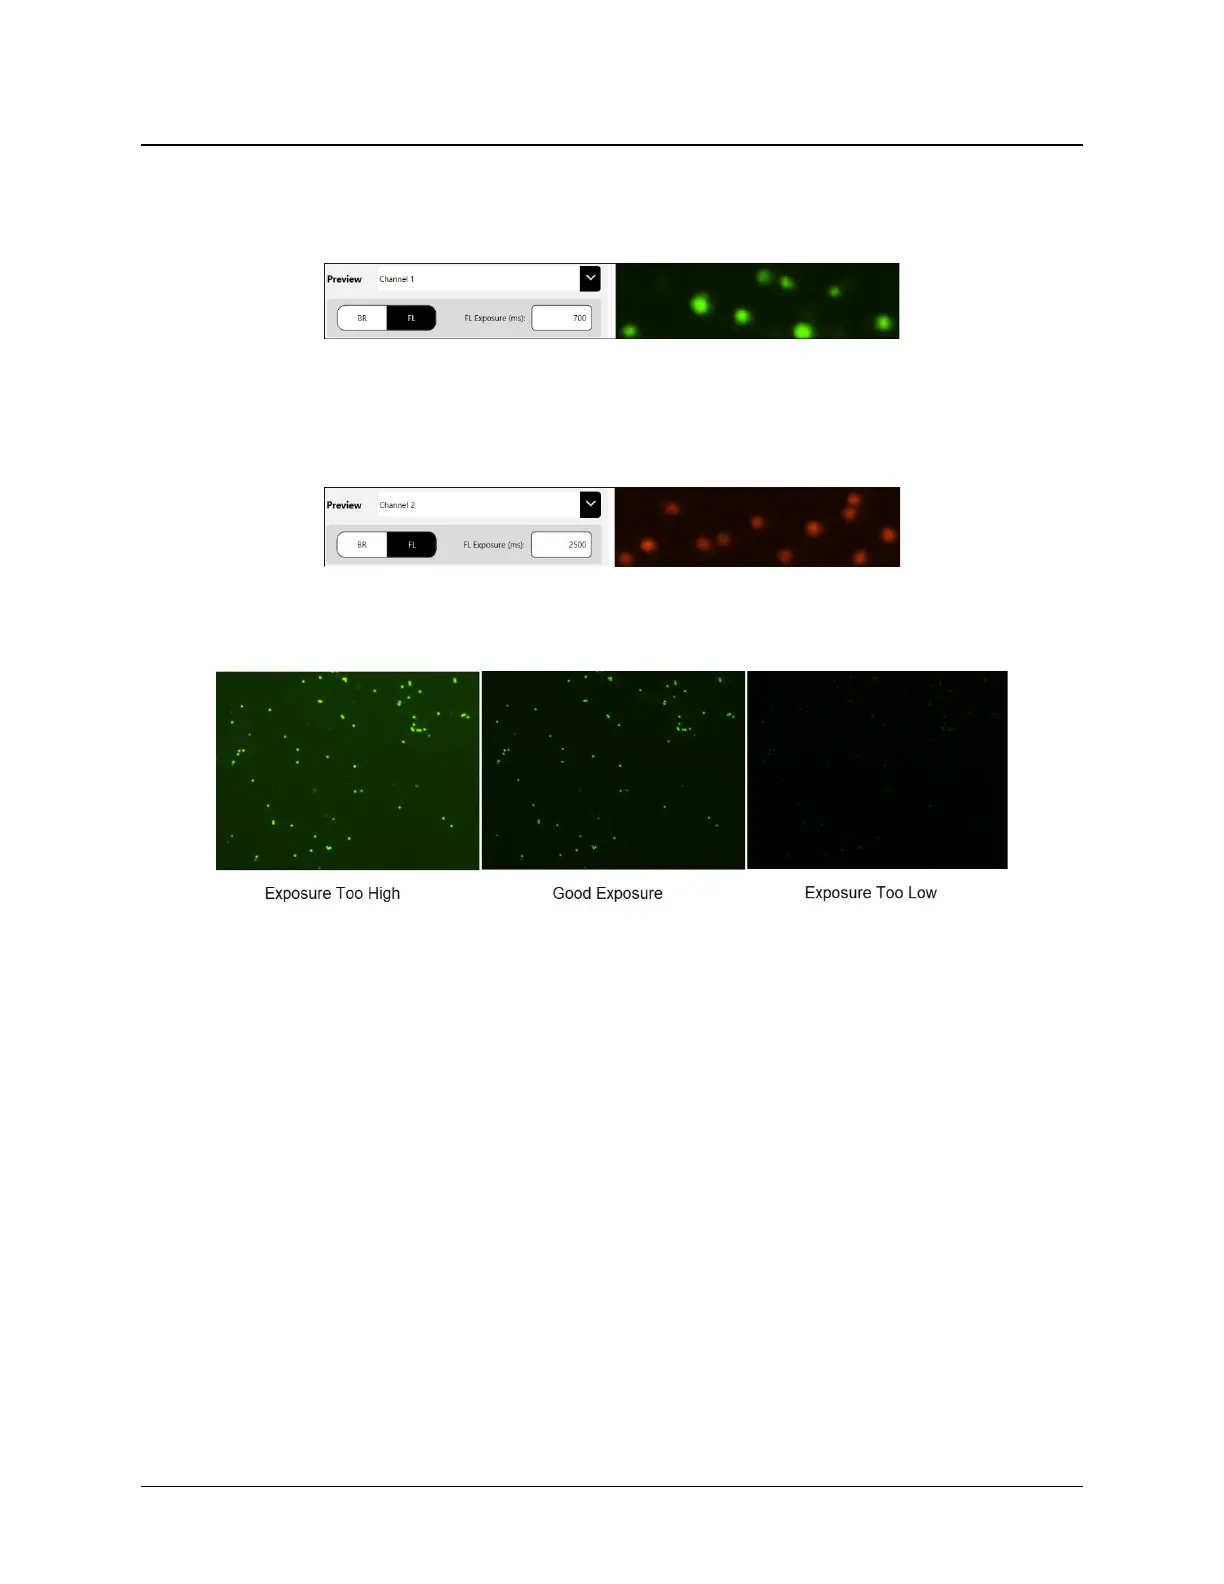
To view images for another channel, select it from the Preview field dropdown. Tap the FL button to view
fluorescence in that channel. A sample Channel 2|FL image is shown below.
When previewing fluorescent images, confirm that FL signal is strong but has a low, dark background. Modify the
FL Exposure to increase (prolong) or decrease (shorten) the exposure time accordingly.
Notes:
• For BR/FL imaging modes, each channel will be associated with two images − Brightfield (BR) and Fluorescent
(FL). These images are referred to in assay channel mappings as BR1/FL1 and BR2/FL2.
• When working with assays that have two channels, use the Channel 1/BR image to adjust focus and then select
the FL image to confirm exposure. For Channel 2, you only need to select the FL image to confirm exposure
since focus of its paired BR image is adjusted automatically when you performed the task for Channel 1.
• If FL images are available for both Channel 1 and Channel 2, a slight offset may exist between BR1 and BR2
images due to the distance the camera must travel.