92
Store Operation
Marker
When the store mode is set to Auto or Timer Auto, and the L
v
store interval
is speci ed, a marker can be added to the data.
1. Select [Store] from the menu list screen and set the store mode to
Auto or Timer Auto.
Also set the required measurement parameters such as L
v
store interval.
2. Press the START/STOP key to set the unit to the measurement condition.
3. The
(marker 1) and (marker 2) keys now function as markers.
Pressing a key will insert the corresponding marker into the screen.
4. Wait until the preset measurement time has ended, or stop the mea-
surement with the START/STOP key.
5. Use the
keys to select [Recall] on the menu list screen and
press the MENU/ENTER key.
6. Use the
keys to select save location of data and use the
keys to select “SD Auto Lv”.
7. Use the keys to select data le and press the MENU/
ENTER key. The le processing screen appears.
8. Use the
keys to select [View the data] and press the MENU/
ENTER key. The recall data is displayed.
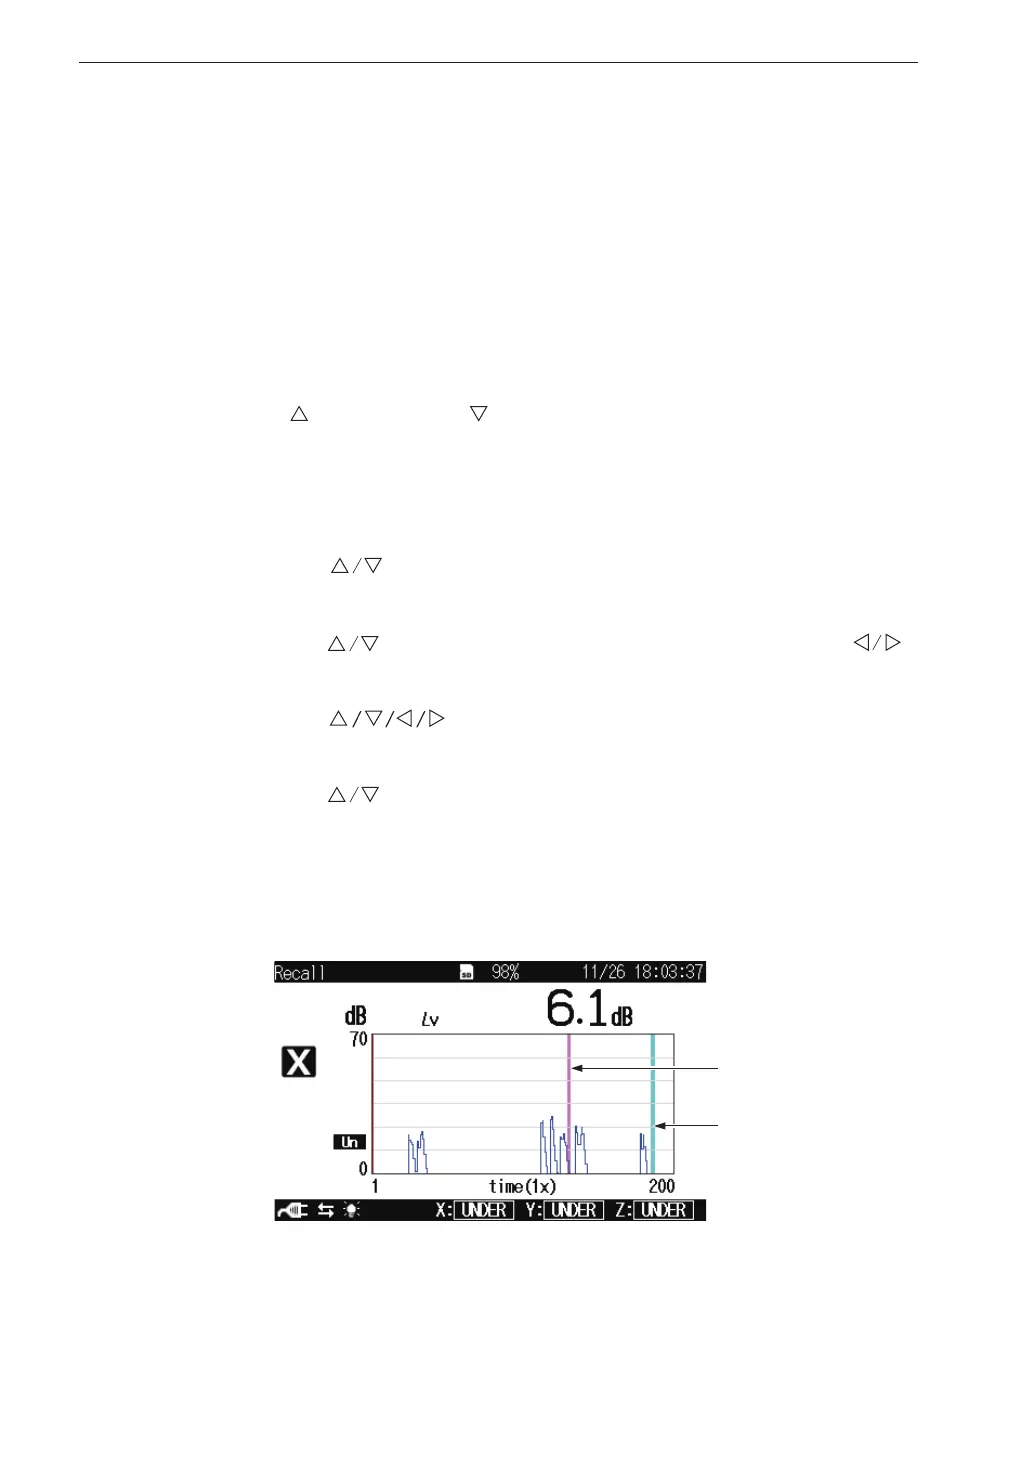
9. Press the DISPLAY key to switch the display. A time-level screen
appears showing the marker information.
Time-Level screen
Marker 1 (red)
Marker 2 (blue)


 To Next Page