Robotiq Screwdriving Solution - Instruction Manual
4.6.Vacuum Coupler Adjustment
At this point, the Screwdriver should be equipped with a screwdriving bit and its corresponding vacuum sleeve. Please refer to the
Mechanical Installation sectionn should you need further instructions on thismatter.
1. To adjust the protruding length of the screwdriving bit, start by screwing or unscrewing the coupler adjuster so that the tip
of the screwdriving protrudes slightly past the lower end of the vacuum sleeve.
Fig. 4-2: Drawing of a Screwdriving Bit Protruding Slightly Past the Lower End of the Vacuum Sleeve.
2. In the Screwdriver Toolbar, tap the On button to activate the vacuum action (a gray icon will display, indicating that the
Screwdriver cannot detect a screw).
Fig. 4-3: Screwdriver Toolbar Showing No Screw HasBeen Detected.
3. Hold a screw corresponding to your application at the tip of the screwdriving bit.
4. Lower the coupler adjuster until the screw icon of the Screwdriver Toolbar becomes green. The screwdriving bit should be
inserted into the screw’s drive with the screw head resting against the end of the vacuum sleeve.
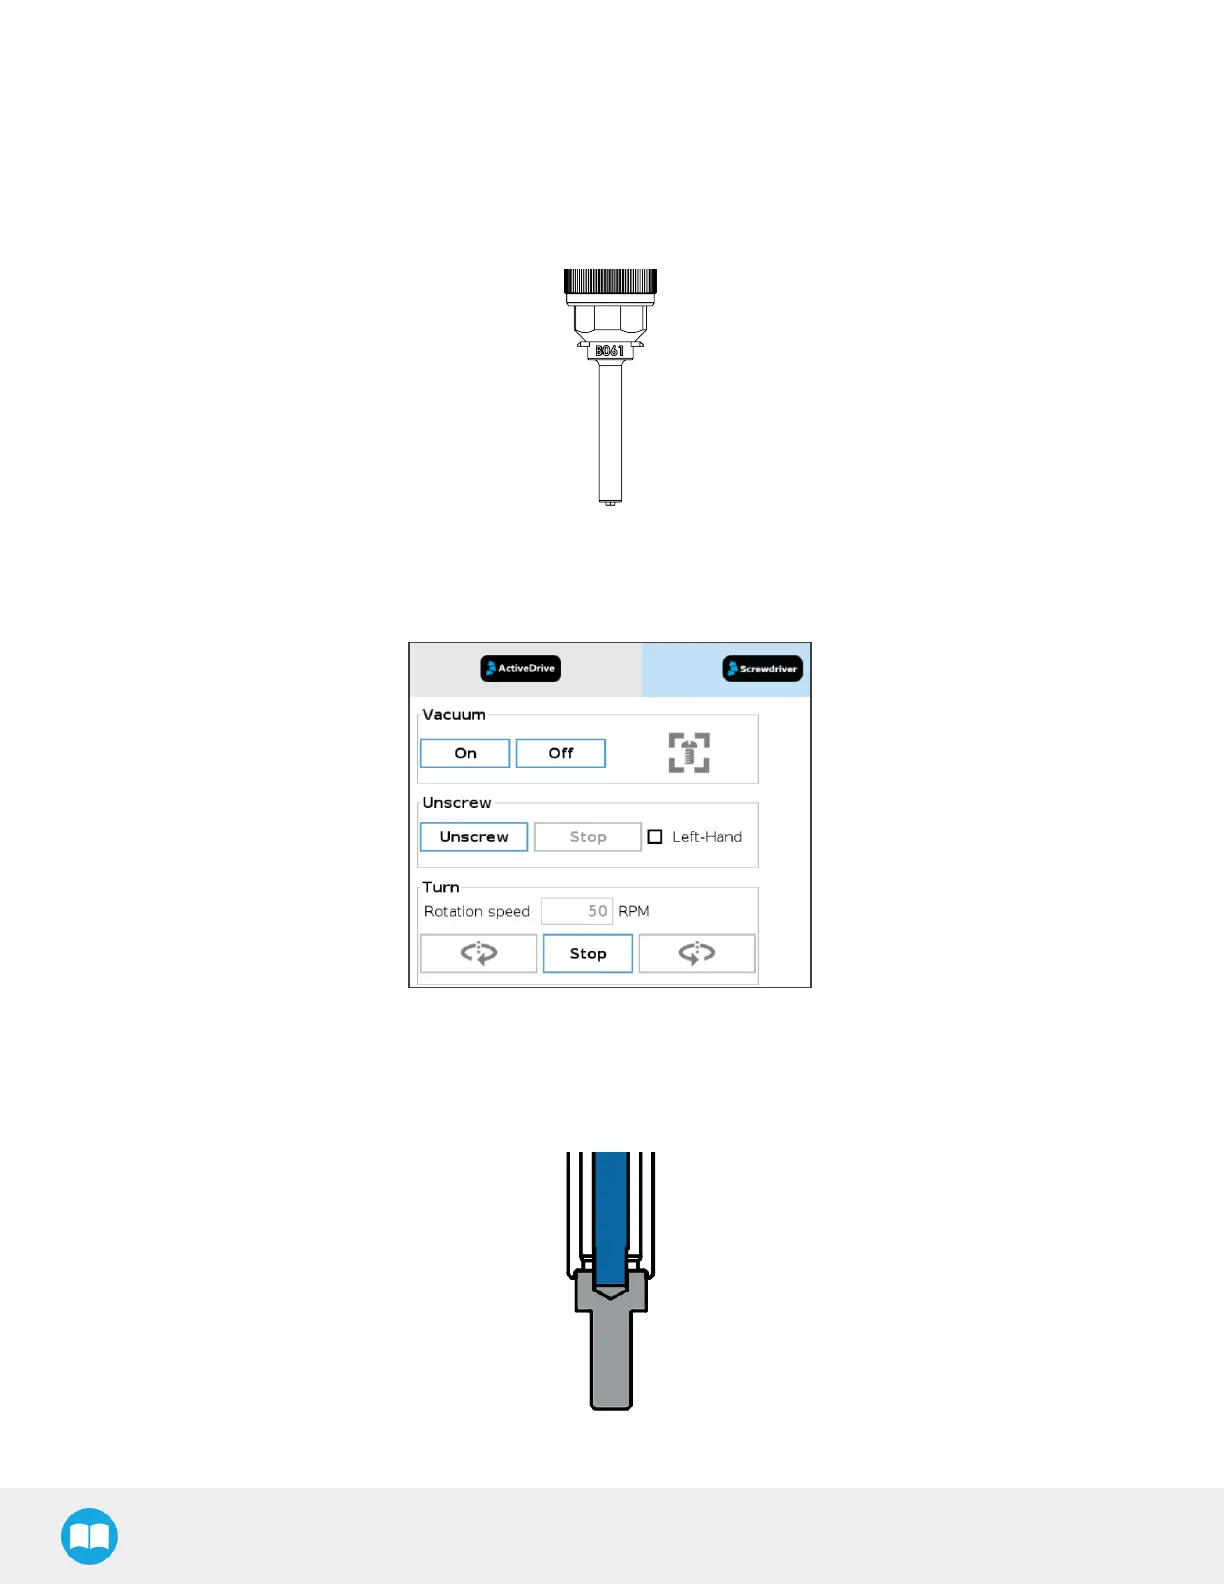
Fig. 4-4: Drawing of Screwdriving Bit (in Blue) Inserted Into Screw’s Drive with Screw Head Resting Against Vacuum Sleeve.
43