Roche Diagnostics May 2009
B-120 Service Manual · Version 9.0
5 AutoQC module cobas b 221 system
Replacing the AutoQC module
7
Slide the AutoQC module into the opening and fasten it to the bottom of the
cobas b 221 system with the two fixing screws.
8
Remove the cylinder pin from the AQC rinse tube and connect the rinse tube to
the angled nipple.
e
For details, see Figure B-90 on page B-121.
9
Connect the AQC sample tube to the angle unit.
e
For details, see Figure B-89 on page B-120.
10
Push the connector cable through the AQC board cover and connect it to the
AutoQC control board.
e
For details, see:
Figure B-89 on page B-120
Figure B-90 on page B-121
Replacing the AutoQC module
1
Switch off the cobas b 221 system.
2
Remove the back panel of the instrument.
e
For instructions, see Removing the rear panel on page B-20.
3
Pull the AutoQC module out to the left.
4
Disconnect the AQC sample tube at the angle unit and pull it out.
The AutoQC module rails must fit flush to the cobas b 221 system cover frame so the two fixing
screws can grip.
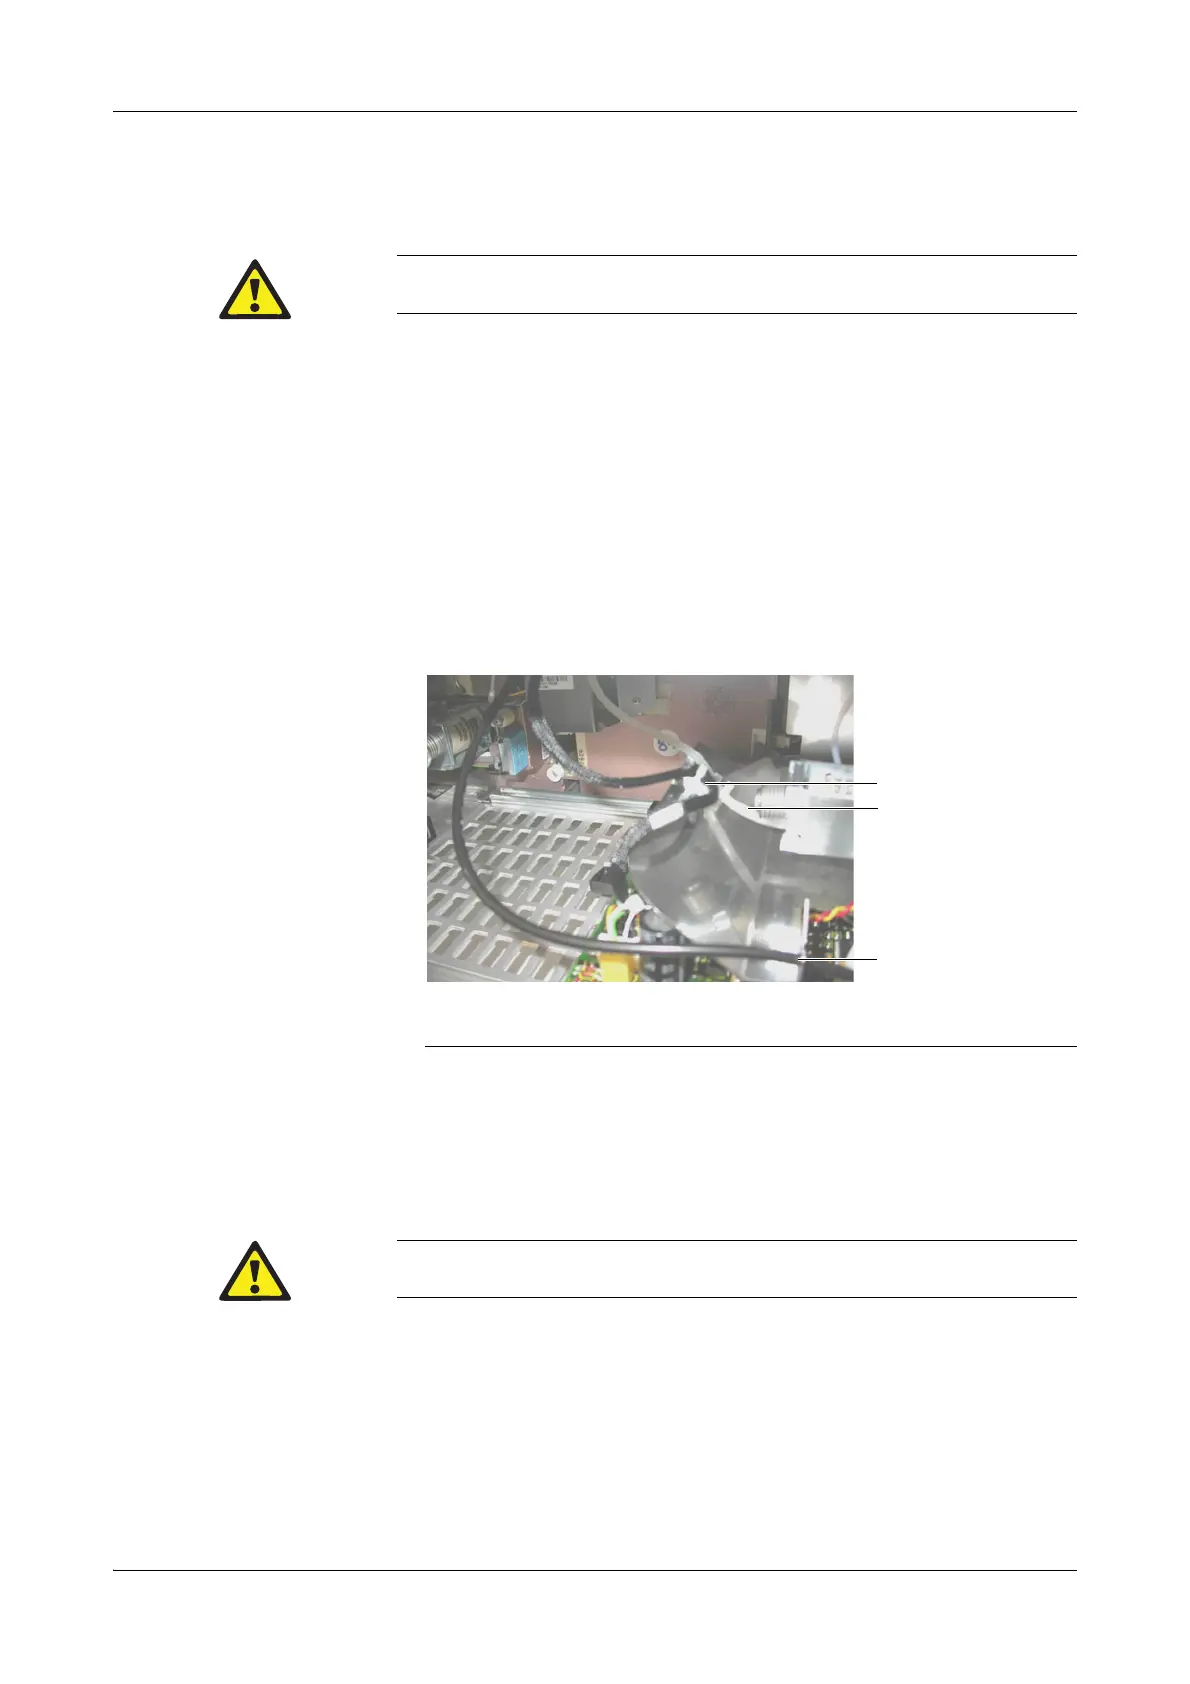
A Connector cable
B Rinse tube
C Sample tube
Figure B-89 AutoQC module: rinse tube, sample tube, connector cable
Activate the function program
h
[System] > [Component test] > [Aggregates] > [AQC motors]
> [AQC motors] > [Service Position] to bring the motors to the service position.
 Loading...