38 Rockwell Automation Publication 2711P-UM008J-EN-P - April 2022
Chapter 2
6. Verify that all levers are in the correct locked position.
The notch on the outside of lever shows its locked position.
These two views show levers that are locked in position 3.
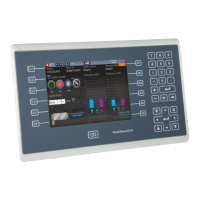
Mount the Stainless Steel
Terminal in a Panel
Mounting clips secure the stainless steel terminals in a panel. The number of
clips varies by terminal size. Tools that are required for installation include
panel cutout tools, a large slotted or Phillips screwdriver, and a torque wrench
for tightening the mounting clips.
To mount the stainless steel terminal in a panel, follow these steps.
1. Cut an opening in the panel by using the panel cutout template that
shipped with the terminal, or the cutout dimensions in Table 14 on
page 30.
2. Place the terminal screen-down on a clean, flat surface.
Be careful not to scratch or damage the terminal screen.
ATTENTION: All levers must be in the correct and same locked
position to provide an adequate gasket seal between the terminal
and the panel. Rockwell Automation assumes no responsibility for
water or chemical damage to the terminal or other equipment
within the enclosure because of improper installation.
ATTENTION:
Disconnect all electric power from the panel before making the panel cutout.
Make sure that the area around the panel cutout is clear and that the panel is
clean of any debris, oil, or other chemicals.
Make sure that metal cuttings do not enter any components that are installed in
the panel, and that the edges of the cutout have no burrs or sharp edges.
Failure to follow these warnings can result in personal injury or damage to panel
components.
 Loading...