Do you have a question about the Rockwell Automation Allen-Bradley PowerFlex 525 and is the answer not in the manual?
| Brand | Rockwell Automation |
|---|---|
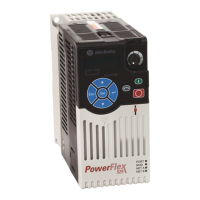
| Model | Allen-Bradley PowerFlex 525 |
| Category | Industrial Electrical |
| Language | English |
Learn basics of drive programming, configuration, and commissioning of the PowerFlex 525 AC drive.
Lists required software programs, hardware devices, and files for the lab.
Illustrates network connections, IP addresses, and key hardware components like the drive and demo units.
Labeled image of the 1769-L35e demo box with its controls (Switch, Start, Stop).
Labeled image of the 1769-L43 demo box with its controls (Stop, Start, Switch).
Details the Human Interface Module (HIM) features such as improved visibility, scrolling text, and alphanumeric display capabilities.
Explains parameter groups accessible via the keypad (Basic Display, Basic Program, Communications, etc.) and custom grouping options.
Describes the function of display LEDs, navigation keys (Esc, Sel, Enter), and control keys (Start, Stop, Jog, Potentiometer).
Explains how to connect the drive via USB to access configuration files for parameter changes.
Details the process of selecting an upload location and naming the drive configuration file.
Describes the utility's purpose for file transport and its limitations regarding parameter changes.
Instructions on starting the CCW software and accessing its main interface.
Guides users to expand the Catalog, select the Drives folder, and open the PowerFlex 525 drive within CCW.
Details how to access the USB Import/Export tab in the drive's properties within CCW.
Explains the steps to import a drive configuration file into CCW, including selecting the device.
Shows how to access the Parameters window and select parameter groups like 'Basic Program'.
Describes how to populate parameters and prepare for exporting the configuration back to a file.
Details the final steps for exporting the configuration and confirming the save operation.
Explains how to use the USB utility to download the configuration file back to the drive.
Instructions for reconnecting CCW to the drive via an Ethernet connection.
Details how to use the RSLinx Ethernet/IP driver and connection browser to locate the drive.
Verifies the successful connection to the PowerFlex 525 drive within CCW, indicated by a 'Connected' status.
Explains how to access the parameters window and use the 'Show Non-Defaults' feature to identify modified settings.
Demonstrates how to use the filter value entry box to quickly find parameters containing specific keywords like 'motor'.
Introduces AppView for application-specific parameters and CustomView for user-defined parameter groups.
Guides users through creating a custom parameter group by editing existing ones and adding parameters.
Provides a list of specific parameters to be added to a custom view for easier management.
Shows the result of adding parameters to a custom view, displaying them in an organized list.
Instructions on how to initiate the PowerFlex 525 Startup Wizard from the CCW interface.
Details the options for resetting drive parameters and setting the drive's language.
Covers setting up motor data, torque mode, boost, and brake type parameters.
Explains how to conduct a direction test to verify correct motor rotation and adjust settings if needed.
Guides users to start the Static Tune process to automatically adjust drive parameters for optimal motor performance.
Details settings for acceleration/deceleration, speed references, and motor feedback types.
Covers EtherNet/IP settings, IP address configuration, and setting up digital input terminals.
Explains relay/opto/analog outputs and how to review all planned parameter changes before applying them.
Describes how to apply pending changes, reset the device, and exit the CCW application.
Highlights advantages of using drive profiles in RSLogix for system development, maintenance, and diagnostics.
Instructions for launching RSLogix 5000 and opening an existing project file for the PowerFlex 525.
Guides users to open the module properties for the PowerFlex 525-EENET node in the I/O configuration.
Explains the information available on the Setup tab of the module properties, including configuration and revision.
Covers configuring network settings via the Communications tab and using the USB Import/Export functionality.
Details how to launch the Parameters window and return to the General tab of module properties.
Explains how to set up the module definition, including drive rating, firmware revision, and configuring input/output datalinks.
Describes how to close the module definition and copy existing drive configurations for use with multiple drives.
Shows how to view the input tags associated with the PowerFlex 525 drive, including status bits and feedback.
Details viewing output tags for control commands and selecting the correct project file to open.
Guides the user through the process of downloading the configured project to the PowerFlex 525 drive.
Covers inhibiting the module and downloading the project to the controller, ensuring proper communication.
Explains how to set the controller to Run mode and re-open module properties.
Describes how to establish an online connection with the drive and initiate a download if differences are found.
Instructions to re-launch the Startup Wizard for performing motor direction and AutoTune tests.
Details the steps for conducting the motor direction test and the static tune process.
Covers verifying parameters, testing drive performance, and adjusting speed references.
Encourages monitoring drive status and confirms the completion of the PF525 commissioning lab.
Explains the Automatic Device Configuration (ADC) feature for automated drive configuration via the Logix controller.
Guides users on how to enable ADC for the PowerFlex 525 drive within the Logix controller's configuration.
Details downloading the project to the controller and transitioning it to Run mode to trigger ADC.
Explains how to monitor the ADC process, observe the drive's 'Configuring' and 'Running' states, and confirms lab completion.

