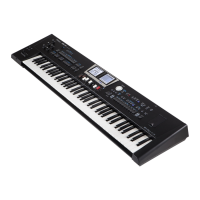
Using the BK-9 as a USB player
48
Using the “Mark & Jump” function
(only for SMF)
The BK-9 gives you the possibility to “mark” (memorize) up to 4
locations of the current song (SMF) and “jump” to any of the marked
location. In addition, if you save the song, the four “Mark & Jump”
locations are stored within the song.
The four “Mark & Jump” locations can be selected by pressing the
VARIATION [1]~[4] buttons.
When you select a song that contains such markers, the indicators
of the VARIATION [1]~[4] buttons light. For songs that do not
contain these indications, the indicators remain dark.
Editing and programming “Mark & Jump” locations can be carried
out as follows:.
Creating “Mark” locations
1. Load an SMF song.
See “Selecting a Song or Rhythm on a USB Memory” (p. 44).
2. Open the “Smf Mark Jump Edit” page:
You have two ways to do it:
a. Press the VARIATION [1]~[4] button whose indicator is
dark (“mark” location empty).
NOTE
The “Smf Mark Jump Edit” page will not open if you select
a VARIATION [1]~[4] button whose indicator lights (“mark”
location already set).
b. Press [MENU] button and by the dial select the “Smf
Mark Jump Edit” page.
Right Display
As you can see there are four elds (“Mark Bar 1”~ “Mark Bar 4”:
Parameter Value Explanation
Mark Bar 1
OFF, 1 ~ song length
in Bars
• “OFF”
Empty “mark” location (the
corresponding VARIATION
[1]~[4] is dark)
• “song length in Bars”
It contains the indication of the
number of the bar where you
want to jump.
Mark Bar 2
Mark Bar 3
Mark Bar 4
The following operation can be performed whether the song is
playback or not.
Memorizing a “Mark Bar” location
3.
Select the “Mark” location by pressing the VARIATION
[1]~[4] buttons or using the dial to move the cursor on the
“Mark Bar” eld.
4. Press the [*-, ] button to start the song playback and
listen to the song until you reach the point where you
want to insert the “mark”.
5. Press the CHORD LOOP [REC] button whose indicator
ashes. This inserts the number of the current measure in
the “Mark Bar” eld.
The corresponding button (VARIATION [1]~[4]) indicator lights and
the next “Mark Bar” eld is selected.
To select a dierent “Mark Bar” eld you can either press a button
(VARIATION [1]~[4]) whose indicator is o or use the dial.
6. If you want you can press again the CHORD LOOP [REC]
button to program the next “Mark Bar” location and so on.
MEMO
You may also overwrite a previous “Mark Bar” location by
positioning the cursor on the “Mark Bar” eld and pressing the
CHORD LOOP [REC] button to set the location again.
7. Press the [+] button to stop the song playback.
Deleting a “Mark Bar” location
8.
Press the VARIATION [1]~[4] buttons or use the dial to
select “Mark Bar” eld you want to delete and press the
CHORD LOOP [PLAY] button whose indicator ashes.