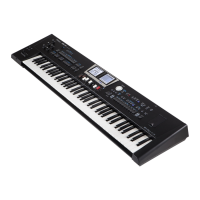
Using Audio Phrases (Audio Key)
66
Assign audio les to the various keys.
MEMO
There is no need to assign audio phrases to all possible keys.
Feel free to only assign the audio phrases you actually need for
your new set.
7. Press the [AUDIO KEY] button to activate the function in
its proper keyboard portion. The button’s indicator lights.
Available for other part
Phrases
8. Press the [QUICK MENU] button.
9. Use the dial to select “Edit” functions.
The displays change to:
Left Display
Right Display
NOTE
If you didn’t press the [Audio Key] button (Step 7) an error
message appears. Press the [Audio Key] button and repeat the
step (9).
The left display helps you to identify the buttons that you can use
to edit audio phrases.
10. Press a key in the highest octave or use the dial to select
the key (“Key Name“ eld) you wish to assign an audio le
to.
11. Press the [USB MEMORY] button.
The display shows the contents of the USB memory.
12. Rotate the dial to select the desired audio le.
13. Push the dial to load the le.
If the le you need is located inside a folder, you must rst select
that folder, push the dial to see its contents and then select the le.
If you opened a folder by mistake, press the [EXIT] button to return
to a higher level.
The BK-9 set “Loop Start” and “Loop End” eld at the length of the
audio phrases automatically.
If you don’t need to edit the audio phrase length you can jump to
the “Assigning a Name to Your new Audio Phrase” (p. 68) directly.
Specifying the audio phrase length.
If you are working with an entire audio song, you probably need to
specify the passage you want to use. Here’s how:
14. Press the [START/STOP] /[*/,] button to start playback.
15. If you need to play back the phrase in loop, Set the “Loop”
parameter “On” .
Right Display
16. Press and hold the VARIATION [1] (Mark Start) button and
release it at the position where you want the passage to
begin.
Mark Start
The “Loop Start” eld shows the position you have just registered
17. Press and hold the VARIATION [2] (Mark End) button and
release it at the position where you want the passage to
end.
Mark End
The “Loop End” eld shows the position you have just registered
MEMO
You may also want to use the INTRO/[' ] or ENDING/[& ] button
to locate the approximate position you need.
18. Press the [START/STOP] /[*/,] to pause the playback or
[SYNC START] /[ + ] button to stop playback.
19. You can now check the beginning and end of the passage
by pressing the VARIATION [3] (Seek Start) button.
The playback starts from the “Loop Start” position.
20. You can now check the end of the passage by pressing the
VARIATION [4] (Seek End) button.
The playback starts one second before the actual end of the
passage (“Loop End” position).