5.
From the test pattern, read the correction value at the location.
6.
Enter the correction value you read.
Press .
Press .
Use
to set the correction value for [F]
(the feed direction).
Use
to set the correction value for [S]
(the scanning direction).
Press
to enable the setting.
Press .
7.
Check the results of adjustment.
Press .
Press
to execute.
If the printing and cutting lines are aligned, adjustment is
complete.
If further adjustment is needed, go back to step
6.
and ne-
tune the adjustment.
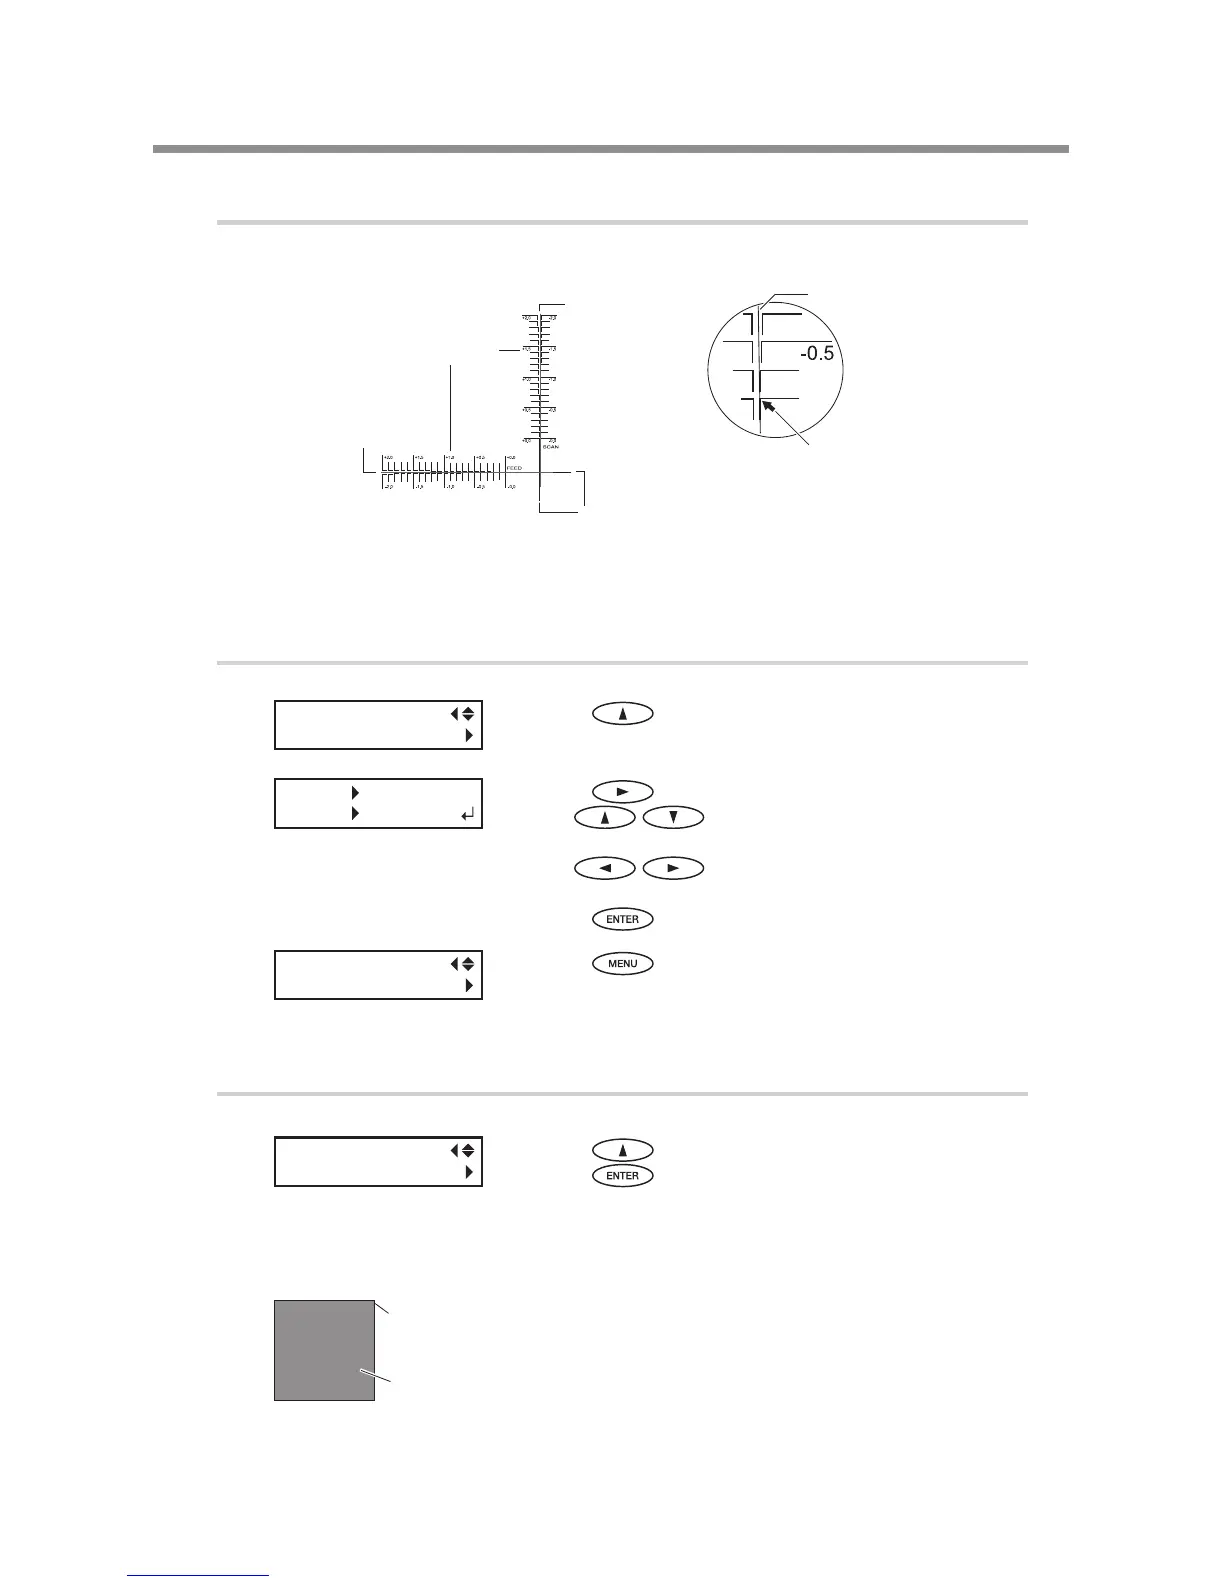
Test pattern
Check the value on
the [SCAN] side.
Correction-value scale
Check the value on
the [FEED] side.
Cutting line
Scan direction
Cutting line
The point where the cutting line
intersects the correction-value
scale is the correction value. In this
gure, the value is "-0.3." Use the
same method to read the value on
the [FEED] side.
Printing position
Cutting position
Cutting position and printing position are aligned.
 Loading...