66
About the Home Screen
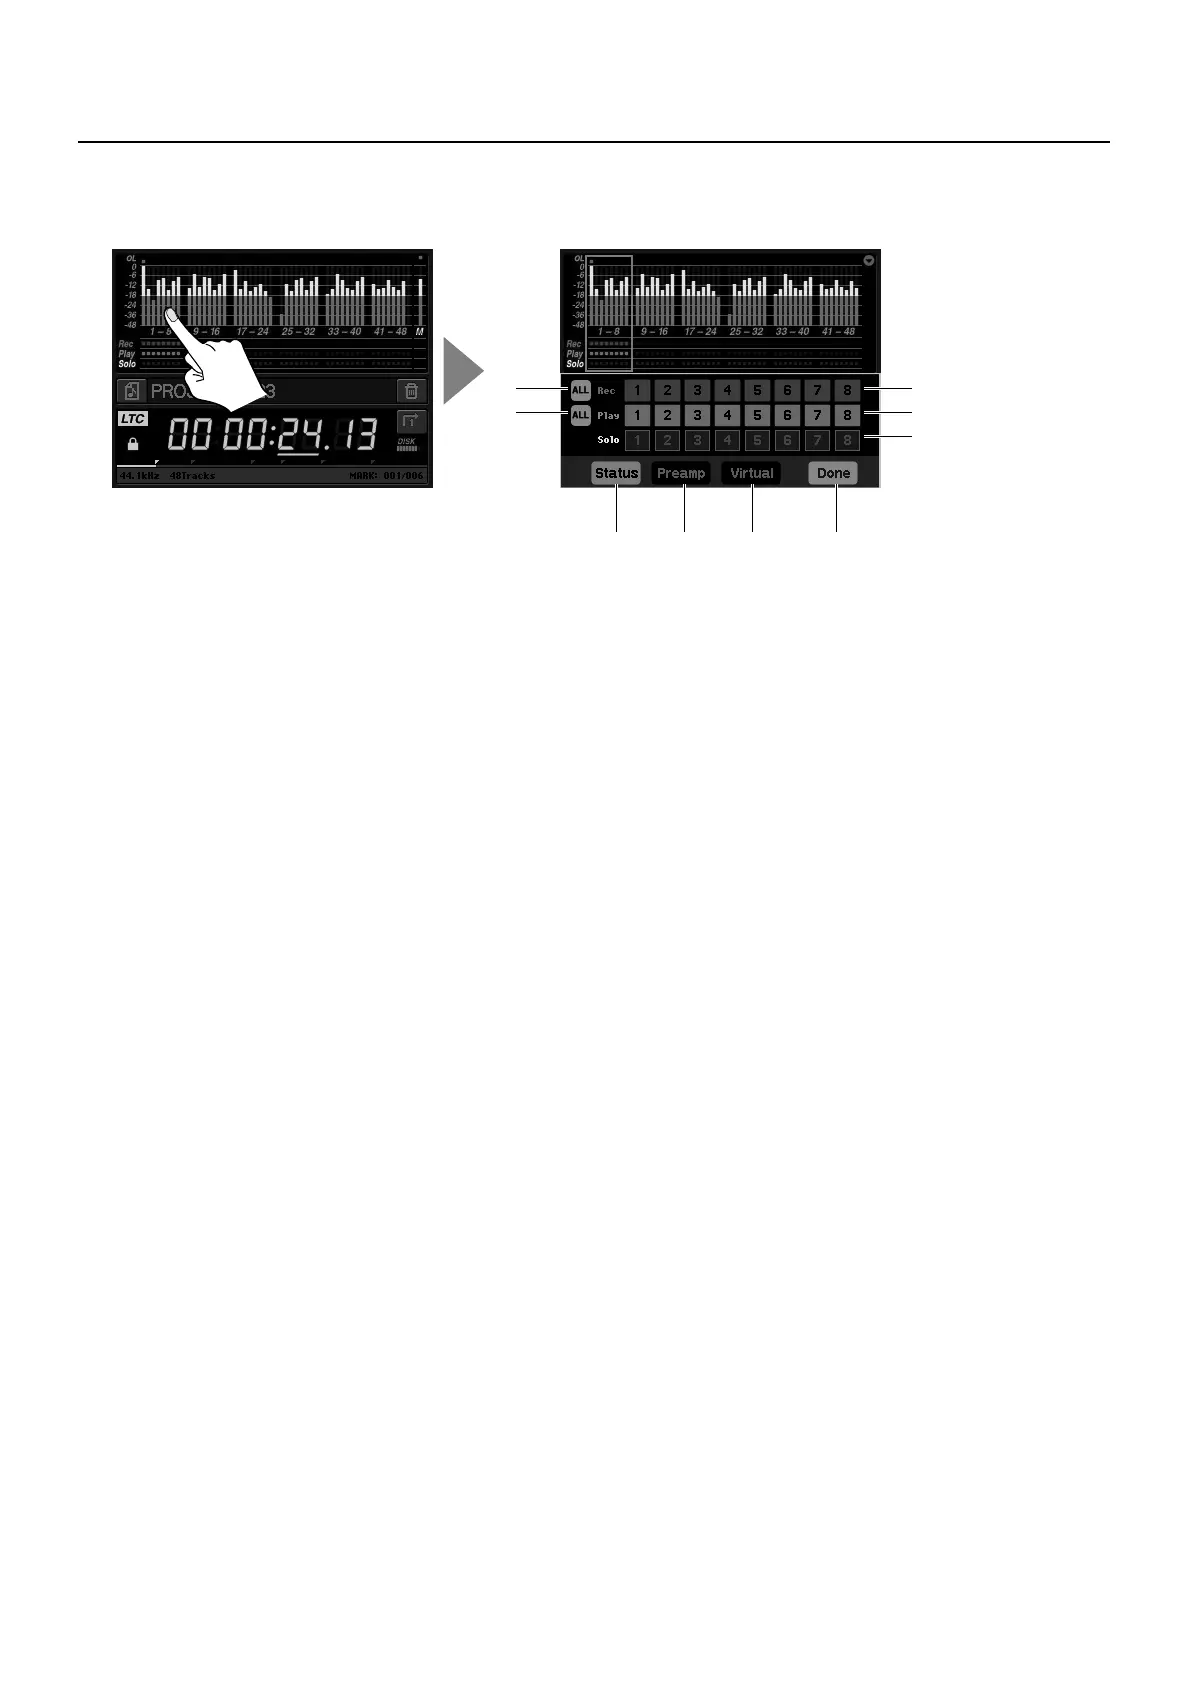
Track Status Screen
Touching the level meter for a group of eight tracks makes the display change to the screen shown below.
fig.track-status.eps
1. Rec ALL
This arms all tracks for recording. Touching it once highlights all tracks in red. Touching it a second time grays out and unselects
all tracks.
2. Play ALL
This selects all tracks for playback. Touching it once highlights all tracks in green. Touching it a second time grays out and
unselects all tracks.
3. Rec Selector
This selects an individual track for recording from the eight displayed tracks. The selected track is highlighted in red.
4. Play Selector
This selects an individual track for playback from the eight tracks. The selected track is highlighted in green.
5. Solo Selector
This selects an individual track for solo output from the eight tracks. The selected track is highlighted in yellow, and only the
audio for the track selected here is output to the monitor equipment (devices connected to the MONITOR OUT and PHONES
connectors). Touching the same number a second time cancels solo output.
* Solo output is sent only to the monitor equipment, no REAC output is performed.
* During solo output, the level meter for the output track is displayed at the bottom of the screen. A [CLR] icon is also displayed, and functions to
clear the peak at the level meter. Touching the [X] icon makes the level meter disappear.
6. Status Icon
Touching this returns the display to the track status screen.
7. Preamp Icon
This changes the display to the preamp setting screen (next page) for a connected digital snake device.
8. Virtual Icon
This changes the display to a screen for independently adjusting the output of individual tracks on the R-1000 during playback (p.
68).
9. Done Icon
This applies the various settings and returns the display to the home screen.
13
2 4
5
6 7 8 9
 Loading...