23/05/2019Roundshot VR Drive Instruction Manual – Firmware Version 2.023 129
6.7 Using the VR Drive light meter (continued)
Software Setup
When creating a new quality or HDR program you can follow the wizard as before. Please find
below the key parameters to be set when using the light meter:
Release with USB cable
off
Servive menu
on
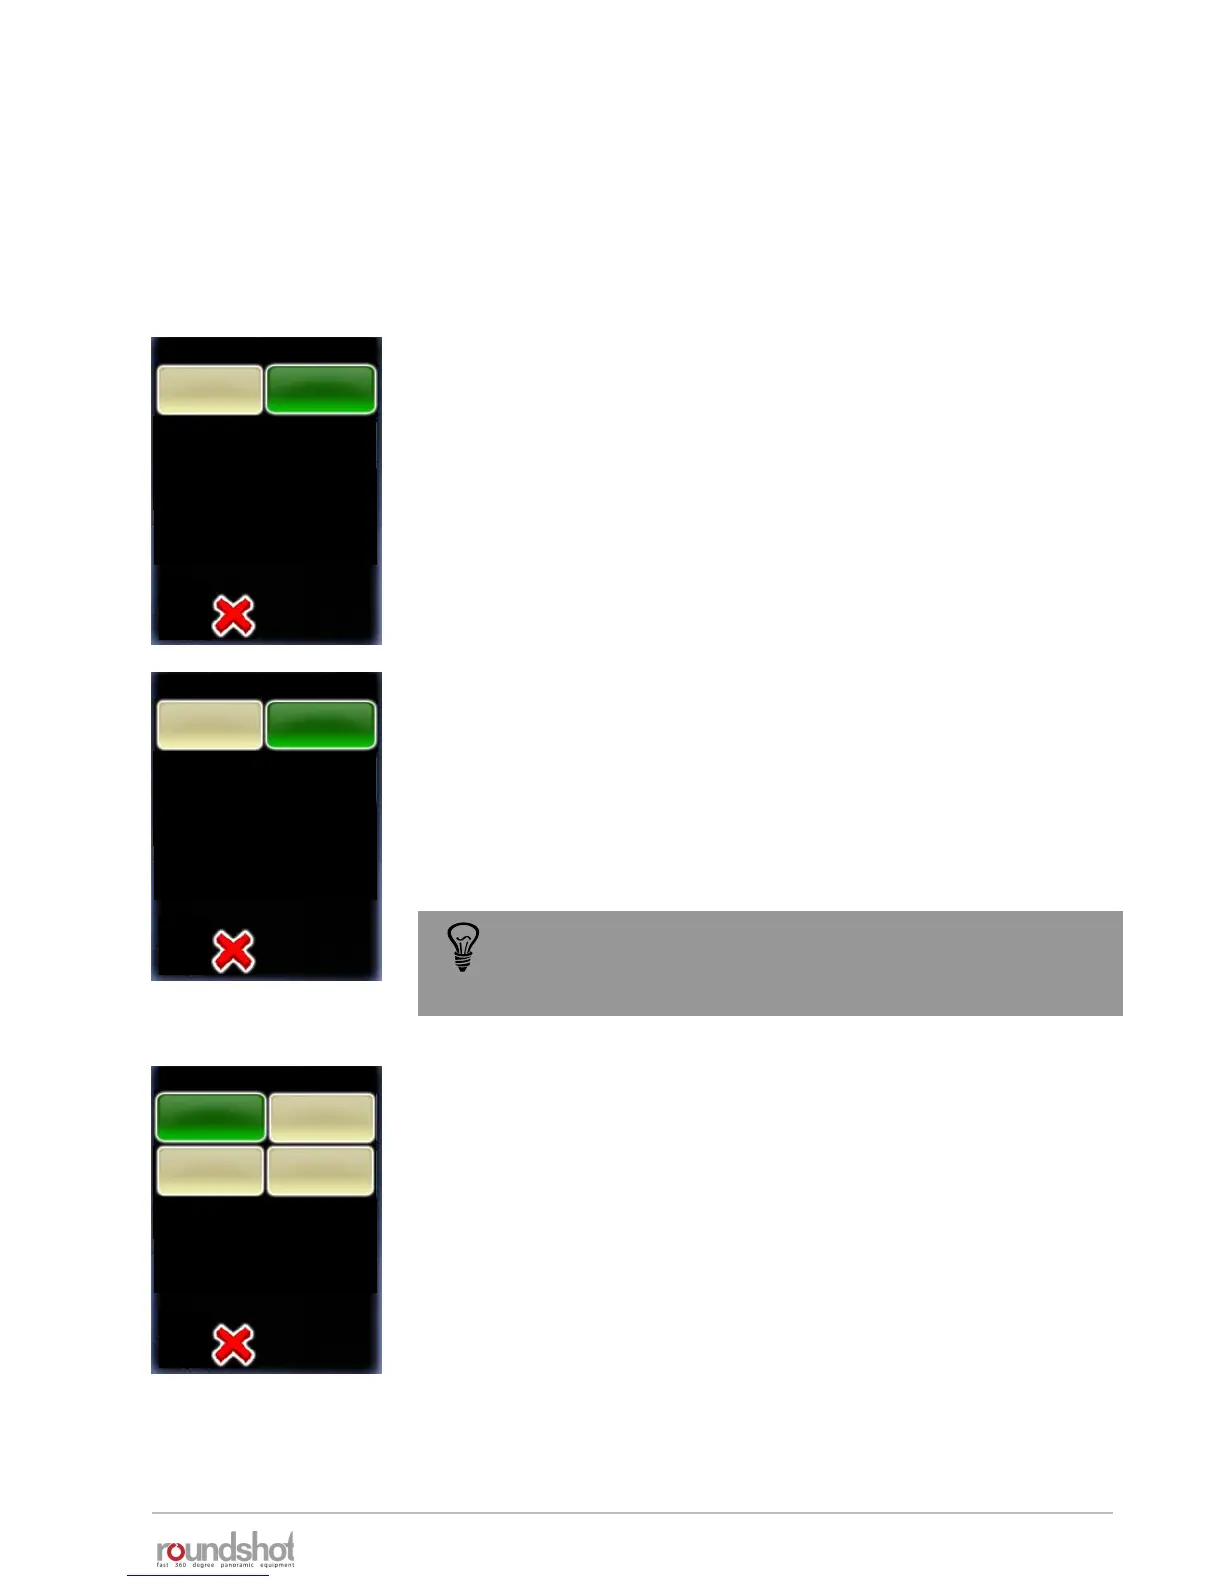
Set the “release with USB cable” to on.
It is possible to leave this parameter to off but in this case, it will be
necessary to connect the USB and the release cable on the camera
auto exposure
off
Servive menu
on
Set the “auto exposure” to on.
This function is only available if the light meter is connected to the
VR Drive and can be detected.
The light will be measured at the beginning of a program and the
chosen parameters (exposure, ISO and aperture) will be used for all
the images of the program.
variation strategy
exposure /
aperture
Servive menu
exposure time
exposure /
ISO/ASA
all
Define the “variation strategy” to be used to define the best
parameters on the camera and get a correct image exposure:
• Exposure: only the exposure time will change according to light.
The wizard will ask to define the ISO/ASA and aperture in the
next step.
• Exposure/aperture: both exposure and aperture can be
changed by the VR Drive according to light. The wizard will ask to
define the ISO/ASA in the next step.
• Exposure/ISO: both exposure and ISO/ASA can be changed by
the VR Drive according to light. The wizard will ask to define the
aperture in the next step.
• All: The VR Drive will automatically select all parameters
according to light
Please make sure to position the light meter in front of an
average light area. Avoid placing it in front of a strong light
source or the sunlight to avoid underexposed images