RTK Series 725 Annunciator
90
31. Maintenance
31.1 No Special Tools
All normal maintenance and programming is carried out from the front of the annunciator without the
use of special tools. Filter and film legend changes and lamp and LED replacement are all
undertaken by unclipping the front filter assembly.
31.2 Removing Filter Assemblies
See Section 3.4.
31.3 Changing Film Legend
See Section 3.4.
31.4 Changing Bulbs/LED Assemblies
After removal of the filter assembly the lamp holder will be visible. A lamp test pushbutton can be
pressed to ascertain which lamps have failed; it is then a simple matter to remove the faulty bulbs.
These bulbs are standard 10mm glass wedge and can be removed by pulling directly away from the
lamp holder with a pair of pliers or the standard lamp remover supplied with the unit. Replace by
reversing the procedure, taking care that the wedge base is correctly located in the socket before
pressing home. The LED assemblies are removed and replaced in exactly the same way accept that
the glass wedge is replaced with a small PCB connecting tag. The LED’s are not polarised so can be
fitted in either orientation.
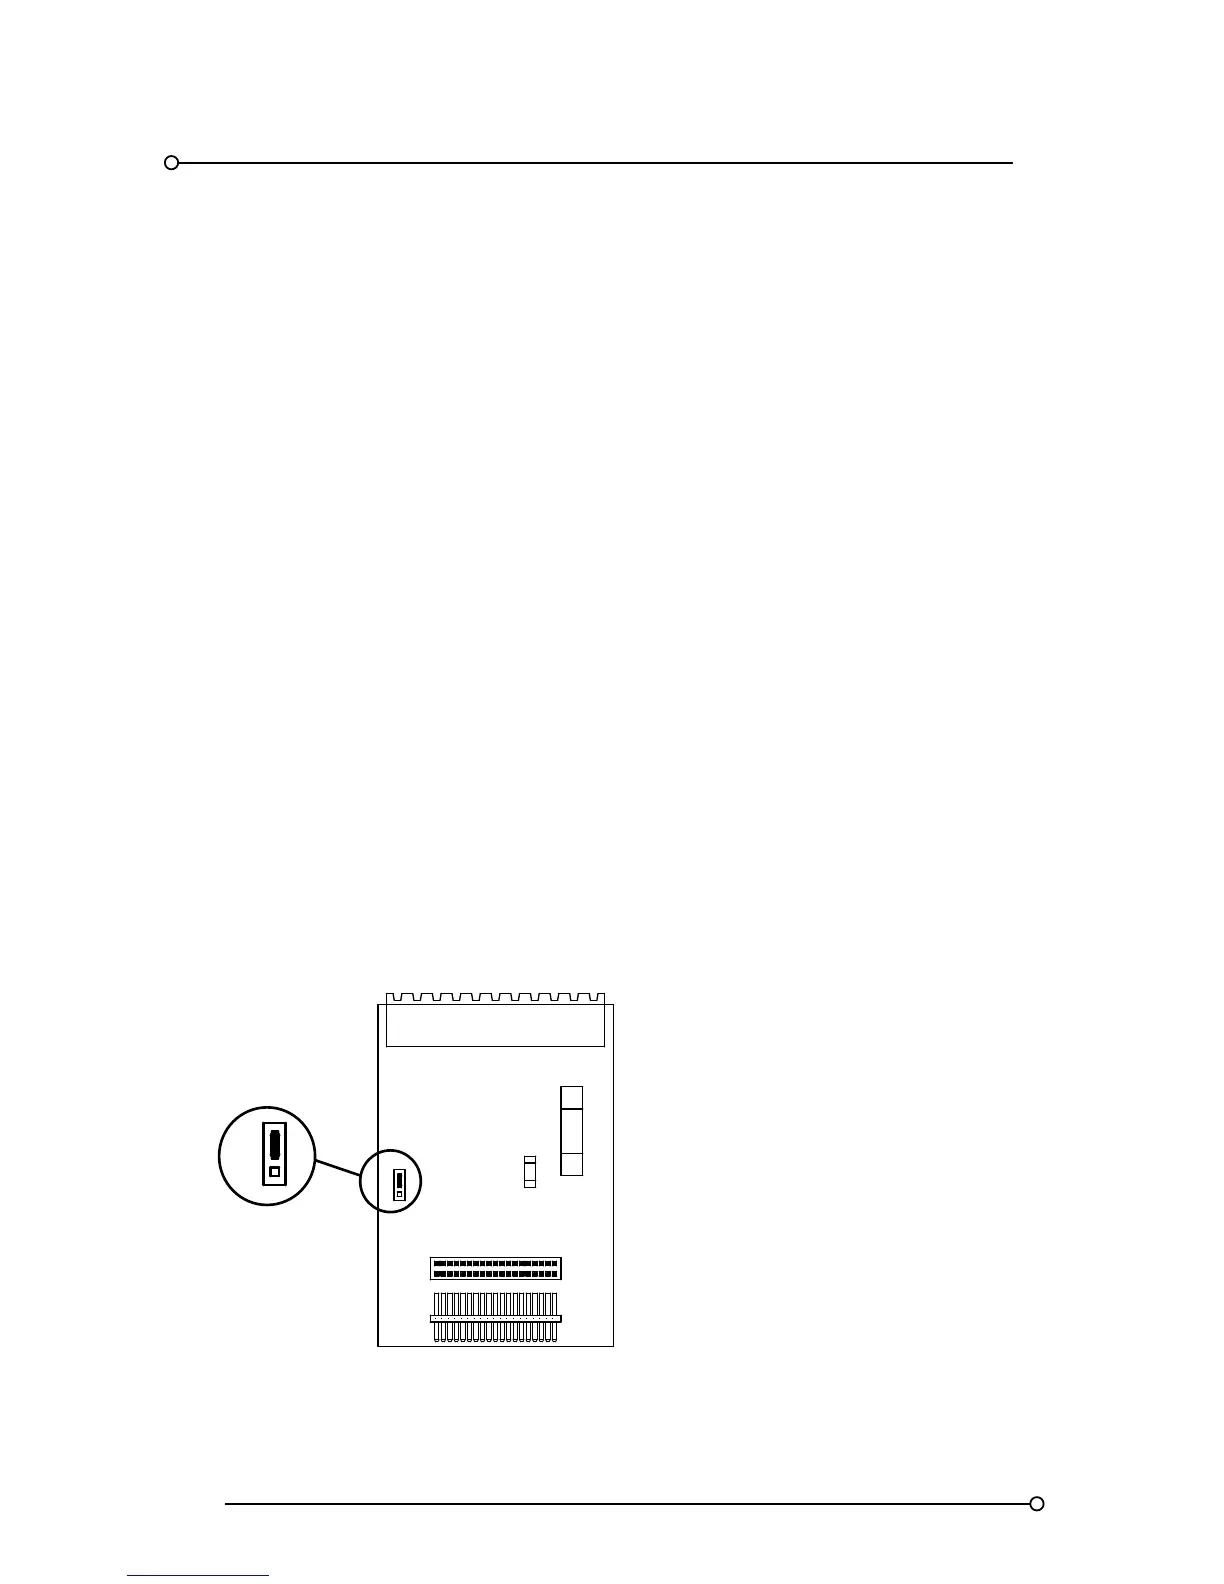
31.5 Fuse Replacement
Two fuses protect the overall system, one protects the supply and motherboard (F1) and the other
protects the feed to the alarm contacts (F2). These are both situated on the supply card, which is
fitted in the SPR module. The location of the two fuses is shown below. Take care to replace fuses
with fuses of exactly the same type. Spare fuses are supplied with all annunciator shipments.
31.6 Position Of Fuses On The Supply Card
10 A/T
F1
1 A/F
F2
FR
SP
FR
SP