Model 2010D Calibration Setup Page 6-
The Digital I/O Groups may be set up by the following procedure:
[1] Select Sequences under the main menu and press the Enter
button. A pop-up menu will appear.
[2] Select Remote Activation from the menu. A pop-up menu will
appear.
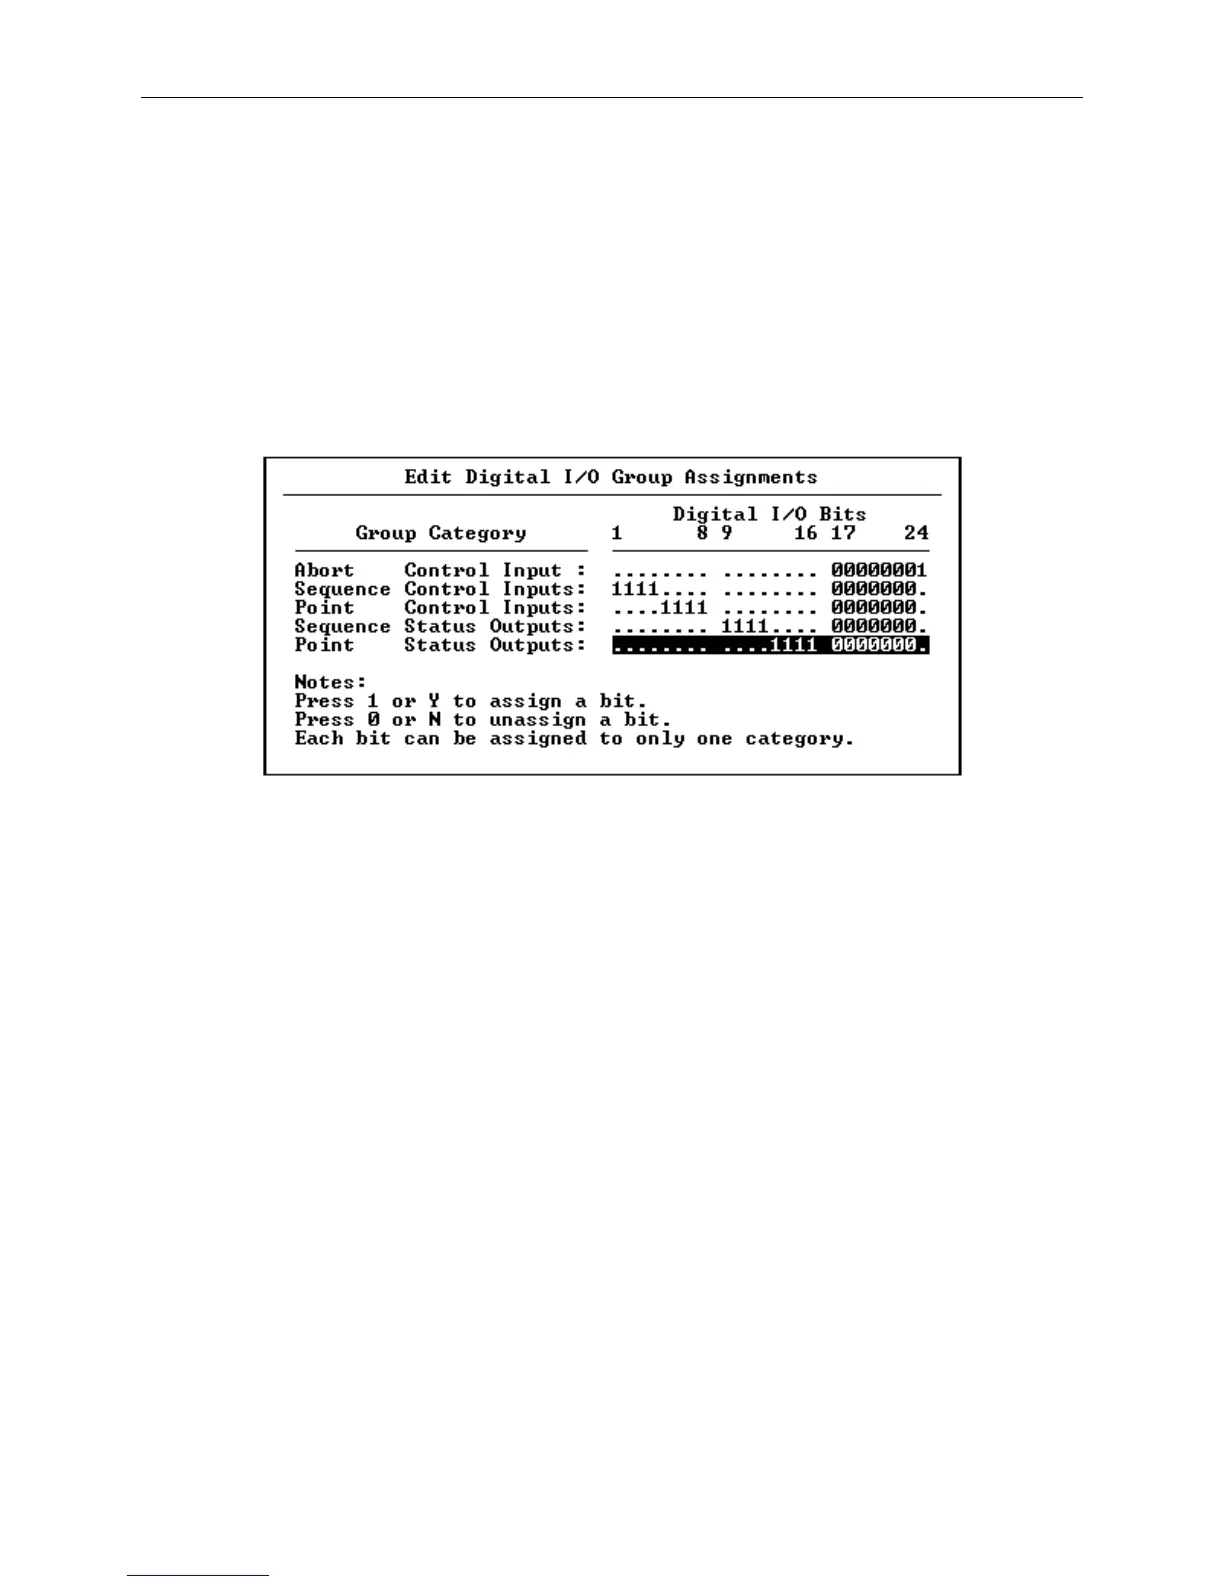
[3] Select Digital I/O Groups from the pop-up menu and press
the Enter button. The Edit Digital I/O Group Assignments
screen will appear, as shown in Figure 6-9.
Figure 6-9 The Edit Digital I/O Group Assignments Screen
[4] If a separate Abort Control Input is needed (that will be
used to terminate a sequence), initialize it by setting the
desired bit to "1". When finished, press Enter to proceed
to the next field.
[5] Identify the bits that will be used for Remote Sequence
Activation by setting the bits to "1", then press Enter to
proceed to the next field.
[6] Identify the bits that will be used for Remote Point
Activation by setting the bits to "1", then press Enter to
proceed to the next field.
[7] Identify the bits that will be used as Sequence Status
Outputs by setting the bits to "1", then press Enter to
proceed to the next field.
[8] Identify the bits that will be used as Point Status Outputs
by setting the bits to "1", then press Enter to proceed to
the next field.