11
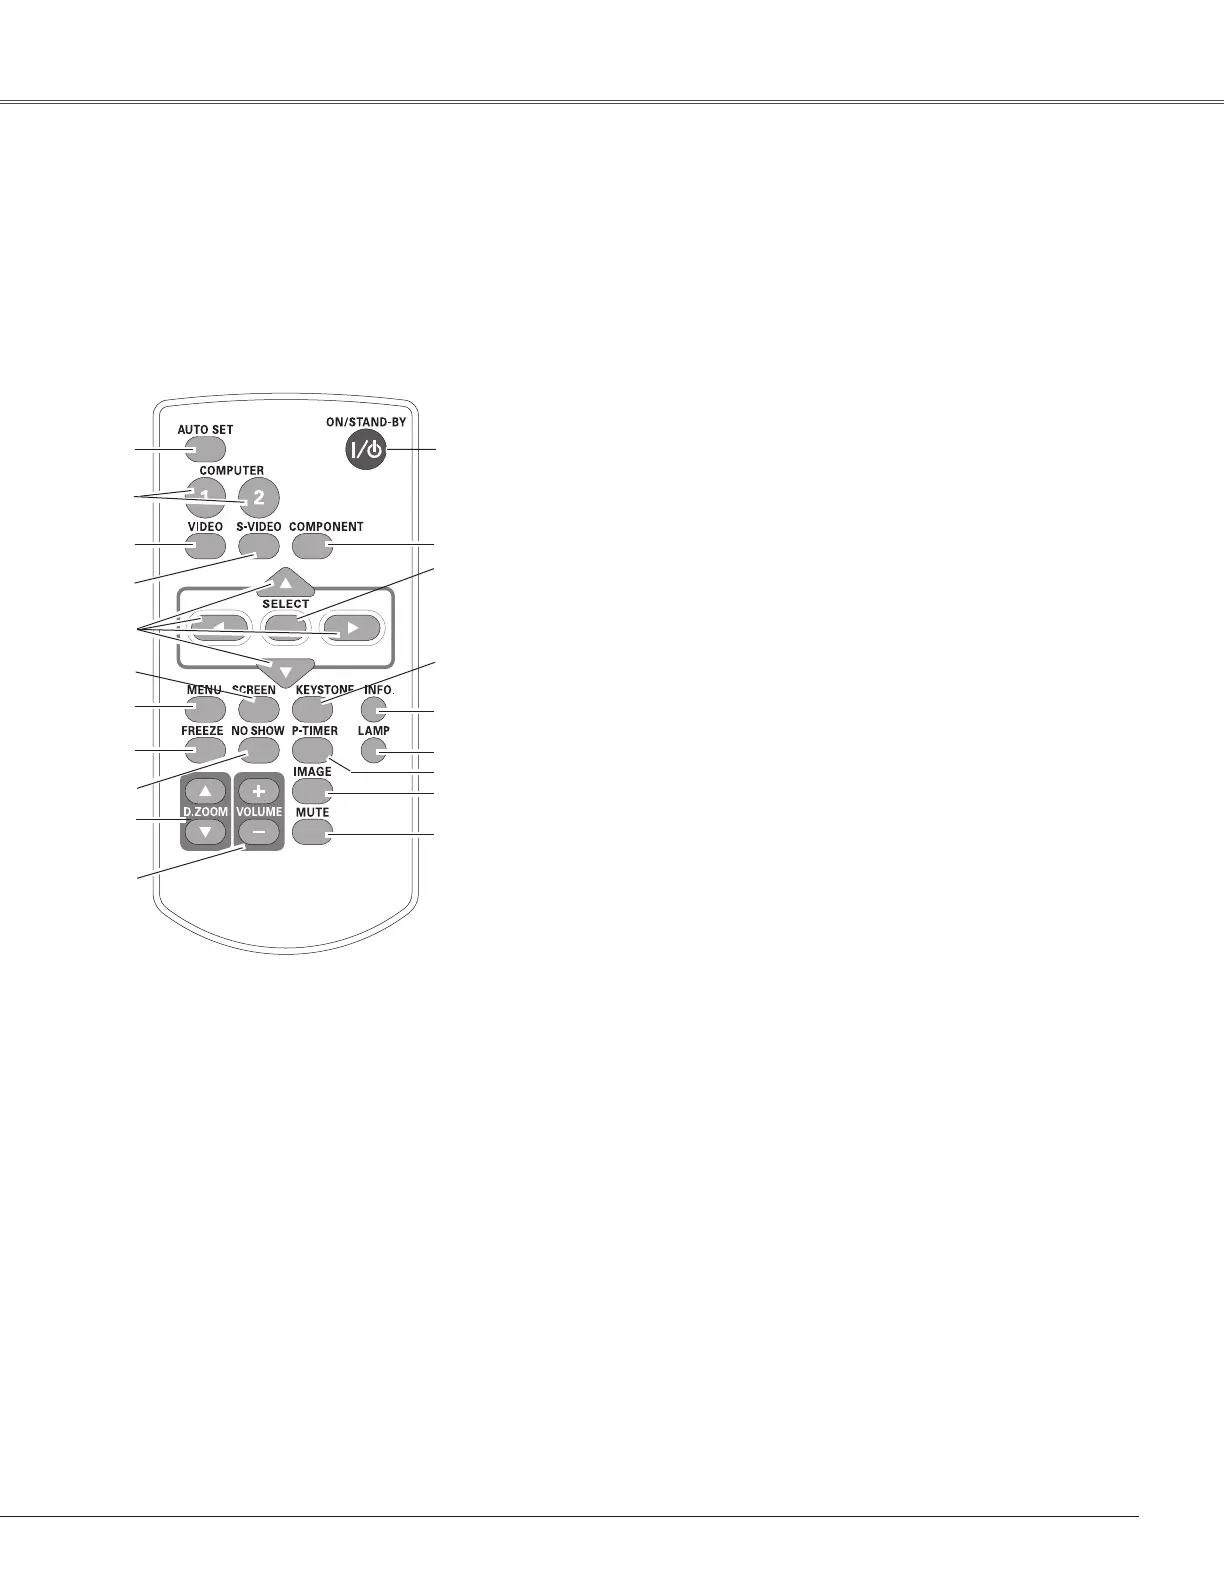
Part Names and Functions
Note:
To ensure safe operation, please observe the following precautions:
– Do not bend, drop, or expose the remote control to moisture or heat.
– For cleaning, use a soft dry cloth. Do not apply benzene, thinner, spray,
or any chemical material.
Remote Control
⑦
⑭
⑩
⑳
④
⑱
②
⑧
⑨
⑬
⑯
⑤
⑥
⑪
⑫
⑲
⑮
③
②AUTO SET button
ExecutethesettingofAutosetup(includesInputsearch,AutoPCadj.
andAutoKeystonefunctions)inthesettingmenu.
(pp.23,45)
⑤ S-VIDEO button
SelecttheS-VIDEOinputsource.(p.37)
⑥Point ▲▼◄►
buttons
–SelectanitemoradjustthevalueintheOn-ScreenMenu.(p.21)
–PantheimageintheDigitalzoom+/-mode.(p.36)
⑬
MUTE button
Mutethesound.(p.24)
⑦SCREEN button
Selectascreenmode.(pp.26,35-36,43)
⑮P-TIMER button
OperatetheP-timerfunction.(p.26)
⑩NO SHOW button
Temporarilyturnofftheimageonthescreen.(p.26)
⑯LAMP button
Selectalampmode.(pp.25,53)
⑱KEYSTONE button
Correctkeystonedistortion.(pp.23,46)
⑲SELECT button
–Executetheselecteditem.(p.21)
–ExpandorcompresstheimageinDigitalzoommode.(p.36)
⑧MENU button
OpenorclosetheOn-ScreenMenu.(p.21)
⑨FREEZE button
Freezethepictureonthescreen.(p.25)
⑫VOLUME +/- buttons
Adjustthevolumelevel.(p.24)
①ON/STAND-BY button
Turntheprojectoronoroff.(pp.18-20)
③ COMPUTER 1/2 buttons
SelecttheCOMPUTER1orCOMPUTER2inputsource.
(pp.27-28,38)
⑪D.ZOOM ▲▼buttons
Zoominandouttheimages.(pp.25,36)
⑭ IMAGE button
Selecttheimagemode.(pp.26,33,40)
⑳COMPONENT button
SelecttheCOMPONENTinputsource.(p.38)
④ VIDEO button
SelecttheVIDEOinputsource.(p.37)
⑰
⑰INFO. button
Operatetheinformationfunction.(p.58)
①
 Loading...