48
ASSEMBLY AND INSTALLATION
7
When there is no system update
Press the DVD drive switch to have the tray come out, and then remove the DVD.
When there is a system update
When the tray opens automatically, remove the DVD. "STEP 10 Please Insert Disc 1..." will be displayed
on the screen, but there is no need to insert the DVD again.
8
Press the DVD drive switch to have the tray return. When the power is cut off, the tray will not move.
9
Turn the server machine's main power switch OFF.
10
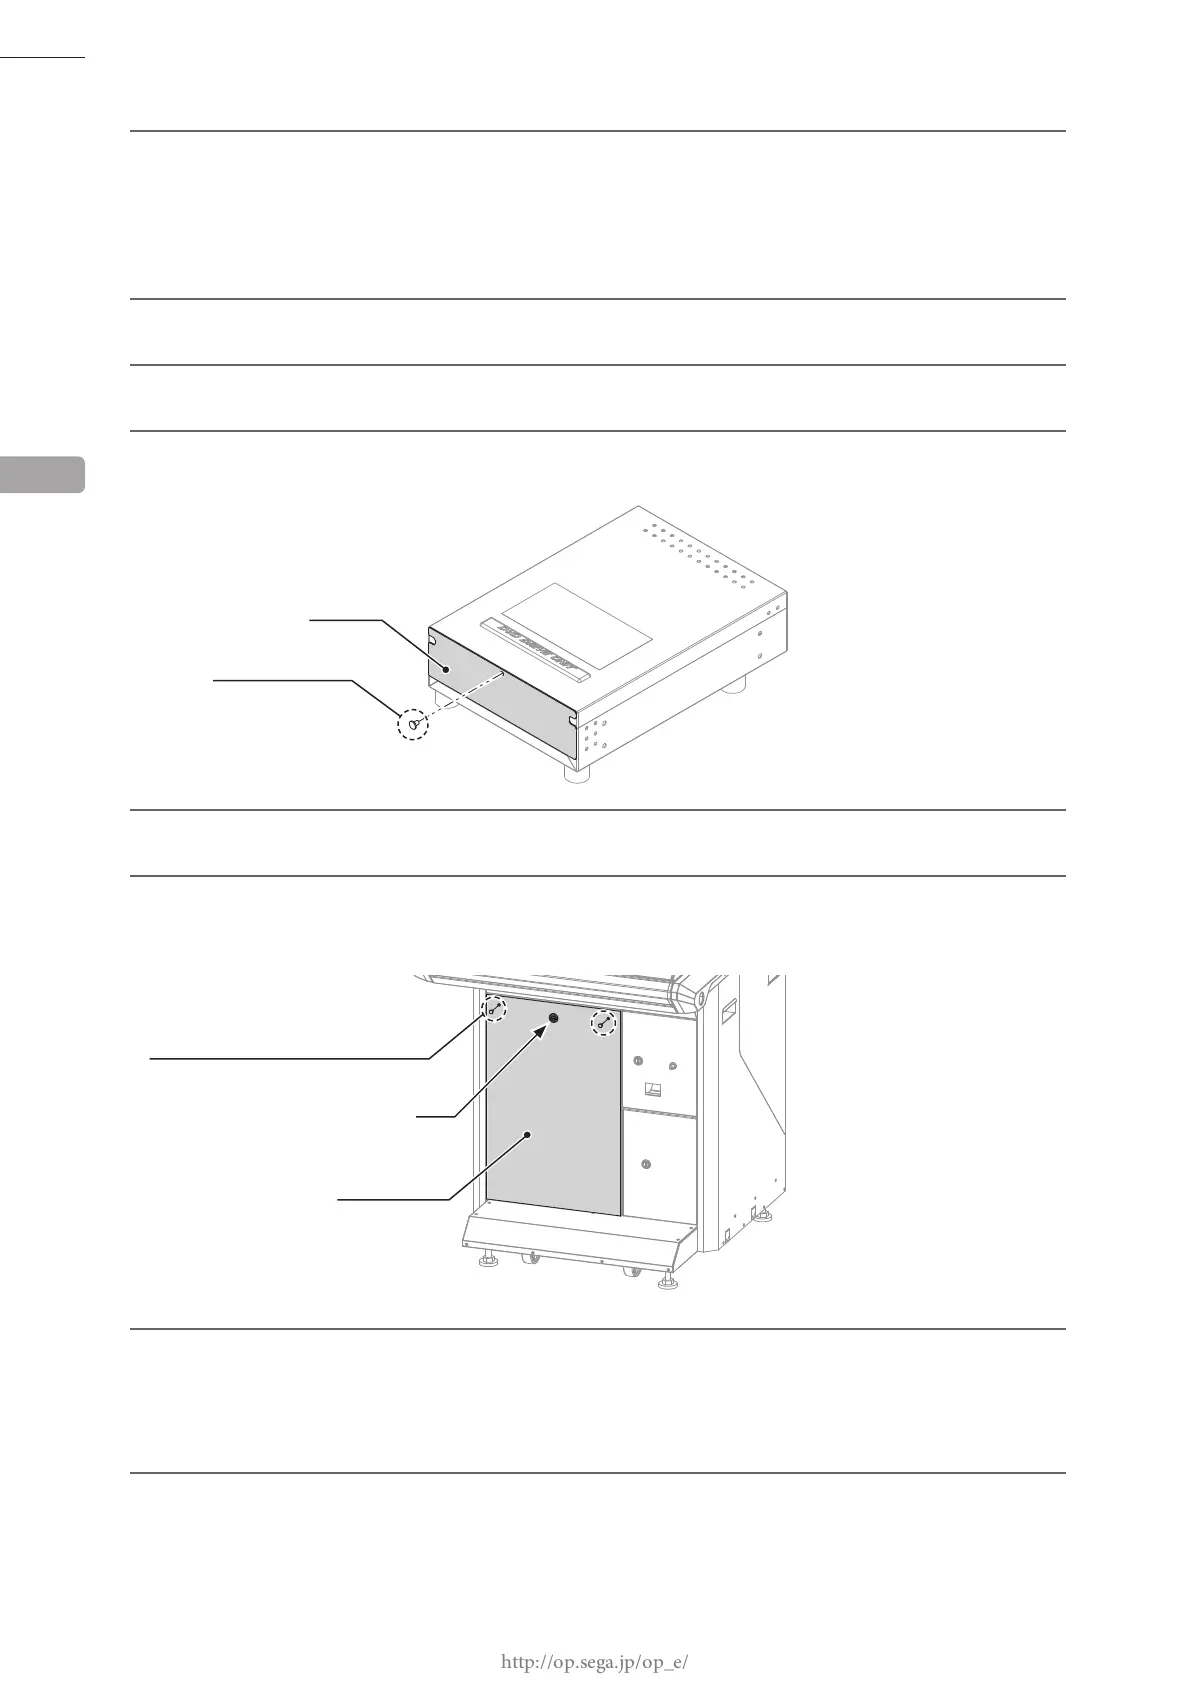
Insert the case lid into the DVD drive, and secure with 1 thumbscrew.
11
Refer to Steps 2 to 9 in "6-5," and work in reverse order to remove the DVD drive.
12
Attach the front door. Lock the front door with the master key, and secure it with 2 tamperproof screws.
When doing this, ensure that cables do not become caught in the door.
FRONT DOOR
13
Starting with the server machine, and then moving on to the other cabinets, turn the main power switches
ON.
When the server machine starts up, installation will start automatically on the other cabinets connected to
the server machine. Do not perform any other operations until the advertising screen is displayed on all
cabinets. If there is a system update, each cabinet will reboot 2 times.
14
Store the DVD drive kit, USB cable for installation, installation cable and DVD software kit in a location
free of dust and cigarette smoke.
TAMPERPROOF SCREW (2), chrome
Lock
6
THUMBSCREW (1)
CASE LID
M4 x 8
 Loading...