40
Manual – Controllers DHE/DHF/DHR21B (standard) and DHE/DHF/DHR41B (advanced)
4
Installing the DHR21B/41B option
Assembly and Installation Notes
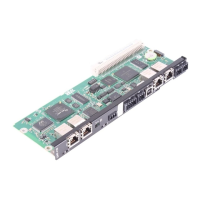
4.9.2 Connecting the DHR21B/41B controller to the Ethernet network
To connect DHR21B/41B to the Ethernet network, connect Ethernet interface X30-1 or
X30-2 (RJ45 plug connector) to the other network stations using a category 5, class D
twisted-pair cable in accordance with IEC 11801 edition 2.0. The integrated switch
supports you in implementing a line topology and offers auto-crossing functions.
Pin assignment Use prefabricated, shielded RJ45 plug connectors compliant with IEC 11801 edition 2.0,
category 5.
4.9.3 Setting DIP switches 2
0
and 2
1
DIP switch 2
0
(Def IP)
If the switch "2
0
" is set to "1" (= right = ON), the following default IP address parameters
are set when switching on the DC 24 V supply voltage:
• IP address: 192.168.10.4
• Subnet mask: 255.255.255.0
• Default gateway: 1.0.0.0 for EtherNet/IP (192.168.10.4 for PROFINET)
• P785 DHCP / Startup configuration: Stored IP parameters (DHCP is disabled)
INFORMATION
• According to IEC 802.3, the maximum cable length for 10/100 MBd Ethernet
(10BaseT / 100BaseT), e.g. between two network stations, is 100 m.
• We recommend that you do not directly connect non-SEW end devices to the
DFR21B/41B option in order to minimize the load on the end devices in EtherNet/
IP networks caused by undesired multicast data traffic. Connect non-SEW
devices via a network component that supports the IGMP snooping functionality
(e.g. managed switch).
Managed switches with IGMP snooping functionality are not required for
PROFINET IO and Modbus/TCP networks.
2104906251
A = View from front
B = View from back
[1] Pin 1 TX+ Transmit Plus
[2] Pin 2 TX– Transmit Minus
[3] Pin 3 RX+ Receive Plus
[4] Pin 6 RX– Receive Minus
 Loading...