4-58
FACSIMILE►FAX RECEPTION
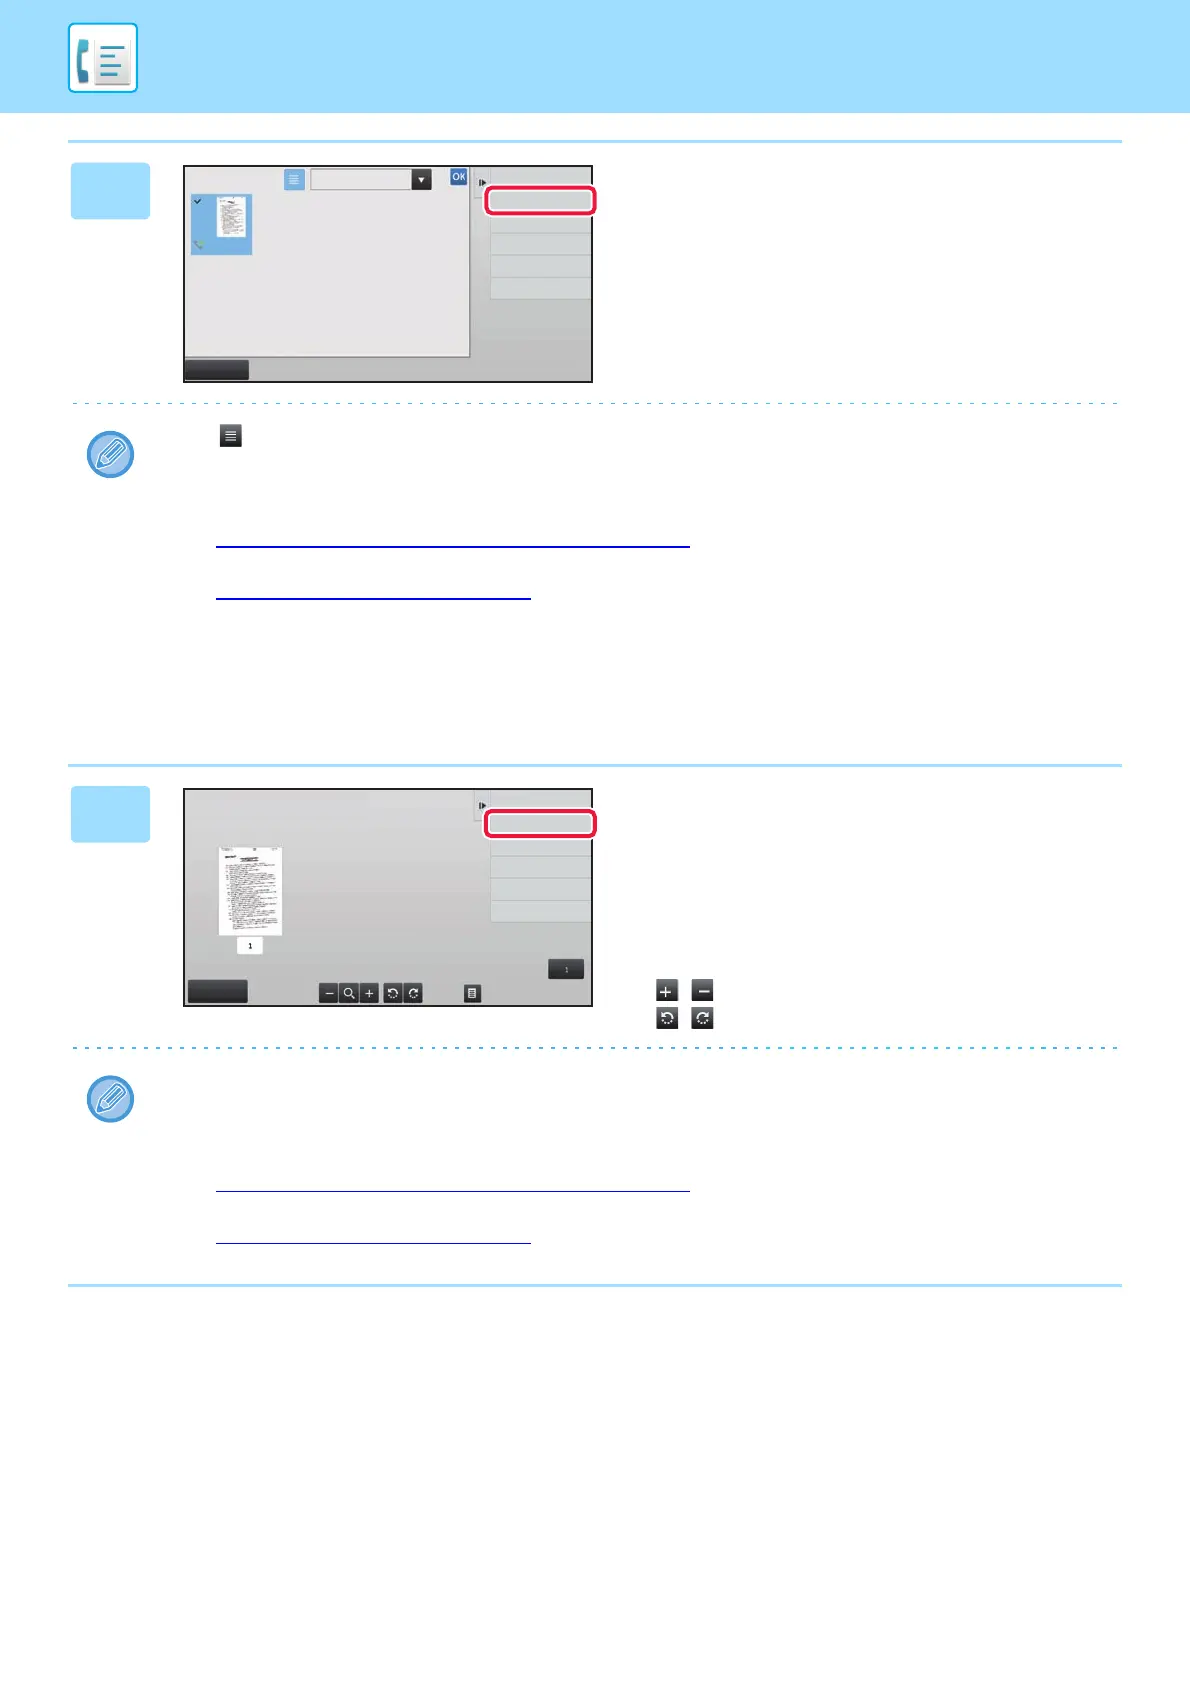
2
Tap the key of the received data you
wish to check, and tap [Check Image]
on the action panel.
Displays the received data image.
• Tap to show a list of received data. The list view or thumbnails view can be changed depending on the setting
mode.
• To delete a received image, tap [Delete] on the action panel.
• To transfer the selected received image, tap [Forward to Other Address] on the action panel.
► FORWARDING RECEIVED DATA MANUALLY (page 4-65)
• To save the selected received image, tap [File] on the action panel.
► SAVING RECEIVED DATA (page 4-67)
• To store the sender fax number as a number for "Allow/Reject Number Setting", tap [Register as Junk Fax] on the
action panel and, in the confirmation message screen, tap the [OK] key.
Specify a sender fax number as a number for "Allow/Reject Number Setting" by selecting, in "Settings (administrator)",
select [System Settings] → [Image Send Settings] → [Fax Settings] → [Receive Settings] → [Allow/Reject Number
Setting].
3
Tap the image you wish to print, and
tap the [Print] on the action panel.
The machine starts printing the image.
• [Select All Page]: Selects all displayed images.
• [Release All Page]: Cancels all images that have been
selected by "Select All Page".
• / : Use these keys to enlarge or reduce an image.
• / : Rotates image counterclockwise or clockwise.
• A preview image is an image for the touch panel. It will differ from the actual print result.
• Tap [Erase Specified Range] on the action panel to delete unwanted area of the image. Specify the image area you
wish to delete in the Erase Specified Range screen.
• To forward the selected image, tap [Forward to Other Address]on the action panel.
► FORWARDING RECEIVED DATA MANUALLY (page 4-65)
• To save the selected received image, tap [File] on the action panel.
► SAVING RECEIVED DATA (page 4-67)
Forward to Other Address
Check Image
Print
All Received DataReceived Data List
Cancel All
Delete
File
Store Data in Folder
Forward to Other Address
Return to Received
Data List
Print
Select Image to Operate.
Delete
File
Erase Specified Range
Select
All Page