5-114
SCANNER/INTERNET FAX►OTHER FUNCTIONS
3
Specify the destination.
► RETRIEVING A DESTINATION FROM AN ADDRESS BOOK (page 5-15)
► VIEWING A LIST OF THE SELECTED DESTINATIONS (page 5-18)
► USING A SEARCH NUMBER TO RETRIEVE A DESTINATION (page 5-19)
► ENTERING AN ADDRESS MANUALLY (page 5-20)
► SPECIFYING A NETWORK FOLDER (page 5-21)
► RETRIEVING A DESTINATION FROM A GLOBAL ADDRESS BOOK (page 5-22)
► USING A TRANSMISSION LOG TO RESEND (page 5-24)
4
Tap the [Others] key, and tap the [Timer] key.
5
Tap [On] key.
6
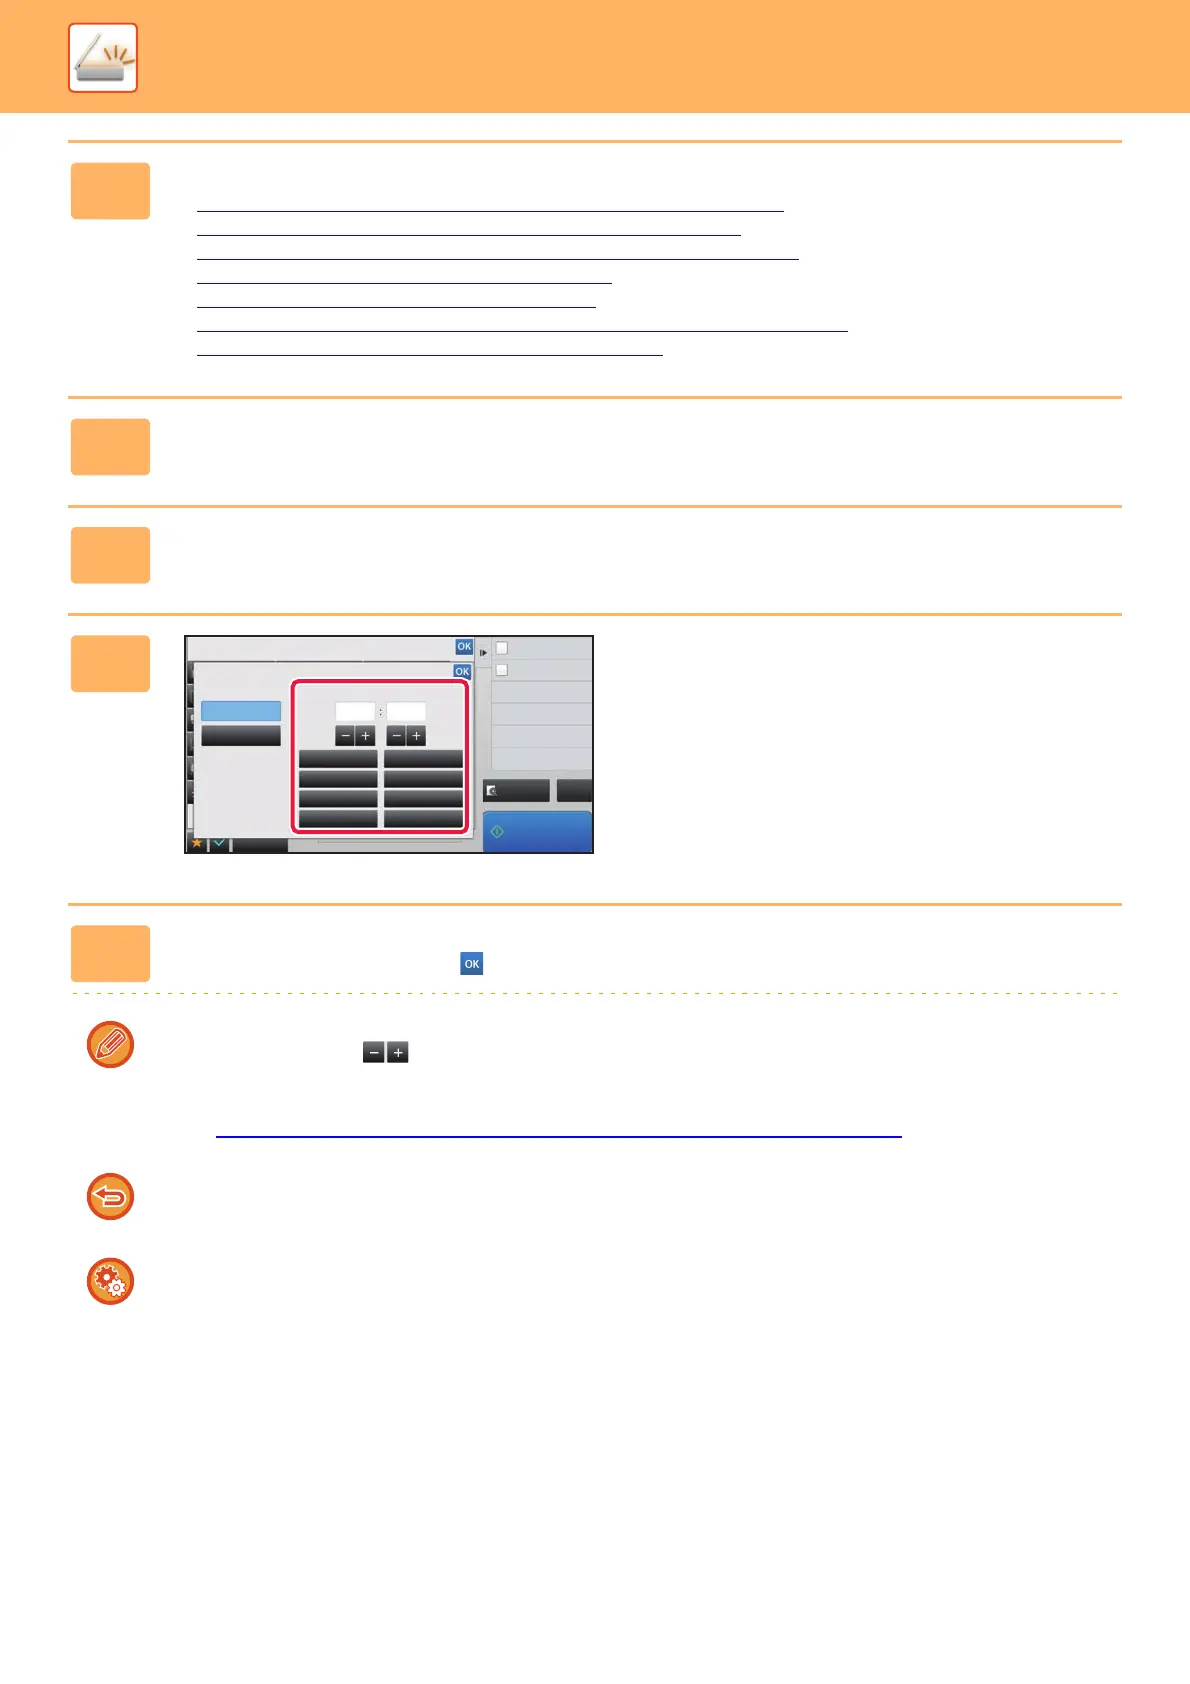
Specify the date.
7
Specify the time (hour and minute) in 24-hour format.
After the settings are completed, tap and [Back] keys in sequence.
• Tap the areas displaying the hour and minute respectively, and enter the values using the numeric keys.
• It is convenient to use to finely adjust the time.
• The setting will show the current time. If the time is not correct, press the [CA] key to cancel the operation. Correct the
time in setting mode and then perform the timer transmission procedure.
► BEFORE USING THE MACHINE AS A NETWORK SCANNER FUNCTION (page 5-4)
To cancel the Timer Transmission settings:
Tap the [Off] key.
To set the date and time of the machine:
In "Settings", select [System Settings] → [Common Settings] → [Clock Adjust].
If [Disabling of Clock Adjustment] has been enabled, the date and time cannot be modified. Select [System Settings] in
"Settings (administrator)" and select [System Settings] → [Common Settings] → [Enable/Disable Settings] to disable the
[Disabling of Clock Adjustment] setting.
Preview
Start
Back
Others
CA
Timer
Off
On
Store Data in Folder
File
Receive Other's Original
Polling
Store Data Temporarily
Quick File
08/08/2017 Tue
10 15
To da y
Monday
Wednesday
Friday
Sunday
Tuesday
Thursday
Saturday