Maintenance
GMS800 · Operating Instructions · 8013025 V1.2 · © SICK MAIHAK GmbH 55
Subject to change without notice
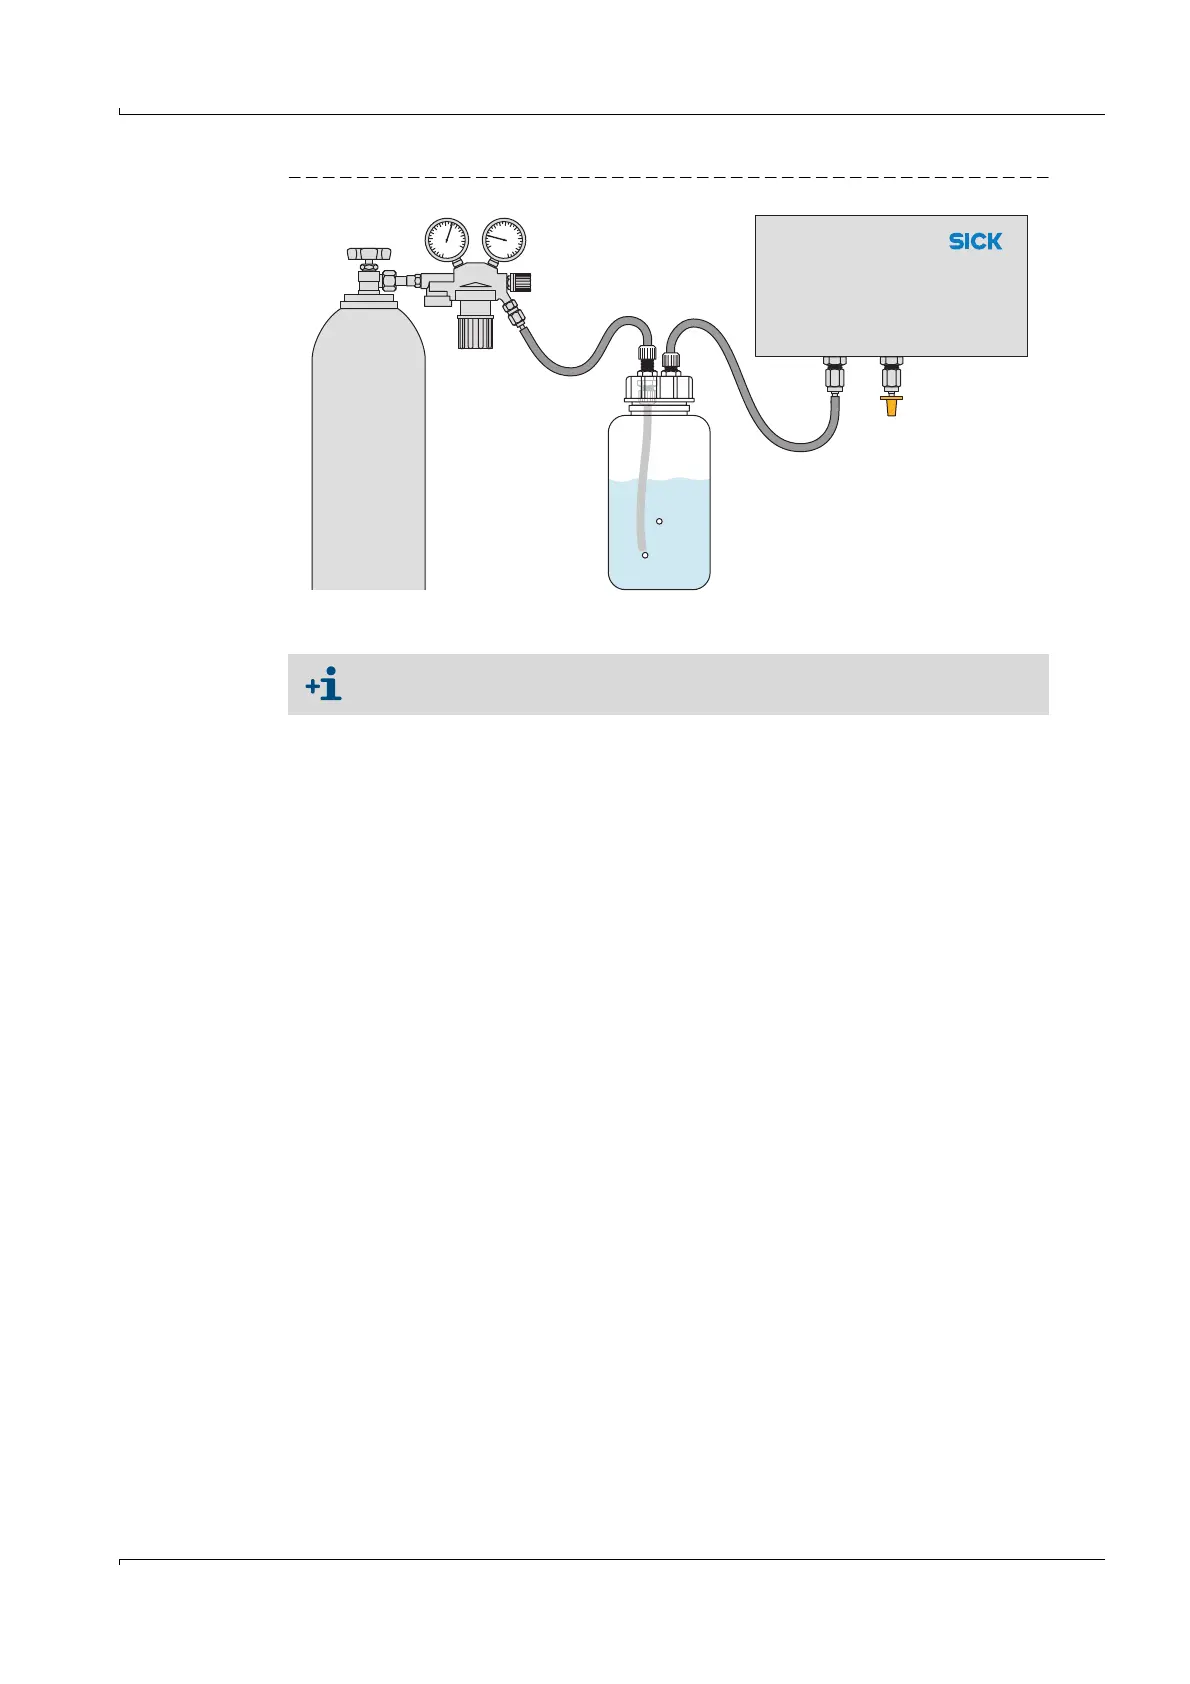
Fig. 10 Simple test method for leak tightness check (example)
Test procedure
1 Put the gas analyzer out of operation. Separate the gas inlet and outlet of the gas ana-
lyzer from the installation (when fitted).
2 Connect the gas analyzer gas inlet to the washing bottle gas outlet.
3 Close the gas analyzer gas outlet off gas-tight, e.g. with a sealing plug.
4 Also close off all the other internal gas path connections (as available) in the same man-
ner.
5 Check: The valve on the pressure reducer gas outlet must be closed off. Now open the
main valve of the compressed gas cylinder.
6 Adjust the pressure reducer so that the output pressure (secondary pressure) is
150 kPa (1.5 bar).
7 Connect the pressure reducer gas outlet to the washing bottle gas inlet.
8 Open the pressure reducer valve slowly (avoid sudden pressure increase).
9 Wait until the pressure ratio is constant (several seconds).
10 Observe the washing bottle: Count the number of air bubbles rising for 1 minute.
The gas path is classified as tight when less than 60 air bubbles rise per minute.
11 To terminate the test procedure:
– Close off the valve on the pressure reducer gas outlet.
– To release the gas pressure: Carefully loosen the connection hose on the washing
bottle gas outlet.
– Reconnect the gas connection on the gas analyzer as for operating mode - pay
careful attention to gas leak tightness.
Gas analyzer
When the gas analyzer has several separate internal gas paths:
b
Perform this procedure individually for each gas path.
 Loading...


