To teach in a switching point, the device must be able to measure. The distance to the
object must not change during teach-in. The object must be in the measuring range.
Setting switching point manually
Set the distance of the switching point manually, see "Adjust the value", page 22. The
value of the switching point can be set depending on the set number of decimal places.
Adjustable parameters
•
Q1 SP1 teach-in (manual)
•
Q1 SP2 teach-in (manual)
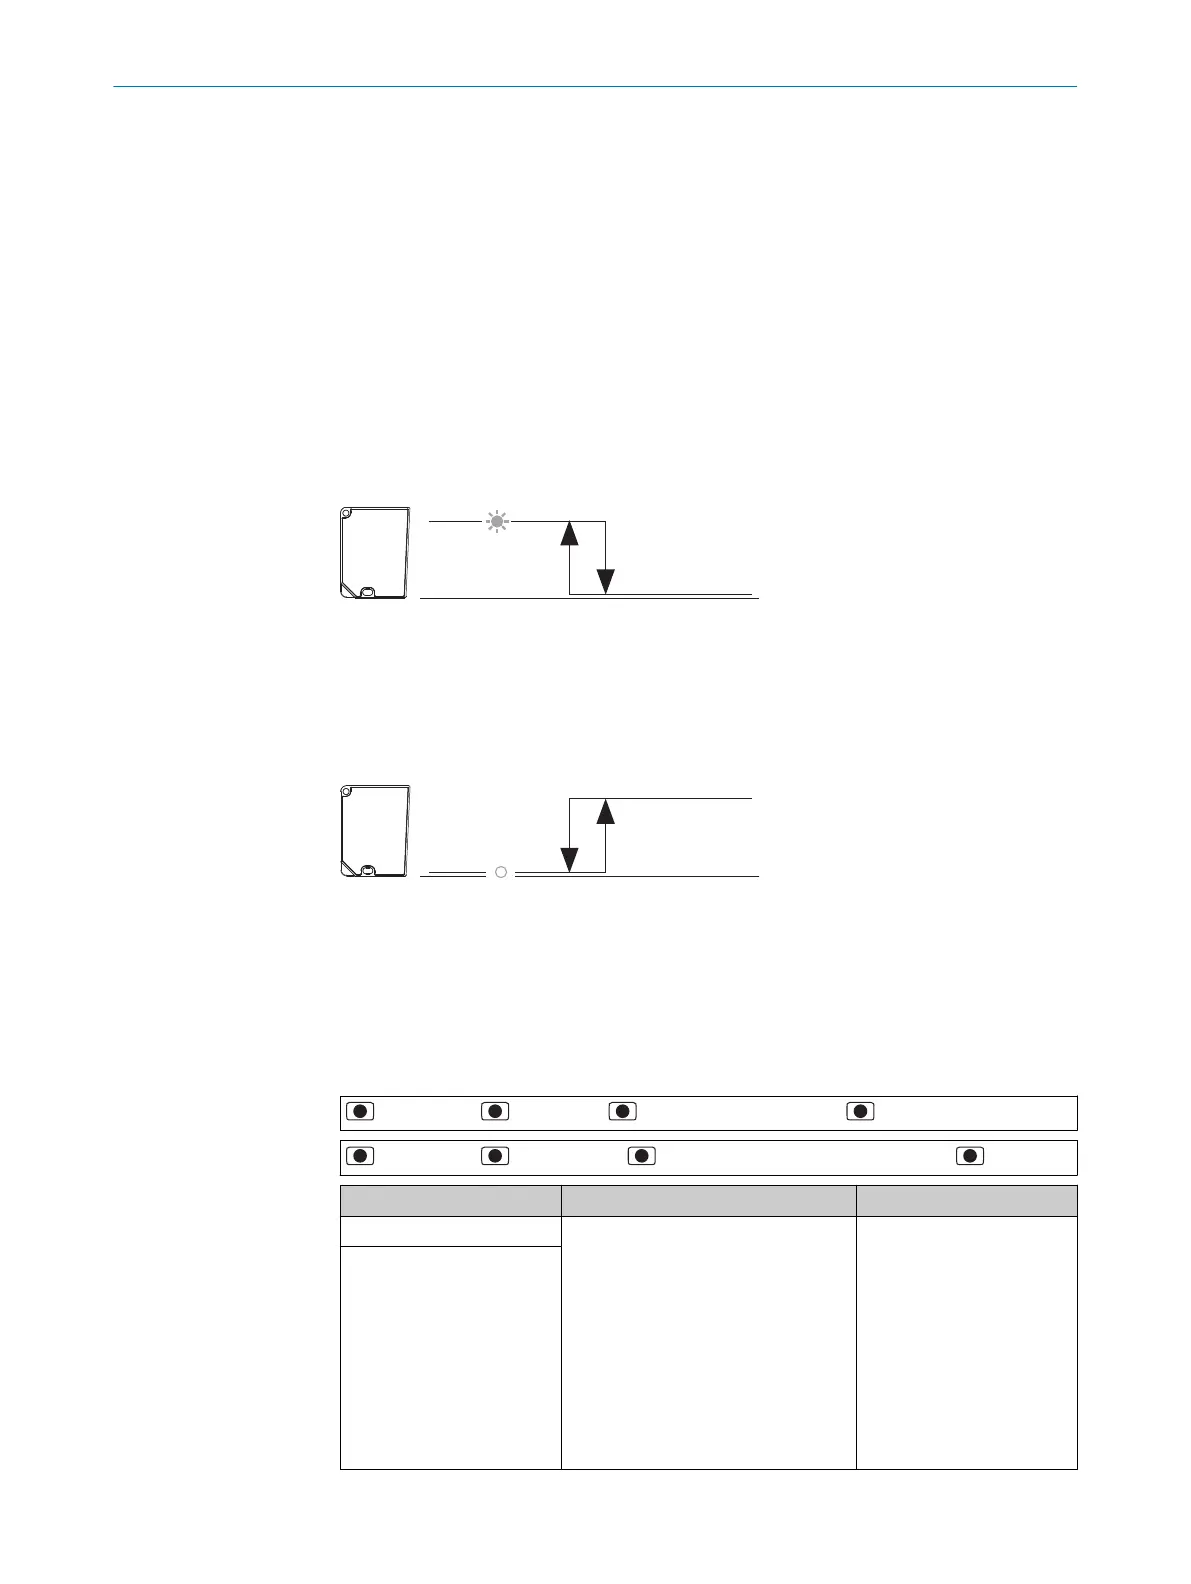
7.4.3.2 Q1 Single point (SP1:DtO) menu
Set a switching point. If the measured distance value falls below (normally open con‐
tact: High-active switching point logic) or exceeds (normally closed contact: Low-active
switching point logic) the switching point, a signal is output (change of output level).
Figure 10: Distance to object, single switching point (N/O contact: High-active, PNP)
1
Minimum
2
Switching point
3
Maximum
Figure 11: Distance to object, inverted simple switching point (N/C contact: Low-active, PNP)
1
Minimum
2
Switching point
3
Maximum
Selecting output mode and setting parameters
> Q1 Output > > Q1 Mode > > Q1 Single point (SP1:DtO) >
> Q1 Output > > Parameter > > Select option, teach-in or set value >
Parameter Value Factory setting
Q1 SP1 teach-in (auto) Setting the switching point
OD2000-030:
-5.04mm ... +5.75mm
OD2000-050:
-10.10mm ... +11.50mm
OD2000-245:
-176.75mm ... +189.00mm
OD2000-350:
-252.50mm ... +271.00mm
OD2000-700:
-505.00mm ... +550.00mm
0.00mm
Q1SP1 teach-in (manual)
7 OPERATION
32
O P E R A T I N G I N S T R U C T I O N S | OD2000 8026231/1I18/2023-01-05 | SICK
Subject to change without notice