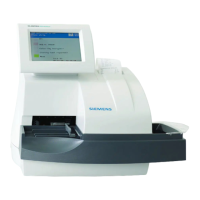
System Overview 77
3. After replacing the reagent(s), you must establish the correct on-system
stability.
a. Minimize the Reagent Inventory window.
b. At the Menu Panel, select
Reagent, then select Reagent Container
Settings
.
c. At the Reagent Container Settings window, locate the replaced
nonbarcoded reagent.
d. Enter the correct reagent Exp. date in the form YYYYMMDD.
e. Select the
O (Open) button to open the replaced reagent container and
initialize the Days Remaining counter.
NOTE: If you replace only 1 of the reagents of a 2-reagent method and the
replaced reagent has a new lot number, the system alerts you that a reagent
pair does not exist. You should change both reagents at the same time. If
the 2 reagents that you replaced have new lot numbers, you must re-
calibrate the new set of reagents before you continue to run samples.
(1) At the Menu Panel, select Reagent, then select Reagent Inventory.
(2) Execute a Barcode Scan at the Reagent Inventory window.
(3) Evaluate calibration status.
4. Perform a start-up wash.
Set up of daily washes
WASH 3 or Startup wash, 26 minutes
DI water (70-mL container)
RTT2 position 56 DI water (70-mL container)
WASH 2 or Shutdown wash, 38 minutes
CTT position 15 ISE detergent (cup)
RTT1 position 55 10% cuvette wash (70-mL container)
DI water (70-mL container)
RTT2 position 55 10% cuvette wash (70-mL container)
DI water (70-mL container)
Same as WASH 2, except replace the 10% cuvette wash with 5% reagent
probe wash in both the CTT and RTT positions.
 Loading...