' $ ! $!& #$"&&"! Ċ (%& !' $$ !"
5 - 26
Siemens AG ⋅ January 1999
Table 5.3 Marshallable binary output functions
Fno. Logical functionShort text
(display on LCD)
3346
3347
3348
3363
3371
3372
3376
Off.Rem.Tr
Off.Rem.off
Off.Rec
>PWM bl
PWM off
PWM blk
Fault WM
Trip from remote station: trip
Trip from remote station: trip command
Trip from remote station: Receive signal
>Blocking of pilot wire monitoring
Pilot wire monitoring is switched off
Pilot wire monitoring blocked
Fault in pilot wire connection
Table 5.4 Factory set indications on signal relay
4th operating level 5th operating level Fno. Comment
MARSHALLING Signal relay Block heading
62 MARSH SR 2
6 2 S R 2 1
Fault WM
3376 Fault in the pilot wire monitoring
(only for devices with pilot wire monitoring)
62 MARSH SR 3
6 2 S R 3 1
L o c k O u t
3031 Lockout state of trip command
The device has 6 LEDs for optical display, 4 of which
can be marshalled. These are designated LED 1 to
LED 4 and can be marshalled in block 63. The block
may be reached from the initial state of the device in
level 1 as follows: Press the B key (forwards), switch
to the 2nd operating level with the " key (next level),
scroll with the B key until block 60 appears on the
display. Switch to operating level 3 with the " key
and scroll forwards to block 63 with the B key !:
MARSHalling LED. Selection is carried out as descriĆ
bed in section 5.5.1. Multiple indications are permitĆ
ted, i.e. a logical indication can be transmitted to seĆ
veral LEDs (see section 5.5.1).
In addition to the logical function itself, it may also be
selected whether each LED is to operate as memoriĆ
zed or not memorized. When scrolling with the "+"
key, each signal function for the LED is displayed eiĆ
ther without a status indication (not memorized) or
with the index "S"(M = memorized).
The marshallable signal functions are the same as
those listed in table 5.3. Signal functions have no efĆ
fect if the relevant protective function in the device
has been configured so that it is non existent.
The selected function must be confirmed with the
enter key .
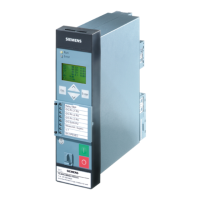
The front view of the device (Figure 6.1) shows the
assignment of the LED on delivery. The following boĆ
xes show an example assignment for binary input 1.
Table 5.5 shows all factory settings.
 Loading...