Section 05 TRANSMISSION
Subsection 02 (CLUTCH)
MMR2000_125_05_02A.FM 05-02-3
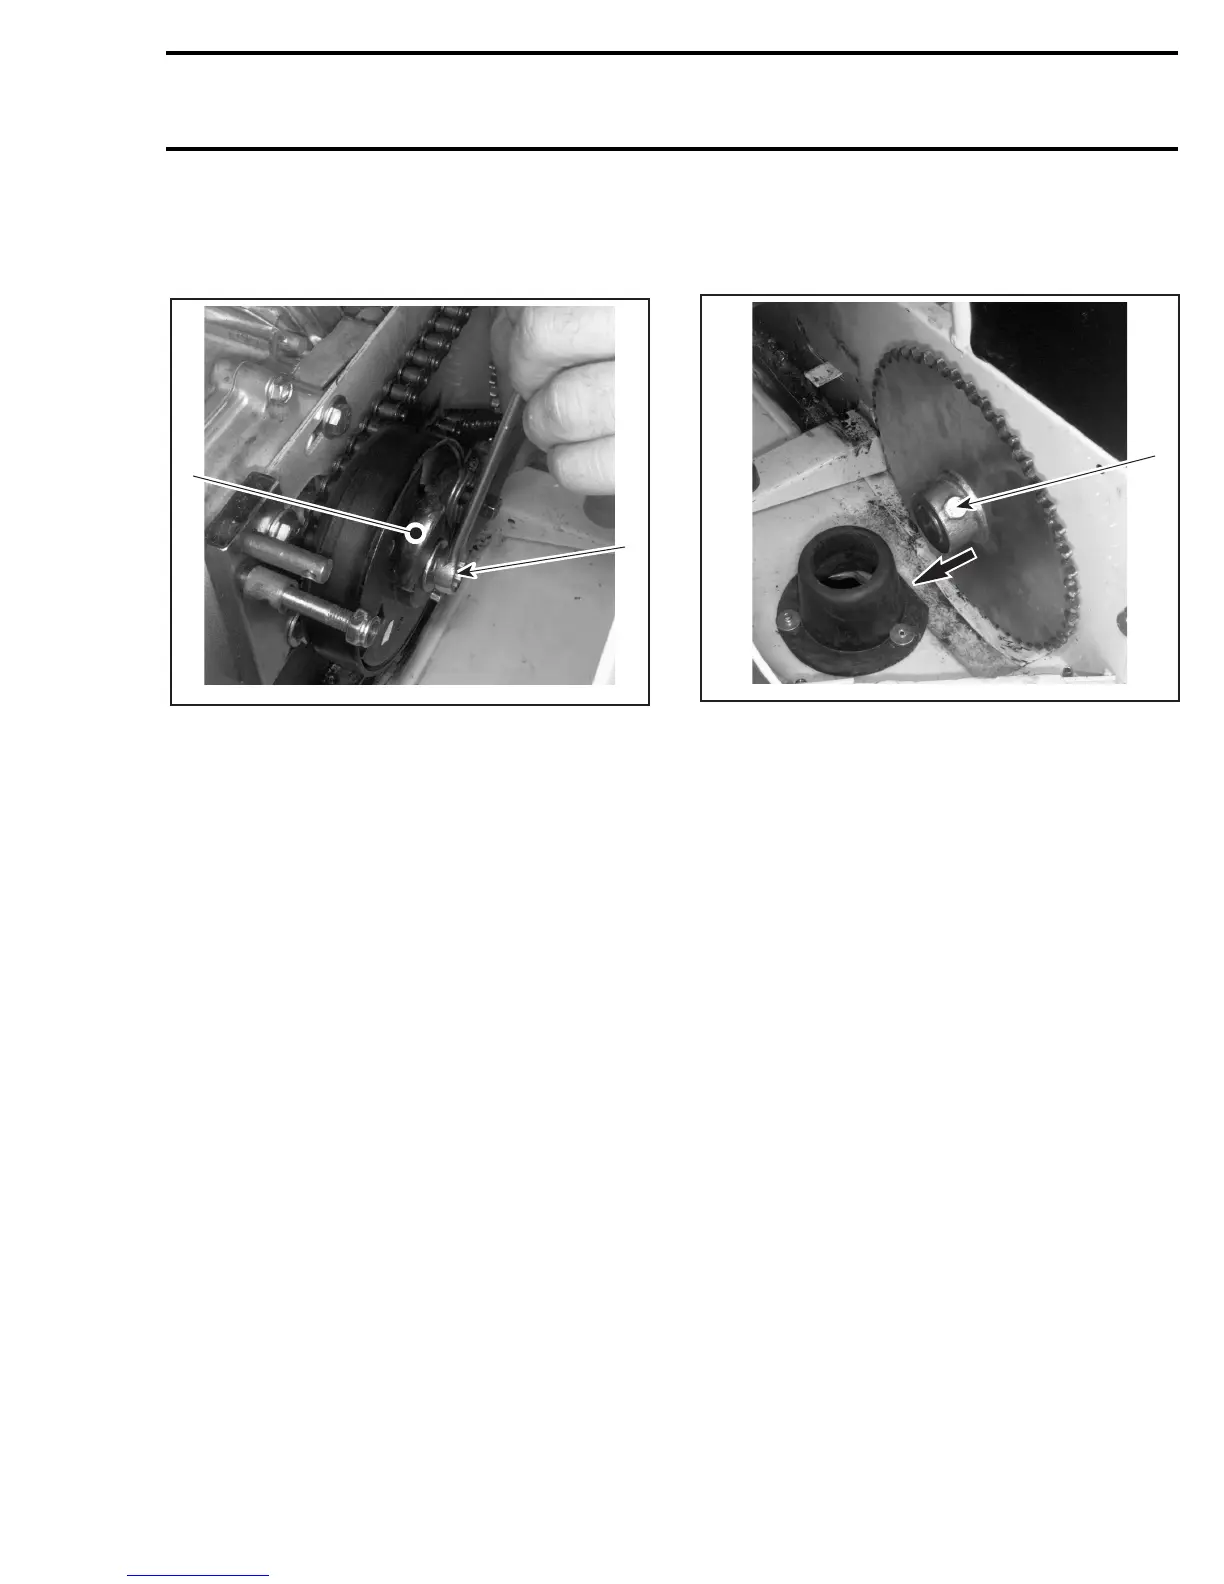
1, Clutch Removal
Holding clutch with a wrench, loosen clutch retain-
ing screw no. 3.
LOOSEN CLUTCH SCREW
1. Wrench
2. Clutch retaining screw
Remove drive chain automatic tensioner ass‘y no. 4.
Remove drive chain from drive sprocket.
NOTE: To ease drive chain removal, chain can be
separated by removing connecting link no. 5, as
described in subsection 04 DRIVE CHAIN.
Remove clutch with extension no. 6 and spacer
no. 7.
8, Driven Sprocket Removal
NOTE: To ease drive chain and driven sprocket
no. 8 removal and installation, it may be useful to
remove footrest.
Remove drive chain from driven sprocket.
Loosen driven sprocket locking nut no. 9, then re-
move driven sprocket screw no. 10.
Pull out driven sprocket from drive axle.
REMOVE DRIVEN SPROCKET
1. Loosen driven sprocket locking screw
DISASSEMBLY
Parts are not available separately. If clutch is dam-
aged, replace clutch assembly.
CLEANING
Clean all metal components in a general purpose
solvent. Thoroughly dry all components before as-
sembling.
INSPECTION
Inspect drive sprocket for wear. If sprocket is
worn, replace clutch ass‘y with new one.
If so check if clutch components are loose. If so,
replace clutch ass‘y with new one.
A31D09A
2
1
A31D0AA
1
 Loading...