Section 04 ENGINE
Subsection 08 (CARBURETOR)
04-08-6 MMR2000_123_04_08A.FM
16,17, Float Valve
Remove float pin no. 10 then remove float no. 9
from carburetor.
Check for worn valve seat on float. Replace if so.
Check for weak float valve spring no. 17 or worn
float valve, as shown in the next photo.
1. Float valve tip OK
2. Replace float valve
CARBURETOR FLOAT LEVEL
Correct fuel level in float chamber is vital toward
maximum engine efficiency. To check for correct
float level proceed as follows:
– Remove float bowl no. 8 and gasket from car-
buretor.
– With carburetor leaned on a clean surface, mea-
sure float level height A using float level gauge
(P/N 529 035 520), as shown in the next photo.
– Keep float level gauge perfectly vertical and in line
with main jet hole.
– Ensure that both float level gauge tips are properly
positioned on carburetor body and that “L” arm is
leaning on float without compressing valve spring.
1. Float level gauge tips properly leaned on carburetor body
2. Lean “L” arm to carburetor to measure float level height
A. Float level height
If float height is not according to specifications on
above table, replace float and/or float valve.
Recheck float level height.
INSTALLATION
To install carburetor on engine, inverse removal
procedure.
However, pay attention to the following:
– Inspect throttle cable and housing prior to instal-
lation.
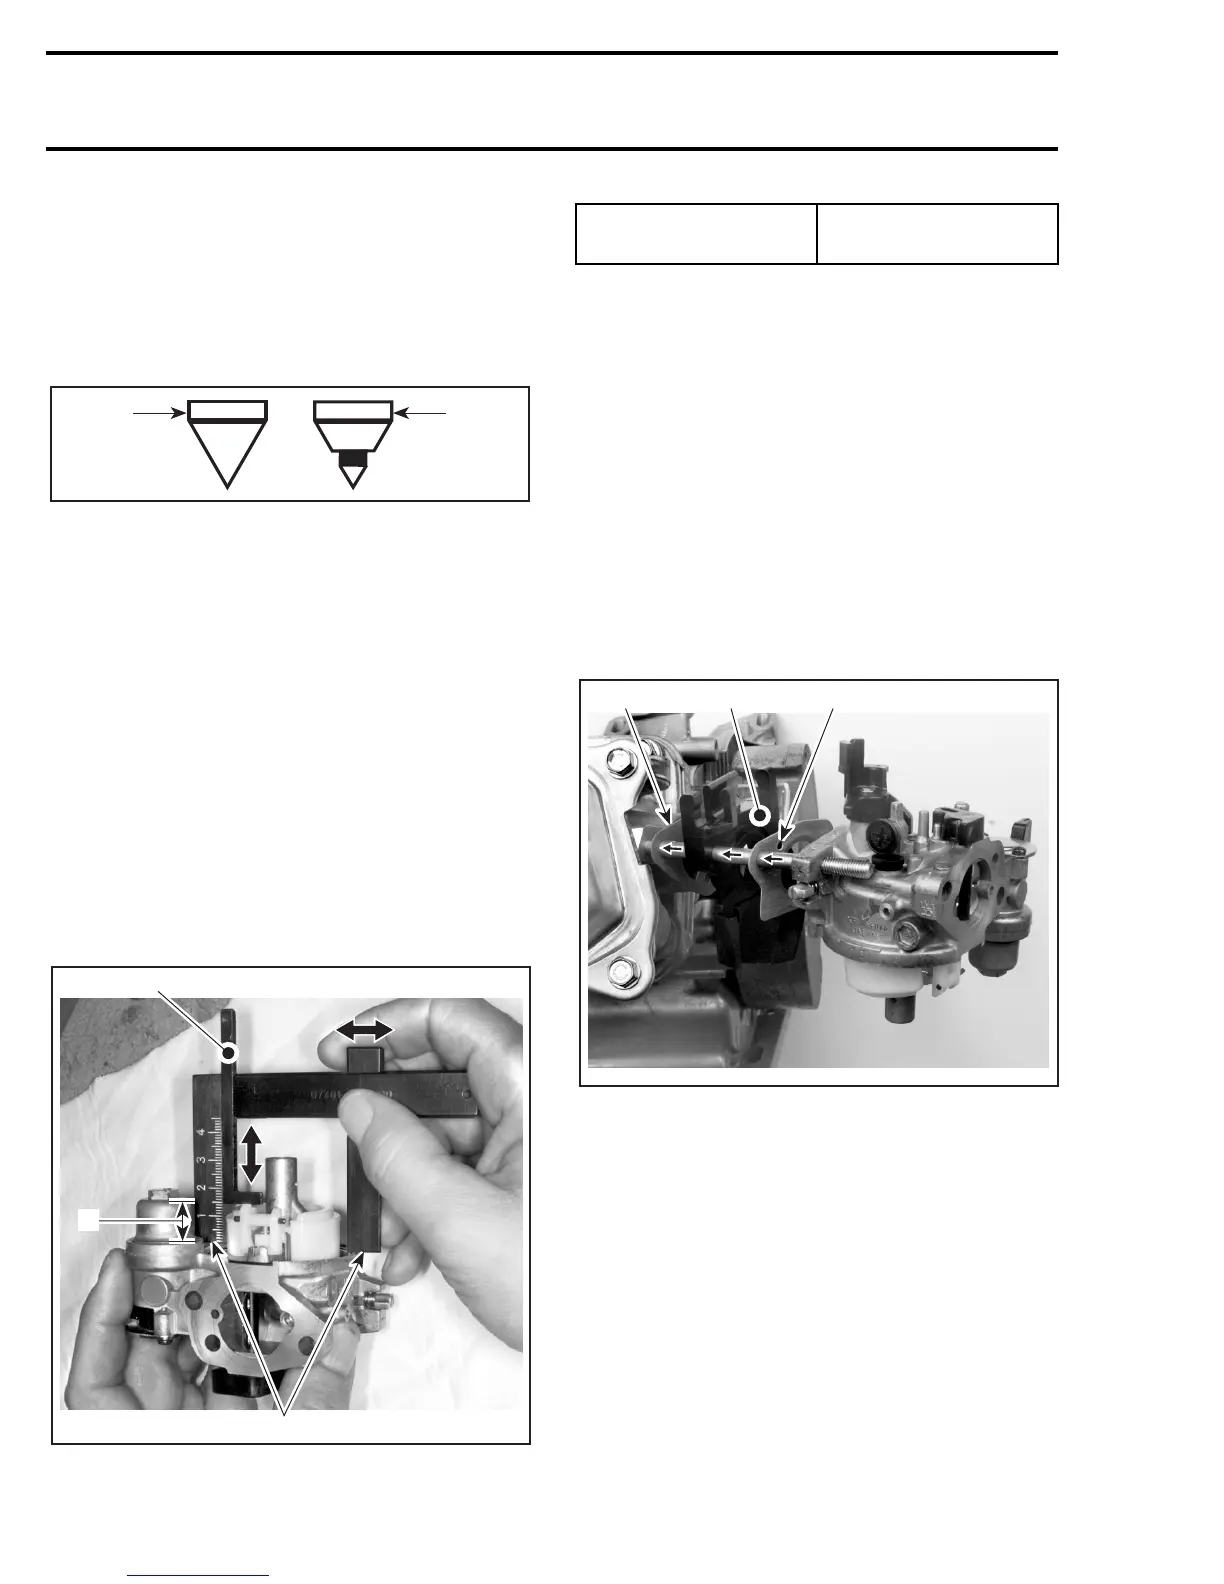
– Ensure that both packings no. 18 and insulator
no. 19 are properly positioned between cylin-
der head and carburetor, as shown in the next
photo.
1. Packing
2. Insulator
3. Note packing hole position
– Ensure that spacer no. 20 is properly positioned
between carburetor and air cleaner elbow ass‘y,
as shown in the following photo.
A31C0YA
1
2
2
A31C0ZA
1
A
STANDARD FLOAT
HEIGHT
13.7 mm (0.54 in)
A31C10A
123