Chapter 2: System Setup
2-13
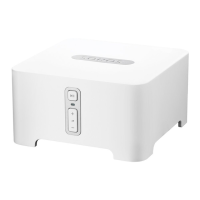
Add a ZoneBridge
If you are adding a ZoneBridge to an EXISTING Sonos system, please follow the
steps below. If you are setting up a NEW Sonos Multi-Room Music System, please
see "Setting Up a New Sonos System" on page 2-4 instead.
You can use a Sonos ZoneBridge to replace the ZonePlayer that is currently wired to
your router, or you can place a ZoneBridge in any location to extend the wireless
range of your Sonos Multi-Room Music System.
1. Attach the power adapter and plug in the ZoneBridge. Be sure it is the proper
power adapter for your country.
•Use the Sonos Controller for Mac or PC to check for software updates by se-
lecting Help>Check for Updates.
• Use a handheld Sonos Controller to check for software updates by selecting
Settings>Online Updates from the Music Menu.
2. Choose one of the following options:
•Use the Sonos Controller for Mac or PC to add the ZoneBridge to your music
system by selecting Add a ZonePlayer or ZoneBridge from the Zones menu.
•Use a handheld Sonos Controller to add the ZoneBridge to your music system
by selecting Settings>Add a Zone from the Music Menu.
Now that you’ve added the ZoneBridge to your music system—
• If you are replacing the ZonePlayer that is currently attached to your router, you
can unplug the wired ZonePlayer, replace it with the Sonos ZoneBridge, and
move the original ZonePlayer to a new location.
Note: If you are replacing the wired ZonePlayer in your music system with a
Sonos ZoneBridge, first add the new ZoneBridge to your music system (steps
below). You can then unplug the wired ZonePlayer from your router, replace it
with the Sonos ZoneBridge, and move the original ZonePlayer to a new
location.
During the setup process, you will be prompted to press
and release the
Connect button on top of the ZoneBridge.
The indicator lights will flash green and white while the
ZoneBridge is connecting.