Chapter 2: Getting Started 29
Getting Started
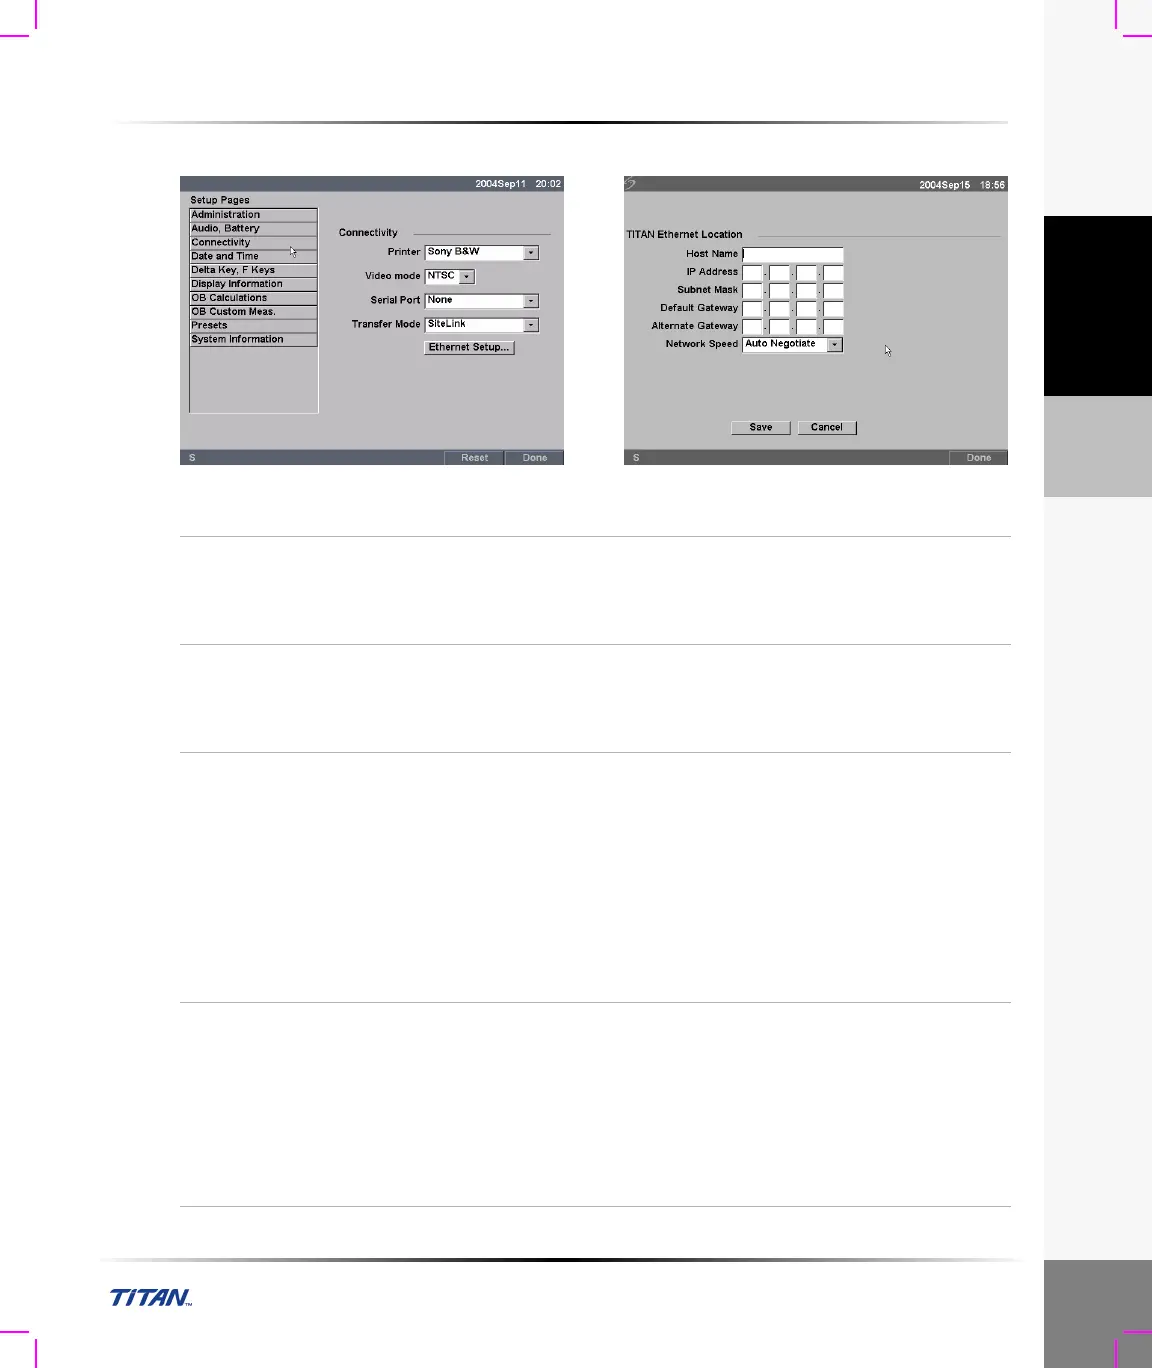
To set up Connectivity:
Figure 12 Setup Screens: Connectivity and Ethernet
Printer
1 Press the Setup key.
2 Select Connectivity.
3 In the Printer list, select the desired printer from the list of
recommended printers.
Video mode
1 Press the Setup key.
2 Select Connectivity.
3 In the Video mode list, select NTSC or PAL for the desired
mini-dock video output.
Serial Port
1 Press the Setup key.
2 Select Connectivity.
3 In the Serial Port list, select VCR, DVD, or Computer (PC).
4 Restart the system to activate VCR or DVD connectivity.
5 Attach a serial cable (RS-232) to the serial port from the TITAN
mini-dock/TITAN docking system to the VCR, DVD, or PC.
Note: If PC is selected, the system allows report data to be sent as ASCII
text from the TITAN system to a PC. Special third party software must be
on the PC to acquire, view, or format the data into a report. Check the
compatibility of your software with SonoSite technical support.
Transfer Mode
1 Press the Setup key.
2 Select Connectivity.
3 In the Transfer Mode list, select DICOM or SiteLink.
After changing connectivity, a dialog box is displayed to restart
the system.
Note: The settings for SiteLink Image Manager and TITAN
configurations must correspond. See the SiteLink Image Manger 2.2 User
Guide.