INSTRUCTION, USE AND
MAINTENANCE MANUAL
GB
Page 27 of 58
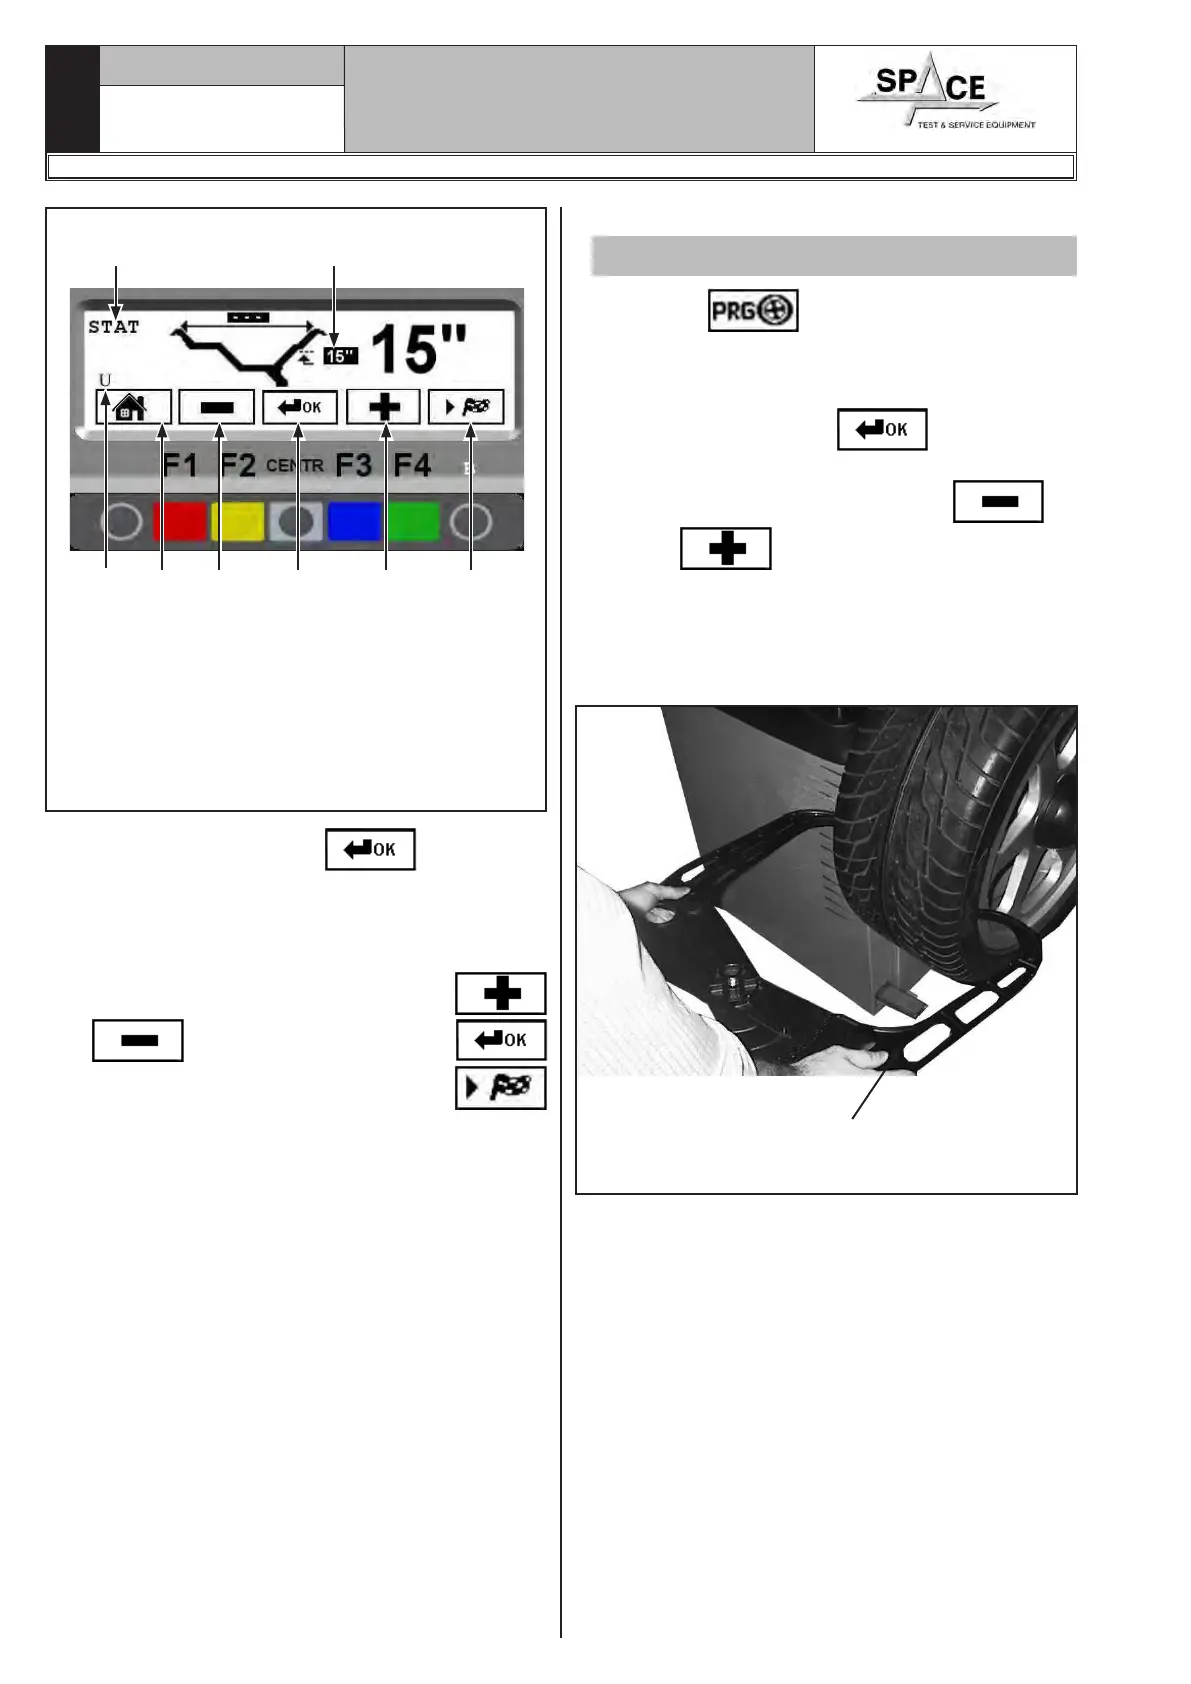
KEY
1 – Return to previous screen page (RED) (F1)
2 – Decrease wheel dimension values (YELLOW) (F2)
3 – Select and confirm the value to be set (CENTRAL)
4 – increase wheel dimension values (BLUE) (F3)
5 – Performs spin (GREEN) (F4)
Fig. 38
Selected program
STATIC mode
N° of
current
user
Rim diameter
1 2 3 4 5
Press the “CENTRAL” key to select the
value to set (only diameter) (Fig. 38).
The display screen will show the selected value on
white bright background and on the right the same
value in large characters (Fig. 38). Increase or de-
crease the measurements through the keys
or . Press the “CENTRAL” key
and execute the spin by pressing “F4” key
(Fig. 38).
• To make a measurement in DYNAMIC mode:
Valid for car/motorcycle
Press “F3”
, the program goes directly
from the start screen page (Fig. 37) to the screen
page illustrated in Fig. 40 with no measurements
(DINAMIC mode).
Press the “CENTRAL” key
to set manually
the width.
The operator must press “LESS”
or
“MORE”
keys until the desired value is
reached (Fig. 40).
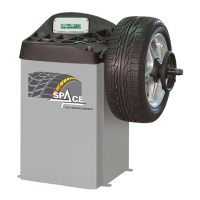
Input the nominal width shown on the rim, or manu-
ally check by using the graduated width gauge, po-
sitioning it on the outer and inner side of the wheel
as shown in Fig. 39.
MANUAL EXTERNAL
DATA GAUGE
Rim width
manual detection
Fig. 39
1296-M010-0_P
Space s.r.l.
ER232R - ER234R - ER236R - ER238R - ER238RFM - ER248R - ERP248R