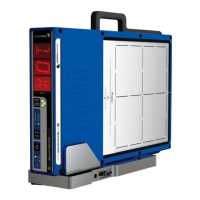
QA BEAMCHECKER™ PLUS 10
means version 2.5.2. The second set is the build number of this version, e.g. 002, which means
build number 2. These numbers will display each time the QA BeamChecker Plus is turned on.
If no rooms or baselines are present on the unit, the display will show RM-. This means no
rooms are available.
QA BeamChecker Plus Communication Software is now ready to be setup on a supported
Microsoft
®
Windows
®
PC.
Windows
®
is a registered trademark of Microsoft Corporation.
2.2 Software Setup & Database Creation
1. Insert the Software CD into the PC and wait for the setup wizard to begin. If Autoplay is not
enabled, browse the CD’s contents and run the file Setup.exe. Follow the instructions to
complete the setup. (See page 9 for more info)
2. Launch the QA Beam Checker Plus Communication Software. The device will turn on
automatically. If it does not turn on automatically when the software is running, please check
the serial communication path and (especially) the serial port setup (see Section 20, 'Features
and Specifications').
3. A prompt will appear providing the opportunity to create a new database or browse for an
existing database. Click Yes to create a new database (See page 10 for more info).
4. The Database Creator process will begin. If the QA BeamChecker Plus is properly connected,
its serial number will be displayed. If not, refer to Section 16, 'Troubleshooting' for further
information on diagnosing issues with the serial communication path. Continue the wizard by
entering a database name and browsing for a location for the QA BeamChecker Plus database
file to reside. It is advised to use a database naming convention that includes the device serial
number for easy future identification.
NOTE: This one database file will contain measurement data taken for all treatment rooms
assigned to this QA BeamChecker Plus. It is recommended to place the database in a location
where it will be backed up, and if desired, accessible from other computers, such as a network
location.
Complete the remaining steps, and the main Communication software interface will now be
accessible.
5. The next step is to create a room to be used with the QA BeamChecker Plus. After
completing the Database Creator process, a prompt will appear to allow creation of a room.
Select the room type that matches the treatment machine desired and enter the remaining
details to continue. Once completed, up to eight additional rooms may be added.
The QA BeamChecker Plus is now ready for acquisition of baselines.

 Loading...