QA BEAMCHECKER™ PLUS 16
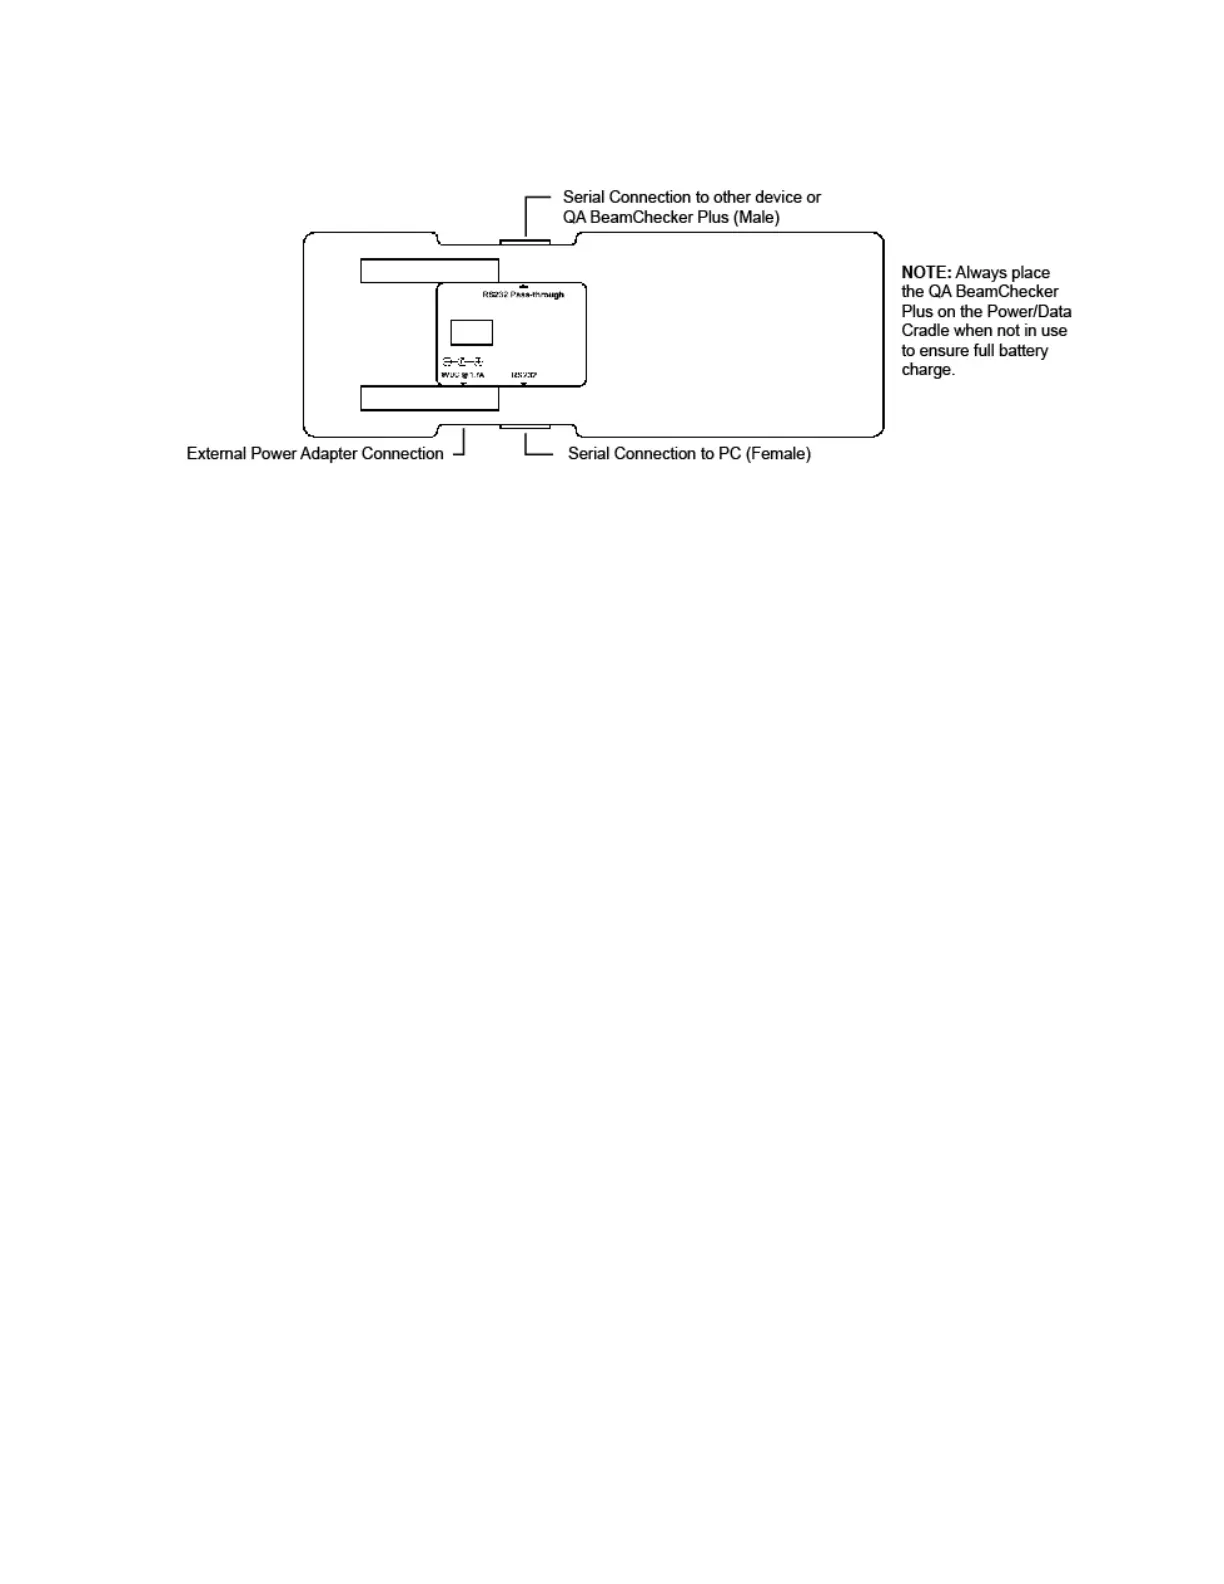
3.2 Power/Data Cradle
4 Setting up the Communication Software
QA BeamChecker Plus Communication Software is designed to run under Microsoft Windows
operating systems. See system requirements for more specific information. Before installing
the software, it is recommended to close all other active programs.
NOTE: The account under which the QA BeamChecker Plus software is INSTALLED must have
at least “Power User” access privileges within Windows. However, as of version 2.2.X, the
software can be RUN as a basic “User”. See the system administrator or operating system
documentation for assistance and/or further details.
1. Insert the program CD-ROM into the computer’s CD-ROM drive. If autorun is enabled, the
InstallShield Wizard will begin automatically.
2. If autorun is disabled, browse to the CD-ROM root directory in Windows Explorer and
double-click setup.exe to start the setup program.
3. Read through the software license agreement and click next to proceed with the setup. A
QA BeamChecker Plus Communication Software program icon will be placed within the Start
Menu under the Standard Imaging program group.
4. If prompted, restart the computer to complete setup and begin using the QA BeamChecker
Plus Communication Software.
Upgrading an Existing Setup
The procedure for upgrading to a new version of the QA BeamChecker Plus Communication
Software is roughly the same as setting up the software initially.
CAUTION: Before upgrading to a new version of QA BeamChecker Plus software, download
any Wire-Free data to the database. If data is not downloaded prior to firmware upgrade, it
may be lost.