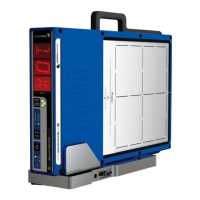
QA BEAMCHECKER™ PLUS 23
Static 5 Channel Room
1. Choose whether measuring photons or electrons. If electrons, ensure a 20 x 20 cm electron
cone is attached to the accelerator.
2. Place the QA BeamChecker Plus on the treatment couch ensuring it is flipped to the proper
side, Photon or Electron, as indicated by the large white field labels on both sides of the device.
3. Position the QA BeamChecker Plus at 100 cm SSD with a field size of 20 x 20 cm. Align the
unit to the center of the field using the QA BeamChecker Plus fiducials and the room
alignment lasers.
4. Connect the QA BeamChecker Plus to the PC as shown in Figure 3.
Dynamic 5 Channel Room
1. Place the QA BeamChecker Plus on the treatment couch ensuring it is flipped to the
Photon side as indicated by the large white field labels on both sides of the device.
2. Position the QA BeamChecker Plus at 100 cm SSD with a field size of 20 x 20 cm. Align the
unit to the center of the field using the QA BeamChecker Plus fiducials and the room
alignment lasers.
3. Connect the QA BeamChecker Plus to the PC as shown in Figure 3.
TomoTherapy System Room
1. Place the Precision TomoTherapy Leveling Platform (or other leveling device) onto the
treatment couch, and place the QA BeamChecker Plus onto it ensuring the Photon side is
facing up as indicated by the large white field labels on both sides of the device.
2. Level the top of the QA BeamChecker Plus by placing the precision bubble level at the
center of the top surface and adjusting the three leveling screws on the leveling platform as
needed.
3. Adjust the vertical height using the treatment couch until the horizontal side lasers line up
to the fiducial alignment mark on the top end of the QA BeamChecker Plus facing the bore of
the TomoTherapy unit. After the couch height is correct, align the lasers to the crosshair on the
top surface of the unit.
4. Now complete an MVCT of the QA BeamChecker Plus by following the directions for
running a Patient Daily alignment procedure using Treatment Delivery Console and the
appropriate TomoTherapy Treatment Planning software for your Treatment Delivery System.
After completing the scan, register the MV image to the reference image (taken during the
planning step - See Appendix B). Note registration adjustments.
5. Connect the QA BeamChecker Plus to the PC as shown in Figure 3.
6.3 Step 2: Prepare the Communication Software
1. On the PC connected to the QA BeamChecker Plus, launch the QA BeamChecker Plus
Communication Software.

 Loading...