14.3.9.2 StecaLink master setting
Adding a slave device
‘Main menu‘
‘System settings‘ ‘StecaLink master menu‘
‘Add slave device’
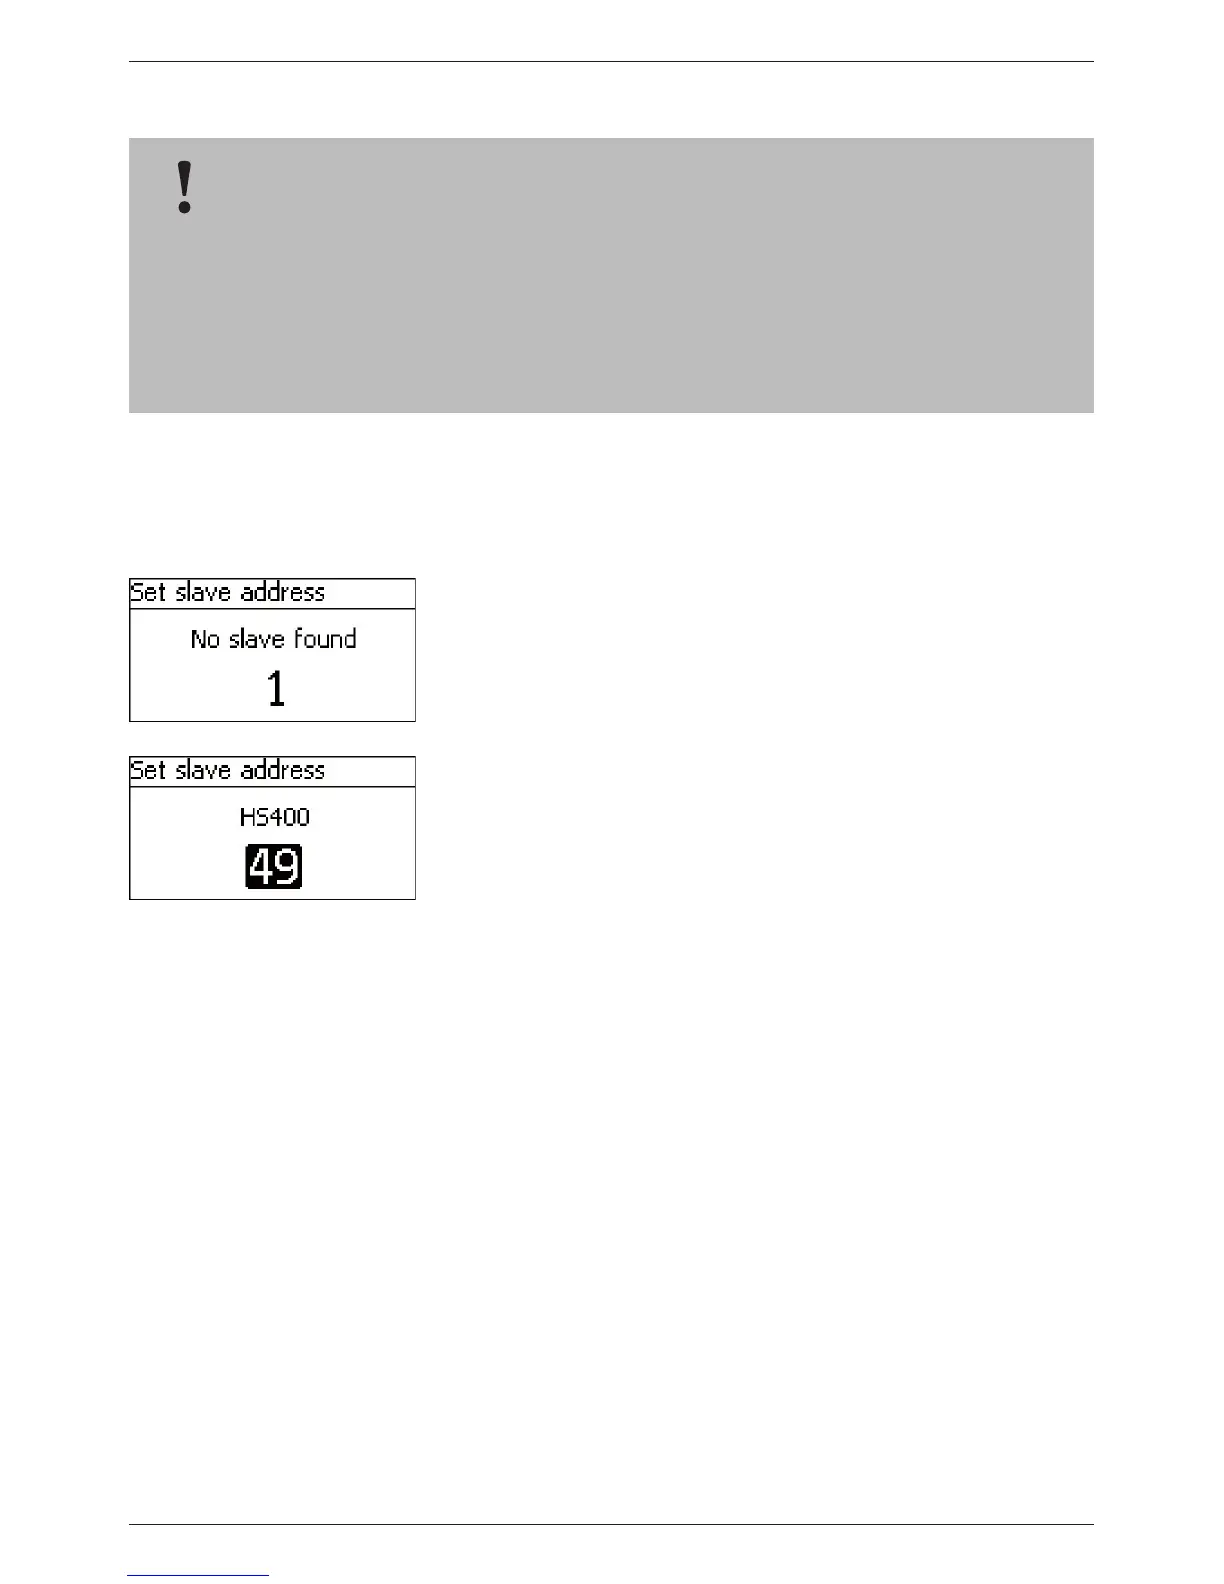
1. Press ‘SET‘. The Set slave address dialogue appears (Fig. left).
2. Press ‘SET‘. The value flashes
3. Press
r, s to change the value.
4. Press ‘SET‘. The value stops blinking. The StecaLink master
queries the entered address.
The detected StecaLink slave member is displayed (Fig. left).
5. Press ‘SET‘. If additional settings for the registered slave are
possible then an additional menu is displayed.
For information on the further configuration parameters, see
‘Changing slave settings’.
'No slave found' – a StecaLink member device could not be identi-
fied at the specified address. See Chapter 15 ‘Troubleshooting’ for
possible error correction measures (see event message - Number
79).
'Address already used' - a StecaLink member device is already re-
gistered under the specified address, see section 15 ‘Troubleshoo-
ting’ for possible error correction measures (see event message
- Number 79).
NOTICE!
– The master device in a StecaLink communication network controls the flow of data to the
StecaLink slave members.
– The StecaLink slave members must be registered at the master device. Configuration of the
slaves must be performed at the master, depending on the type and functional scope of
each respective slave.
– See section 9.2.2 ‘StecaLink master connection’.