Setting Timer 1
1. Select ‘Timer 1’.
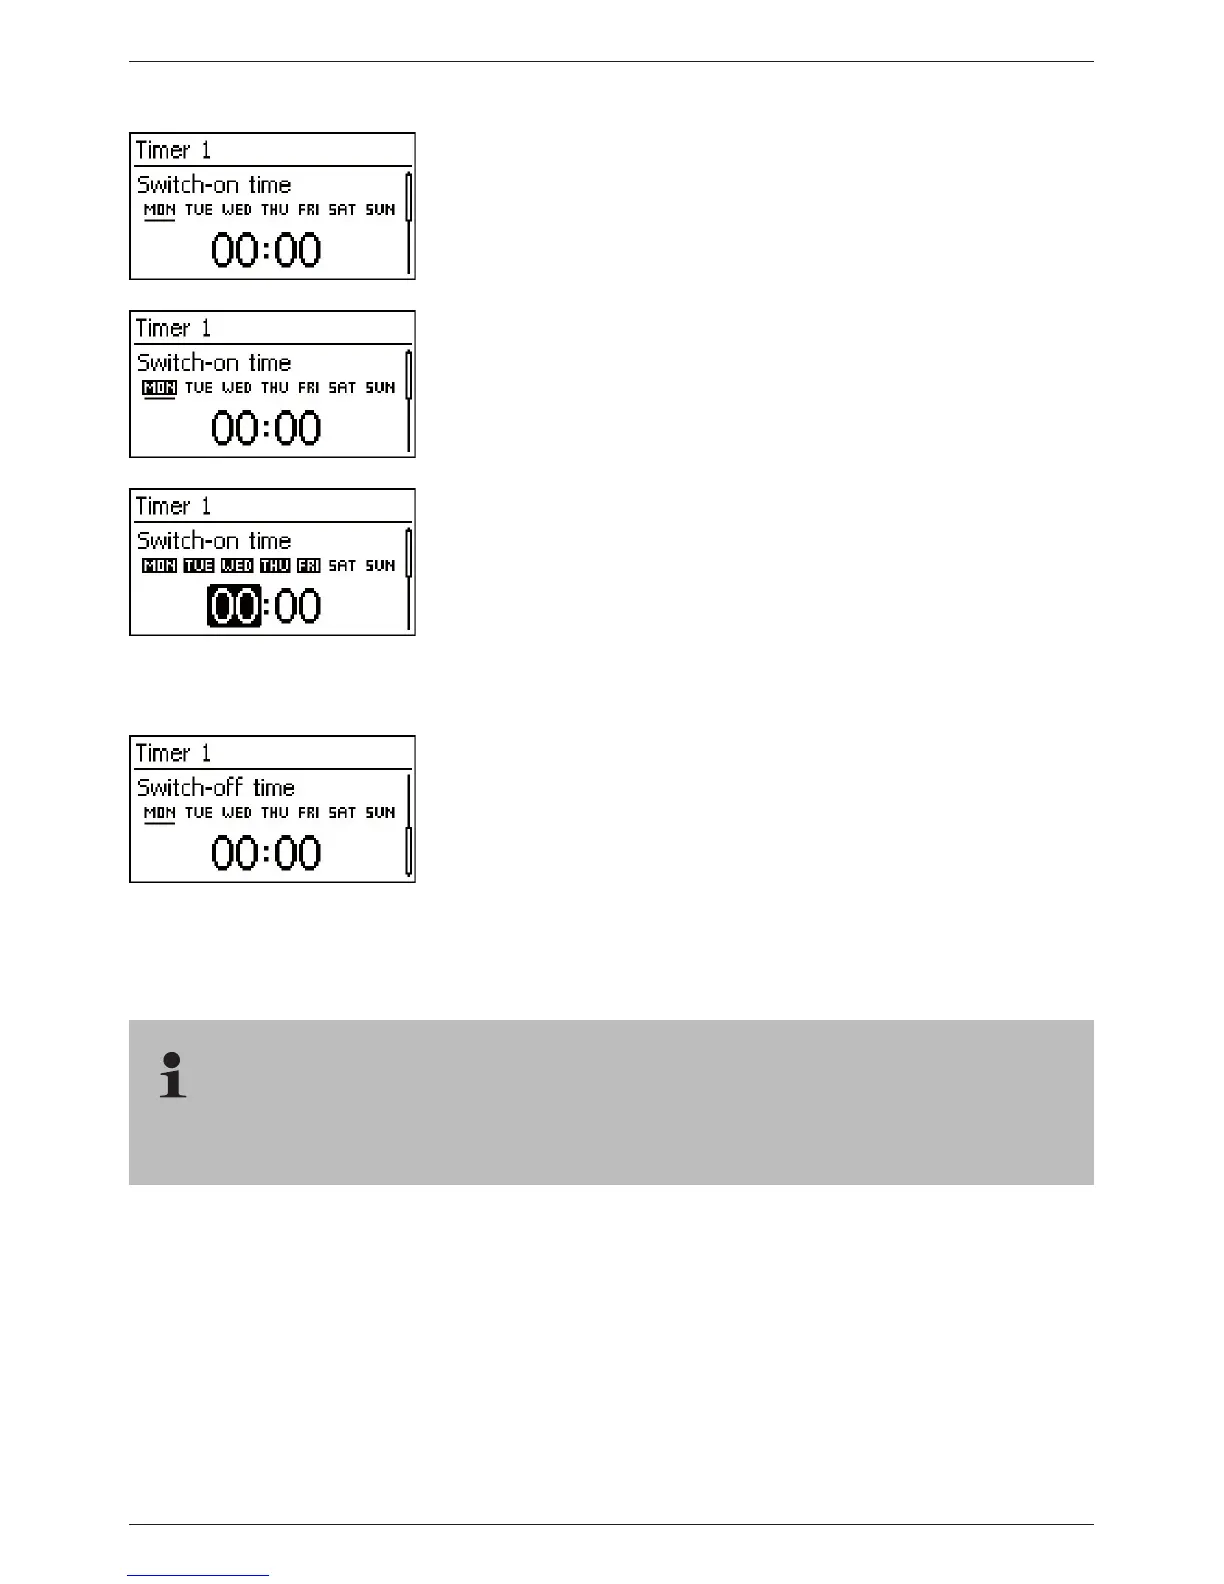
2. Press ‘SET’. The ‘Switch-on time’ dialog appears and the
selected day is underlined (Fig. left: Monday is selected and
switched off).
3. Press
sr to select a different day.
4. Press ‘SET’. The state of the selected day changes (Fig. left:
Monday is switched on).
5. Press
sr to select a different day.
6. Repeat steps 4 to 5 until all days are switched on for which the
switch-on time is to apply.
7. Press
s (several times if necessary) until the hour of the
switch-on time is selected (Fig. left).
8. Press ‘SET’, use
sr to set the hours and confirm with
‘SET’.
9. Press
s. The minutes are selected.
10. Press ‘SET’, use
sr to set the minutes and confirm with
‘SET’.
11. Press
s. The ‘Switch-off time’ dialog appears (Fig. left).
12. Set the day and time of the switch-off time in the same
manner as described in steps 3 to 10.
13. The Evening light and Timer 1 control functions have now
been set. Press ‘ESC’ to leave the page.
14.3 Functionality
With all brightness-based control functions, the required brightness information is obtained
from the solar module.