Operation & Service Manual (VA) 58 ST1175
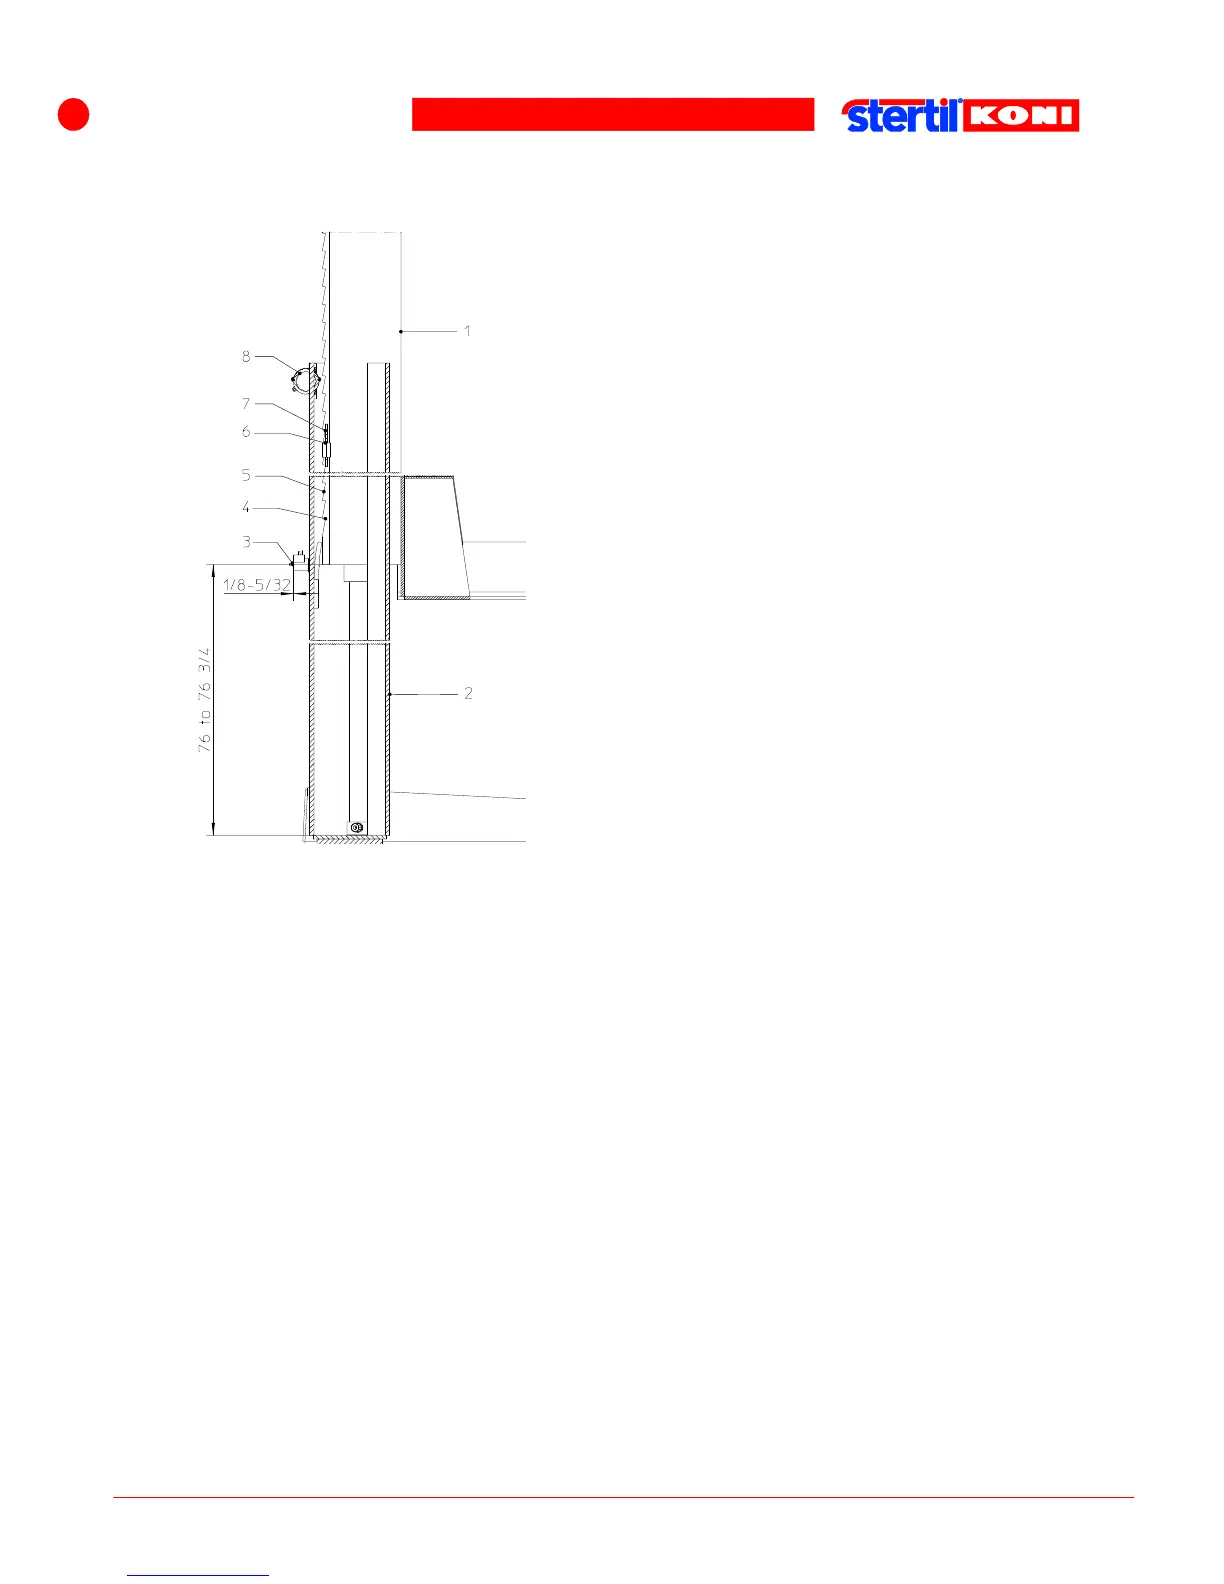
7.6.4 Checking the safety locking feature
1. Guide block
2. Column
3. Adjustment nut
4. Last tooth of locking ratchet
5. Locking ratchet profile
6. Standard 3 notches
7. Potentiometer adjustment rod
8. Potentiometer unit
Adjusting the safety lock
1. Lower the column lifts completely, if necessary, use the switches S1 through S4
on the control panel; see also section Control box sticker.
2. Raise the column lifts to the first safety lock, then lower them into the safety lock.
Check whether the free play of the adjustment nut of the solenoid is 1/8 to 3/16".
3. If necessary, turn the adjustment nut at the rear of the solenoid, until a free play of
1/8 to 3/16" is achieved.
4. Raise the column lifts to the top position, and check this free play during the
raising.
5. Lower the column lifts from the top position into the safety lock, and check again
that the free play is 1/8 to 3/16". Adjust them if necessary.
6. Adjust the top position end stop using the potentiometer adjustment rod, such that
the pawl comes to 76" to 76 3/4" past the last tooth of the locking ratchet profile.
7. Check for oil leaks, damage, and wear and tear. Check electrical cables and
connectors for damage.
8. If dry, lubricate piston-rod with machine oil.