www.stryker.com 6390-009-002 REV D 39
Service
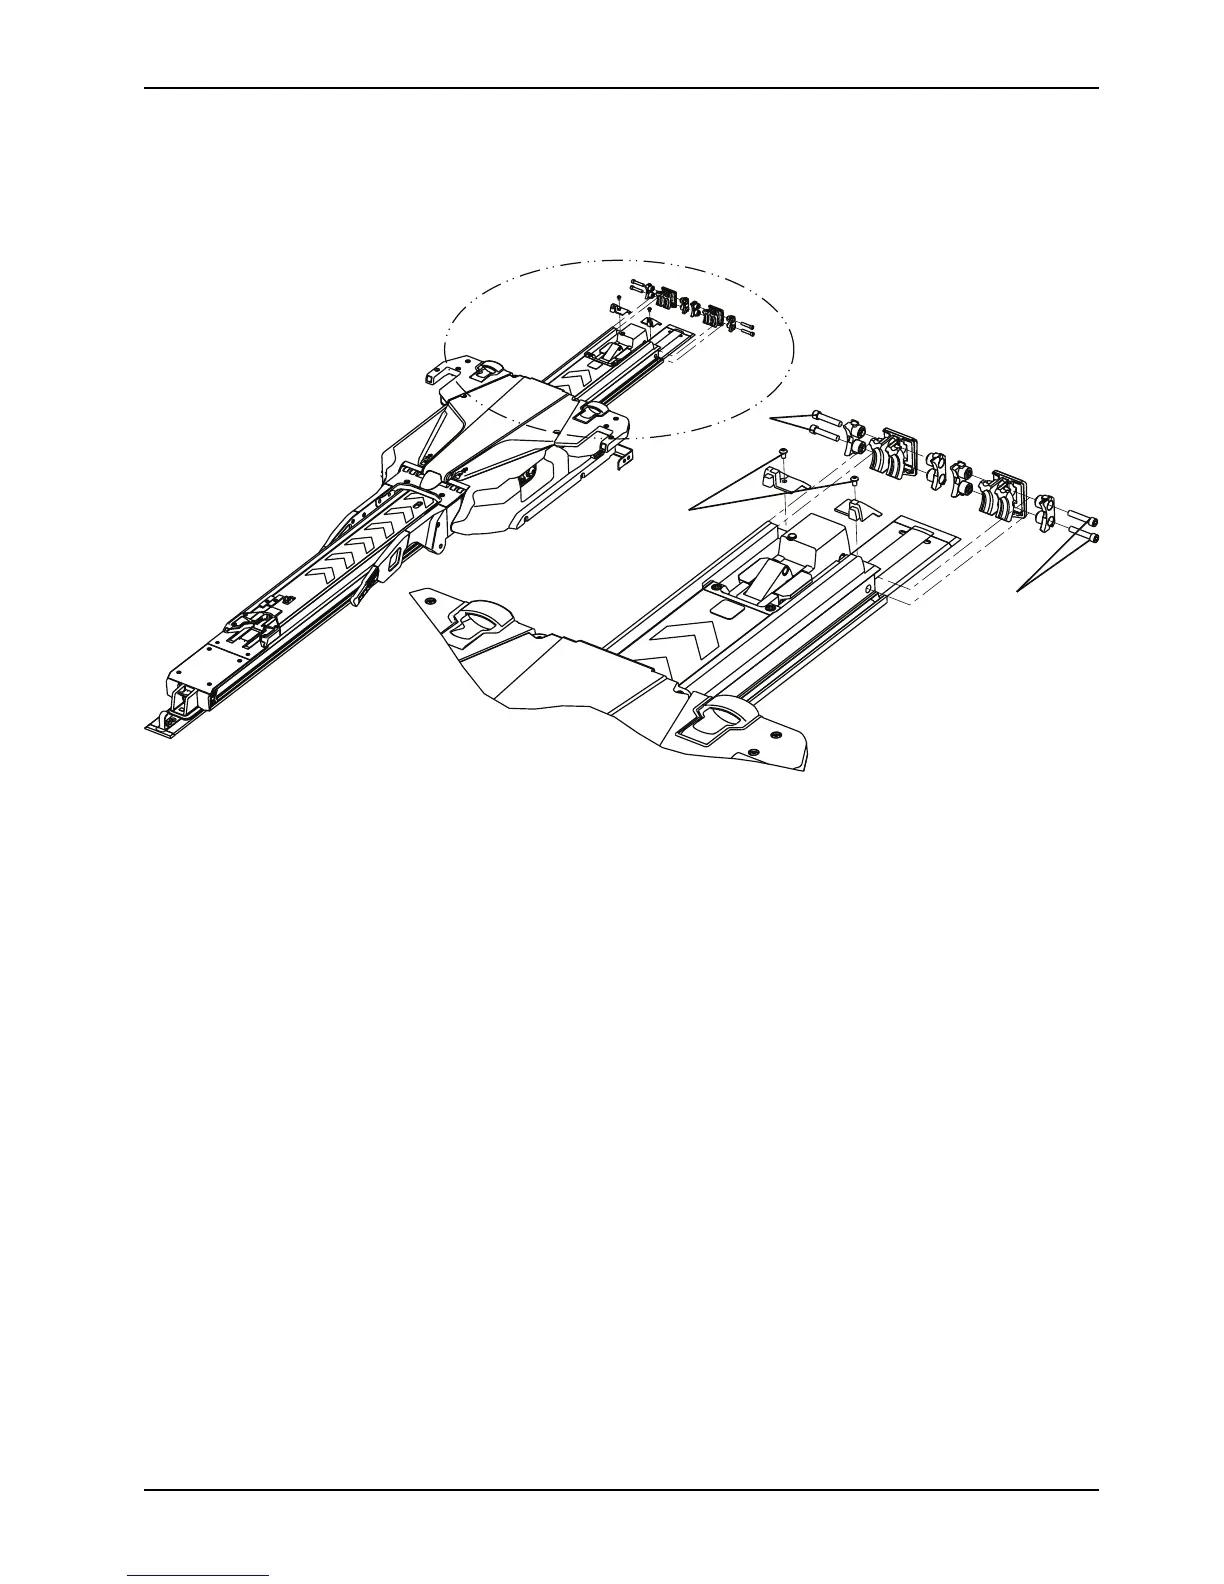
Trolley removal (Continued)
7. Using a 3/16" hex wrench, loosen (do not remove) the four socket head cap screws (two on each side) (D) that
secure the dead stops to the transfer assembly (Figure 4 on page 39).
Figure 4: Trolley screws
8. Push on the screws (loosened in step 7) to loosen the dead stops from the transfer.
9. Remove the dead stop bumpers. Save the bumpers for reinstallation.
10. Lift the trolley assembly by its arm and wing.
a. Do not lift the trolley by the manual cot release handles.
b. Lift only where indicated.
c. Installer 1, position hands at A1 and A2 (Figure 5 on page 40).
d. Installer 2, position hands at B1 and B2 (Figure 5 on page 40).
e. Move the trolley toward the head end until it is off of the transfer.
f. Remove the trolley from the anchor.
g. Place the trolley in a suitable work area.
 Loading...


