Using the solo function
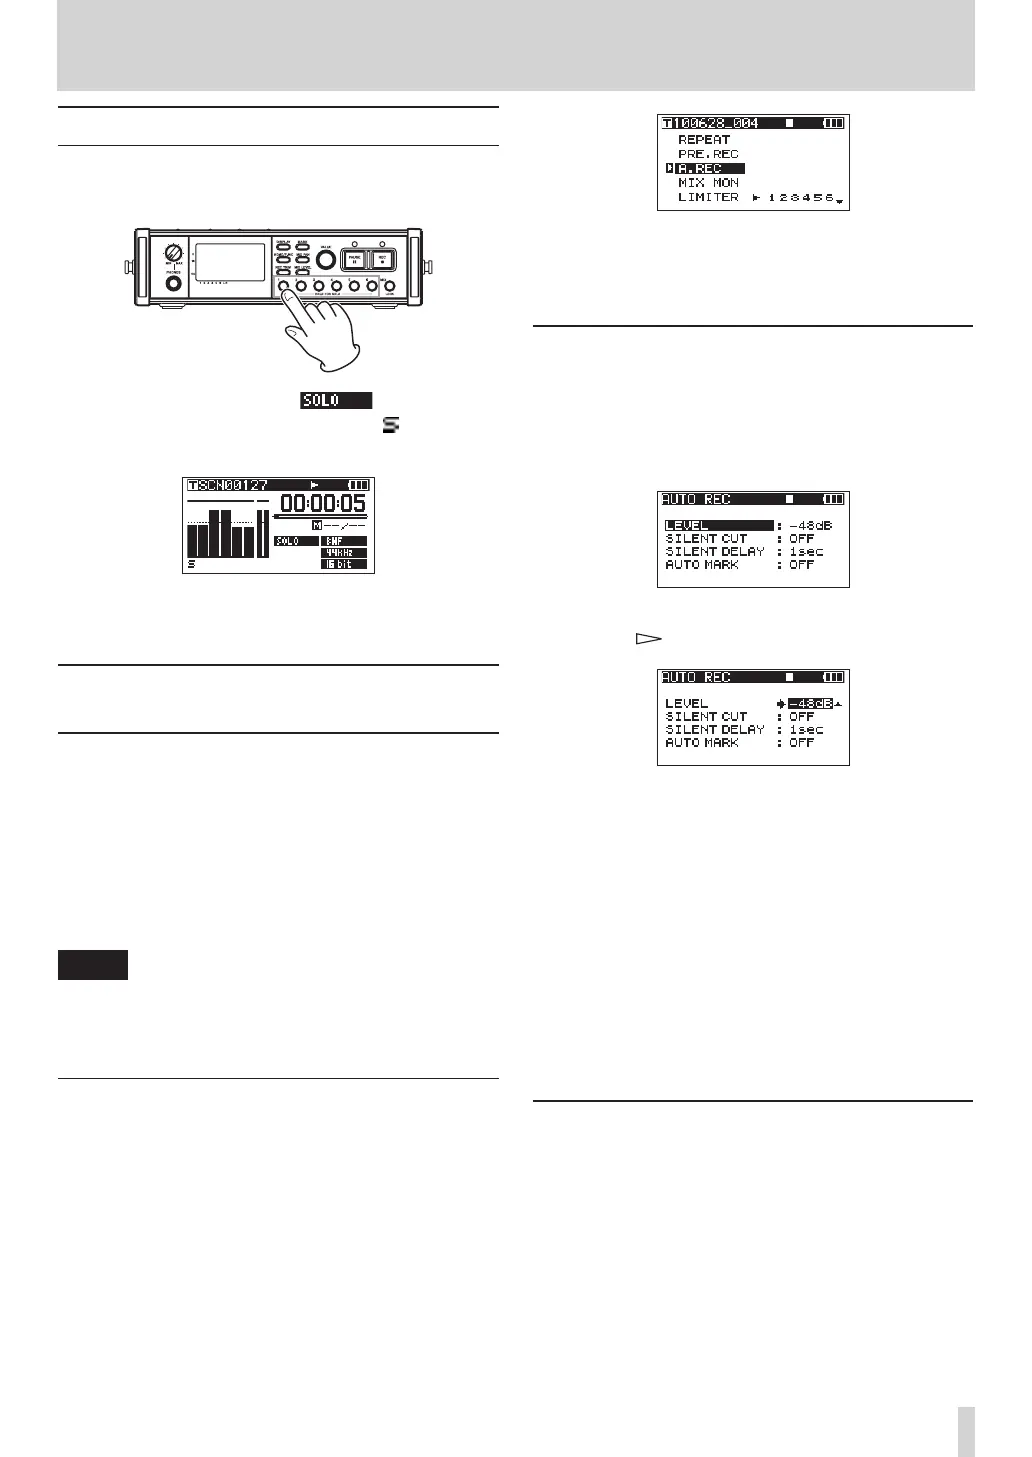
Press and hold one of the 1–6 keys on the front
panel to enable solo monitoring for that channel.
When solo monitoring, the indicator
appears on the Home Screen, and the indicator
appears for the soloed channel.
To stop solo monitoring, press and hold the key
(1–6) for the soloed channel again.
Automatically starting and pausing
recording (auto-record function)
If you turn the auto-record function ON, you can
automatically start, stop and pause recording in
response to the level of the input sound.
If an input level greater than the level set in advance is
detected on any input channel, recording starts.
In addition, the unit can automatically cut silent parts
and add marks at points where recording starts again.
NOTE
The levels of input on all channels must remain below the
set level for at least one second before the auto-record
function is activated.
Using the auto-record function
1 When the Home Screen is open, press the HOME/
FUNC key to open the Functions Screen.
2 Use the VALUE knob to move the cursor and
select the
A.R E C
item.
3 Press the VALUE knob to turn auto-recording
ON or OFF.
If auto-recording has been turned ON, the
A.R E C
indicator appears with a dark background.
4 When you have finished making the settings,
press the HOME/FUNC key to return to the Home
Screen.
Auto-record settings
1 Press the MENU key to open the
MENU
screen.
2 Use the DATA wheel to select the
AUTO
REC
menu
item, and press the ENTER key to open the
AUTO
REC
screen.
3 Use the DATA wheel to select the
LEVEL
item, and
press the key or ENTER key.
4 Set the level at which the unit determines that
a signal is being input for starting and stopping
automatic recording. Use the DATA wheel to set
the value to
–6dB
,
–1 2 d B
(default value),
–2 4 d B
,
or
–48dB
.
5 When you have finished making the settings,
press the HOME/FUNC key to return to the Home
Screen.
6 Press the PAUSE key to enter recording standby.
When the input sound exceeds the level set by
the
LEVEL
item, the unit automatically starts
recording.
Automatically cutting unnecessary silences
when recording (silent cut function)
When recording, the unit can pause when it detects
silence for a certain amount of time, and then restart
recording when it detects an input signal again. Since
this cuts unnecessary silence during recording, space
on the card can be conserved.
1 Set
AUTO
REC
and
LEVEL
as explained in the
previous section.
2 Open the
AUTO
REC
screen of selecting items.
4 – Recording


 To Next Page